How to Configure Your DVR for Remote Access
In this Article I will explain in detail how to program your DVR, router and computer to access your new DVR.
Adding a network device to your home network requires you to change or modify some IP addresses. There are many ways to approach this task, and I will show you a few simple steps to get your DVR up and running. But first, let’s take a look at some scenarios of a Home/Office Network:
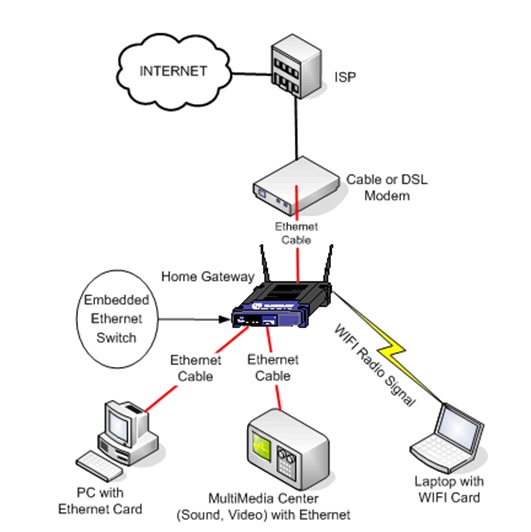
Home Network
Office Network
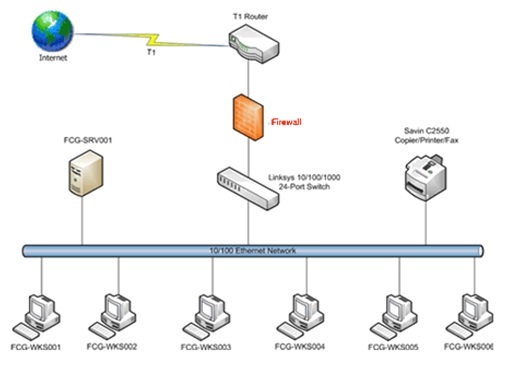
Analyzing both scenarios, each look similar in terms of how the devices are connected to the network. In Office networks you will sometimes find shared printers or even IP Phones (Voice over IP) that will be using IP addresses.
Now when adding a DVR/NVR, or even IP cameras, you need to pay close attention to the IP addresses that are being used by other devices in that network. This is due to the fact that if you assign an IP address to the DVR, NVR or IP camera that is already being used by a computer (hard wired or wireless), printer, or even a wireless handheld device you will have a collision in your network and you will not be able to access the device. In the next step I will show you how to see what IP addresses are available for you to use with your Digital Video Recorder.
Before connecting your DVR to the network, refer to the Manual of the unit, or give us a call for assistance. By default ALL of our recorders and IP cameras have the same IP address. The default IP address is 192.168.1.108.
First, you must review your network scheme to identify if your DVR or IPC (IP camera) is within the same network scheme as your Home/Office Network. There are a few ways to identify your network by simply going to the “Command Prompt” in your Windows PC. If you are using MAC (Apple) you can use the application called “Terminal”. See the examples below:
Windows Procedure
Note: If you are using Windows XP or Windows 7 click, ![]() or
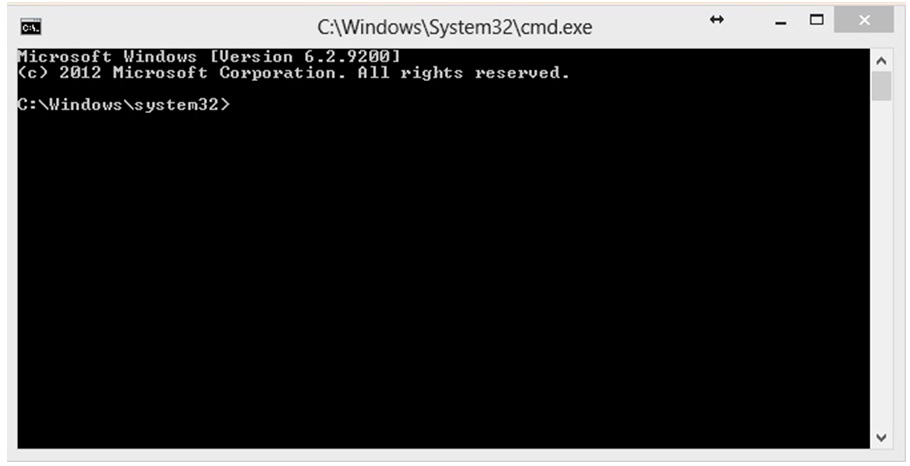
or ![]() then click Run and type “cmd” without quotes. The resulting page will look like this:
then click Run and type “cmd” without quotes. The resulting page will look like this:
Type “ipconfig /all” and resulting page will look like this:
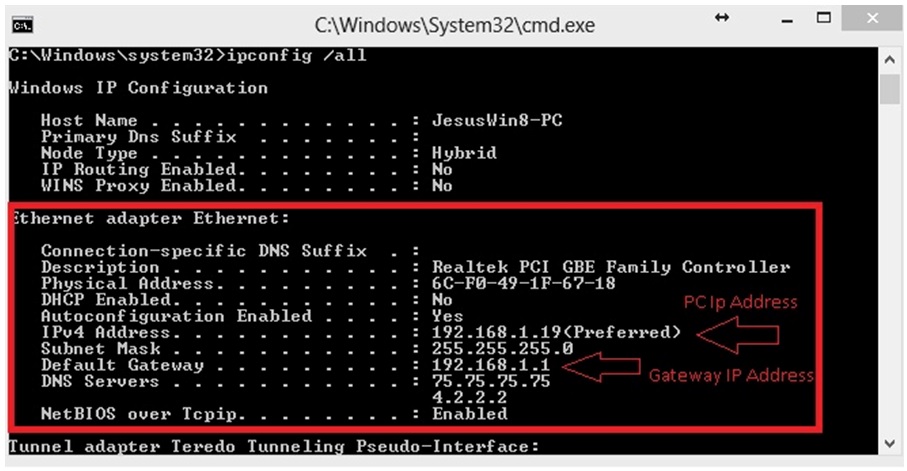
As you see I pointed to the IP address scheme my network has. This falls perfectly in the same scheme as the default IP address of the Digital Video Recorder.
Apple (MAC) Procedure
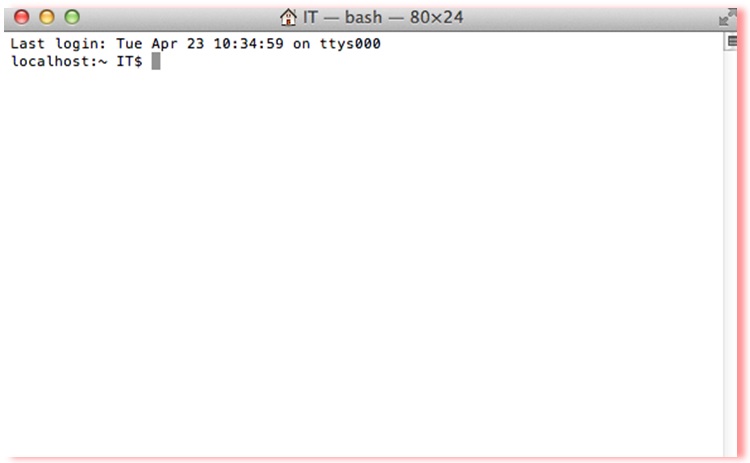
For Apple users, go to the top right corner and type in the spotlight window the word “terminal” without quotes and hit return. ![]() , or click the Command key next to the “Alt” key and the space bar to bring up the picture above. Type “terminal” without quotes and a window will show up like the picture below:
, or click the Command key next to the “Alt” key and the space bar to bring up the picture above. Type “terminal” without quotes and a window will show up like the picture below:
In this page you can type “ifconfig” and the result will show you something like this:
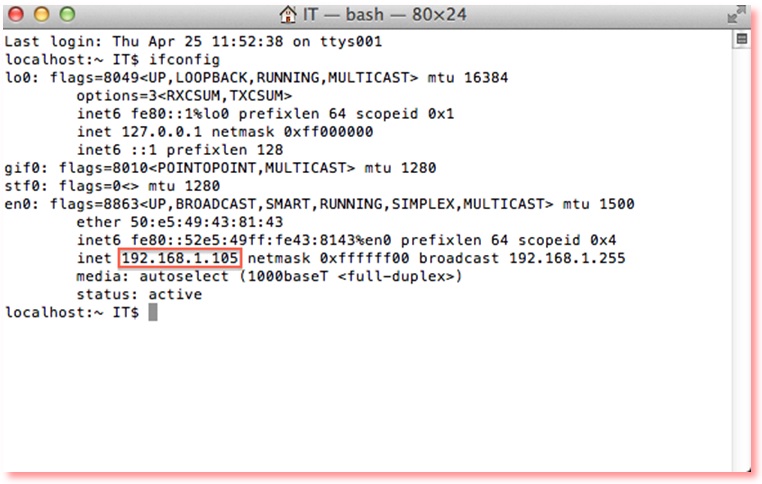
In this page you can see my computer’s IP address. If you look at the default IP address of the DVR like I mentioned earlier, my network falls in that scheme of 192.168.1.XXX, because the first three numbers are the same as the default address of the DVR.
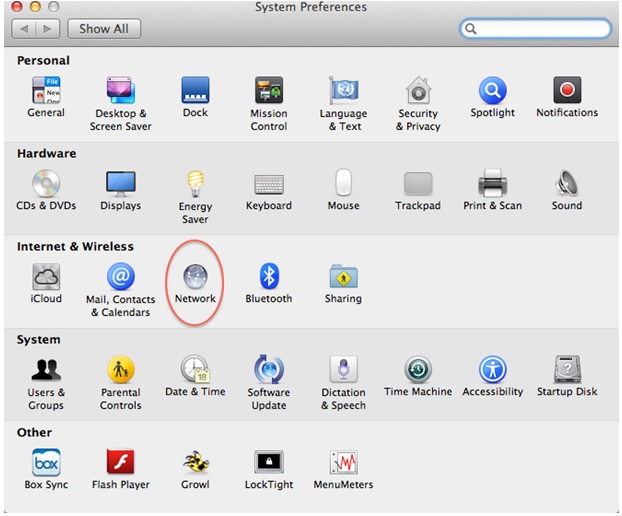
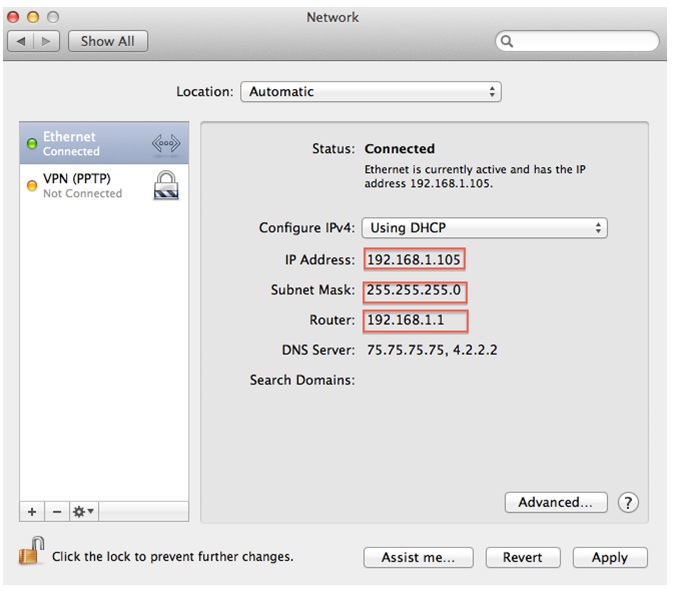
You can also go to System Preferences by clicking the “Apple logo” on the top left corner of your screen. Take a look at the picture below:
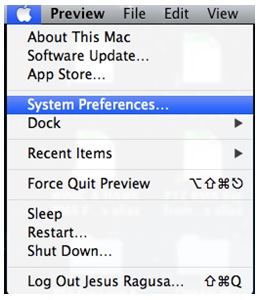
After the system preferences window opens, click on “Network”, click on “Ethernet” or “Wi-Fi” depending on how you are connected on your network and the info about your IP address, subnet mask and Router (Gateway) will display in the page.
Now that you know the IP scheme of your network, we can start figuring out what IP address we can use for your equipment. Routers normally assign an IP address automatically on the network; this feature is called (DHCP). A DHCP server distributes IP addresses from a range of numbers, and it will give this series of numbers to any device attached hard wired or wirelessly connected to these devices. These numbers will be given in a chronological manner. Normally routers have a range of 255 IP addresses (minus 2 that are reserved on the network) that can be distributed among the network, so don’t worry; you will have plenty of numbers you can use for your DVR.
To find out if an IP address on your network is being used by another device, you can simply “ping” the IP address in mind and see if you get a reply back.
To do this on a windows machine or an Apple computer, open the “Command Prompt” or “terminal” and type the word “ping” without quotes, followed by a space; followed by the IP address you have in mind for your DVR. (Example: ping 192.168.1.200). If you get a response back after executing that command, then the result will be something like the picture below:
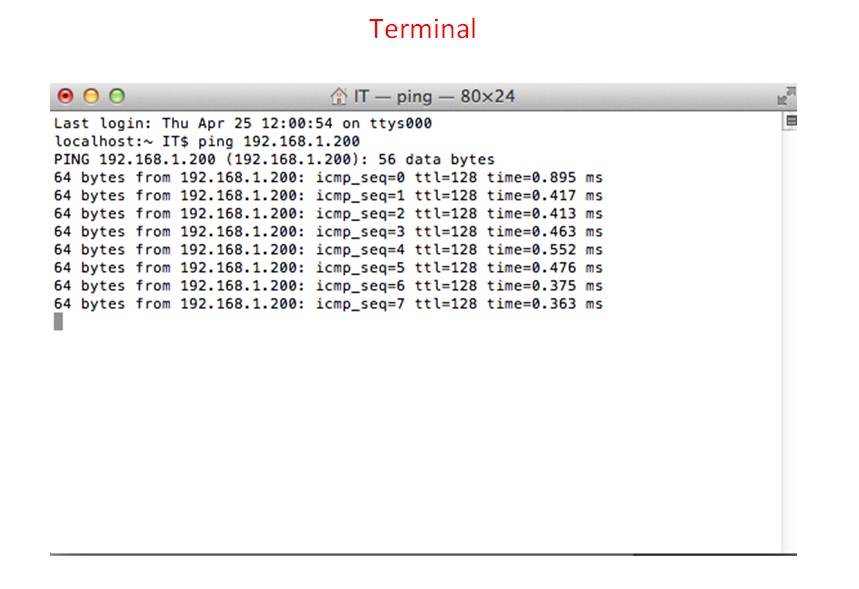
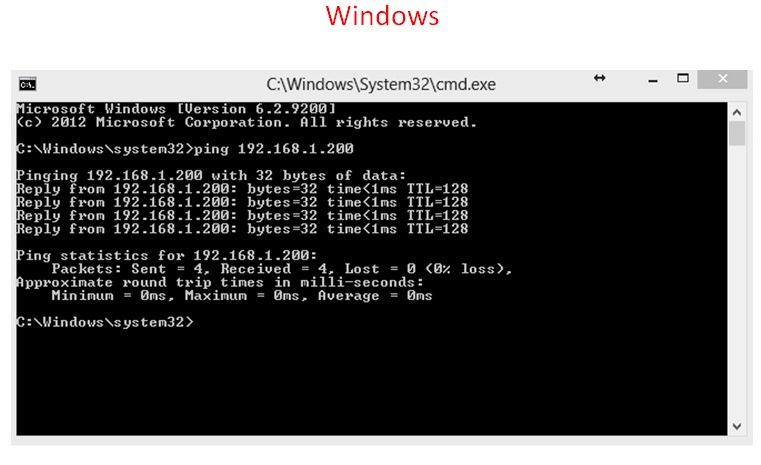
As you can see the result shows that 192.168.1.200 is assigned to a device in my network, therefore I cannot use that IP address on my DVR. Lets try another one, in this case 192.168.1.120. See results in the picture below:
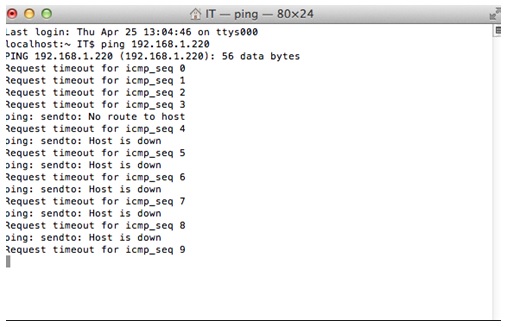
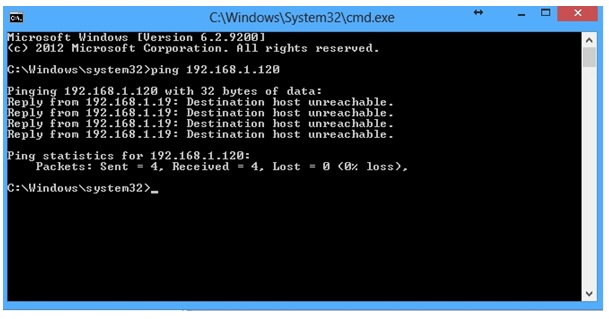
If you notice, both pictures show no response when trying to ping 192.168.1.120. That means that there is nothing in my network with that IP address; therefore I can assign it to my DVR, or if you do the same steps pinging the default of the DVR while the DVR is not connected to the network and you get the same result as the picture above, then you can safely leave the DVR’s IP address as is, safe to connect the DVR on your router or switch.
The next step is to make sure you can ping the DVR’s default IP address (192.168.1.108) after the DVR is connected to the network. If you get a reply back then you are good to move on to opening the ports on your router to allow the DVR to be accessible remotely. To do this you will need to open some ports in your router, this is done through a web browser.
Open any browser of your preference and in the address bar type the IP address of your router/gateway.
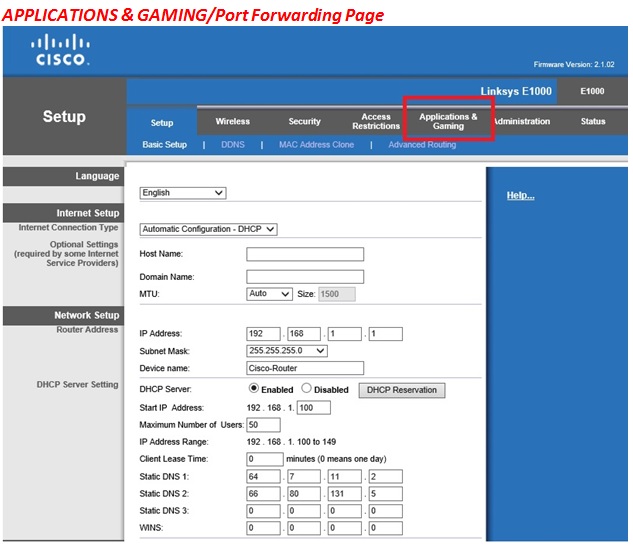
Many manufacturers of network devices have a default IP address you can use to access their settings and configure some features. For example Linksys routers (better known as Cisco) use a default IP addresses of 192.168.1.1, other manufacturers will use 192.168.1.254. This info you will be able to find by identifying your network scheme like I showed you before. In my case my default gateway IP is 192.168.1.1. Follow the pictures below to access your DVR. NOTE: Each Manufacturer has a different interface. This example is done on a Linksys (Cisco) wireless router. This link (Port Forwarding – How-To) will help you understand the interface of your router and it will explain where the settings that you need to change to open ports are located.
Address Bar
![]()
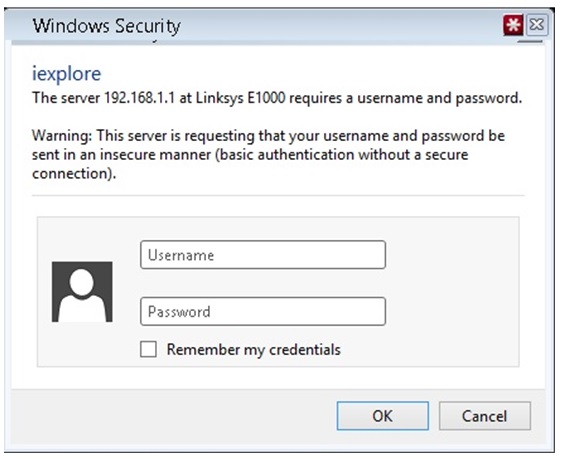
Router Login Page (Consult your manufacturer’s manual to obtain router username and password) Linksys/Cisco default username is admin/password
Applications & Gaming/Port Forwarding Page
Port Range Forwarding
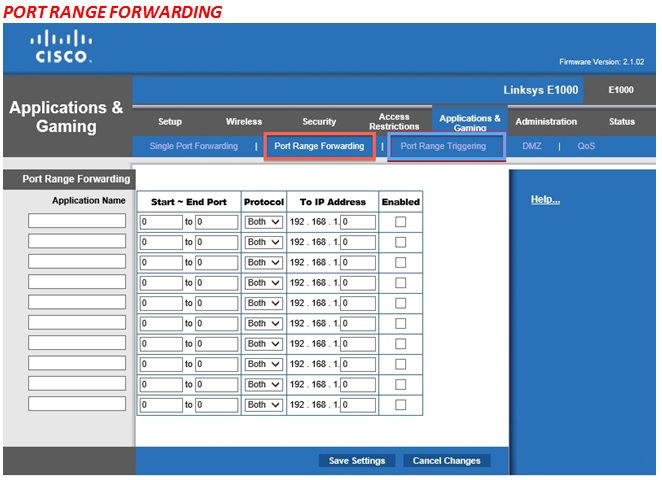
Input Your DVR’s Info Like This and CLICK SAVE SETTINGS

After the settings are successfully saved, you can go to this site www.canyouseeme.org to test if the ports are successfully open. Take a look at the picture below:

As you can see, I am testing the port 37777. The result says SUCCESS! That means that the port is properly forward to the DVR TCP port. You can do the same steps to test the HTTP port of the DVR.
Notice also that there are 2 ports I have forwarded in my router, 37777 and 88. Although 37777 is one of the default ports of the DVR, 88 is not.
Take a look at the following image:
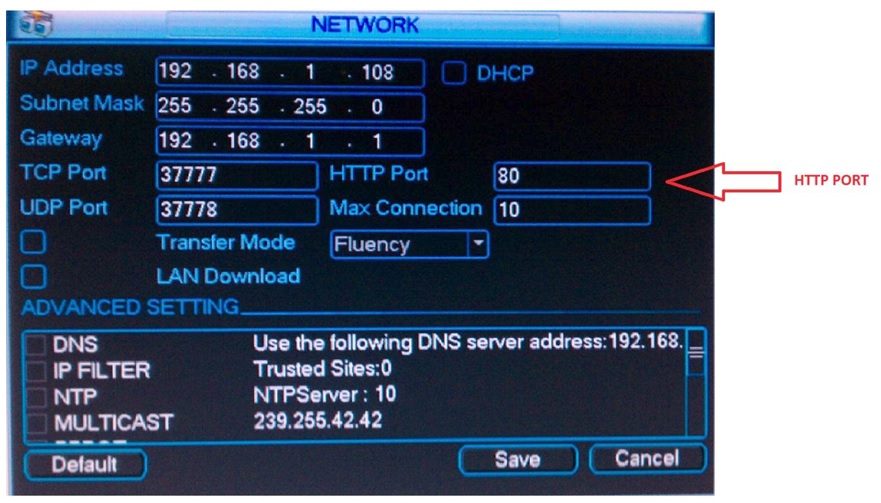
In this image you can see the default network settings of the Digital Video Recorder. It is not a good idea to leave this port as default. Many Internet Service Providers (ISP) block this port for inbound connections. They do this by
design, as a web browser will expect the pages to be served on port 80 by default. We recommend changing this port to 88 or 8080 to prevent any issues accessing the DVR externally.
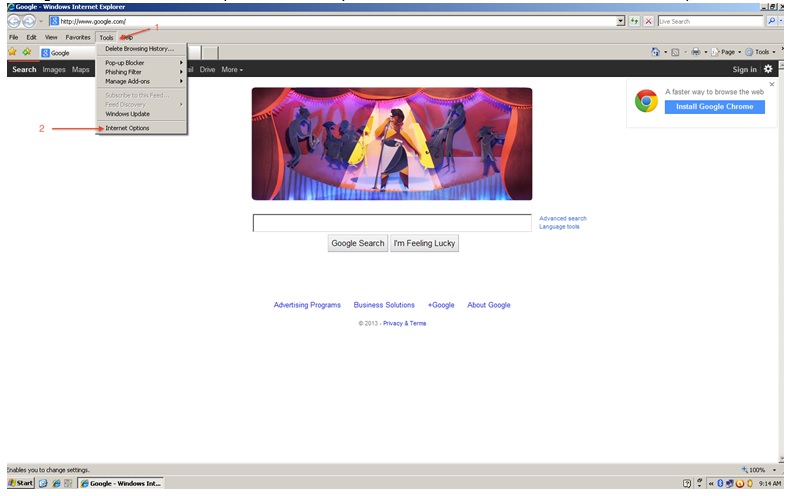
The last step is connecting to your DVR from your PC. To do this you will need to change some settings in your Web Browser (Internet Explorer preferably).
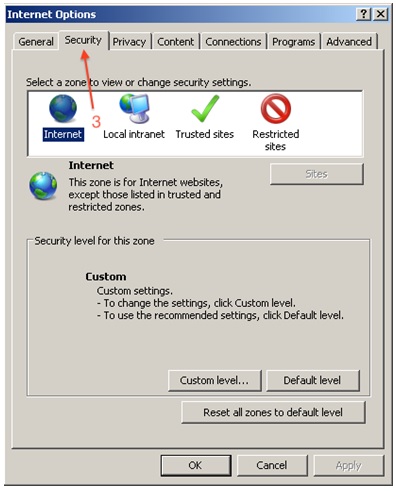
First go to Tools > Internet Options > Security Tab > Custom Level. Take a look at these steps below:
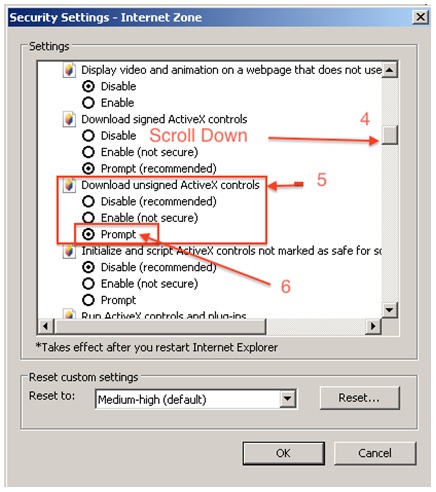
Click OK to save the settings and Apply.
Next, in your Web Browser type following info to access the DVR interface:
![]()
A pop-up window will show up:
![]()
Another window will pop-up, click on “Yes”
After a few seconds your web service will display on your screen:
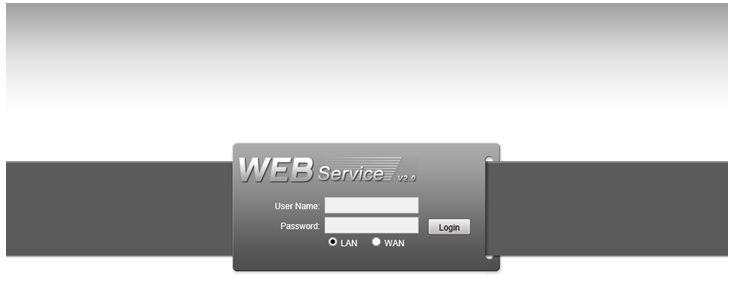
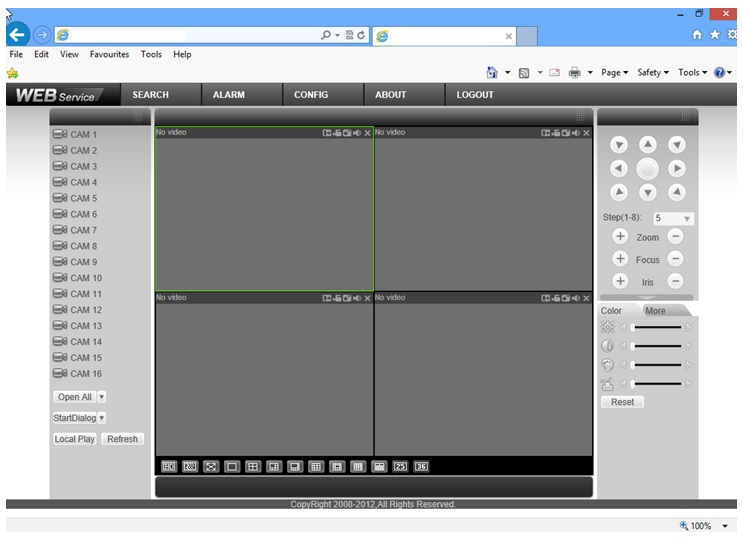
From this page you can type the default username and password that is assigned to the DVR. The default username is admin and the password is admin. Click login, then you will see the page of your Web Service.
To access the DVR from outside the network or externally, the steps will be the same but the IP address will be your external IP address. You can find your external IP address by going to www.canyouseeme.org from the same network where the DVR is. Make sure you access the DVR while you are not inside the location as the DVR, due to the fact that many routers will not allow you to access internal devices from within the network using the external IP Address.
I hope these steps will guide you through setting up your Network devices and DVR for remote access.
Author: Jesus Ragusa