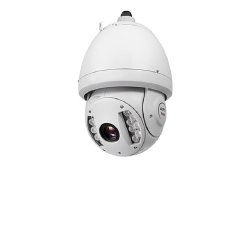
 Security camera systems are continually revolving with new and improved technology, which allows the user to record their security footage through a digital video recorder instead of simple tapes. This gives you the opportunity to view the footage online. It may take a little networking information to be able to set your digital video recorder up to view all of the information online. You will need to know what your router’s IP address is, as well as the information relating to your digital video recorder.
Step-by-Step Information
1. Connect the security camera digital video recorder into your router through a Cat-5 cable. Log into your wireless router and go into the configuration settings. Enter your IP address into the Web browser. Check with the manufacturer of the router to find out what the IP address is. Enter the password for your router and then press enter.
2. Access your local network settings on the router and create a static IP address onto your local network for your security system digital video recorder. This provides you with the option of setting your digital video recorder to provide access for the specified address and eliminate any other devices found on the network from being given the same Internet address and creating a conflict down the road. It should have a subnet mask of 255.255.255.0.
3. Forward all the ports from your digital video recorder’s Internet address. Settings may vary based upon the router, but on average, you will be able to add in a port and specify the designated IP address. Type in the assigned address for your digital video recorder and set the ports to forward to port 80. Depending upon your recorder, you might need to forward multiple ports. Repeat until you have all the ports forwarding appropriately.
4. Power the recorder up and go into the networking system. Enter your setup section and select your static IP address. Insert the IP address previously assigned during router configuration. Put the subnet mask into the system. Make sure all the ports on the recorder are forwarded to those of the router. Save all of your settings.
5. Enter the IP address into your router from the Internet browser outside of your local network. This should ask you for the ActiveX control to access the Web server. Install the application and then log into your recorder to view your internet protocol cameras through the Internet.
If you have any questions or looking for further information, please do not hesitate to contact us. It is our pleasure to help you.
