In this video I am going to show you how to open ports on a Netopia Router, model number 3300.
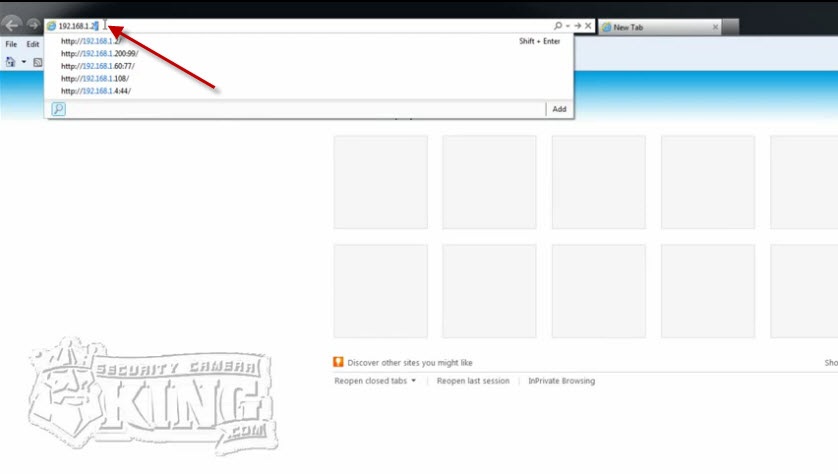
First we’ll go to Internet Explorer and enter the IP for the router. (The default IP for this router is 192.168.1.254.) I already changed those; I never keep my default user names and passwords and my IPs on my units on my network devices. So again the default, right out of the box is 192.168.1.254. The user name is Admin and the password is underneath the modem so you’ll have to flip the modem over to find the password. It’s usually on an access code sticker that comes with the modem on the bottom of the unit. If you cannot access the router you can get that information from AT&T for them to help you otherwise we cannot open the ports if we don’t know the passwords. Once again the default IP is 192.168.1.254 and the password is going to be underneath the unit.
I’m going to put the IP of MY router which is different.
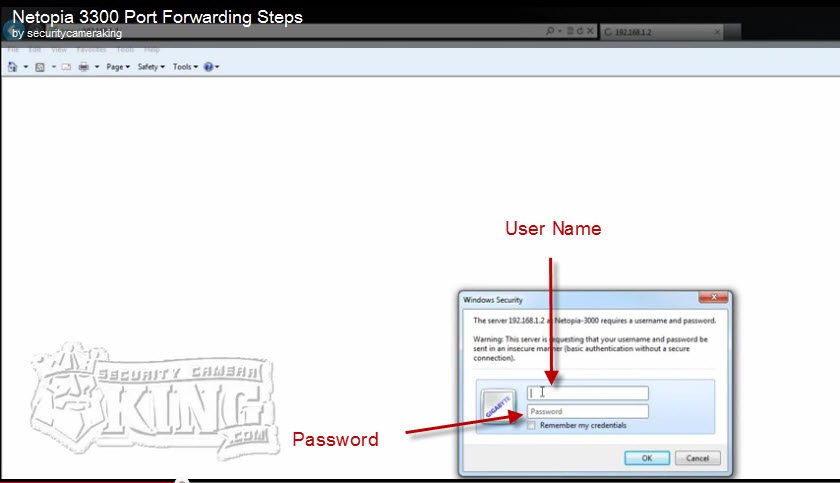
And it’s going to prompt you to enter a username and password in the “Windows Security” window that pops up. And you will find an interface like this:
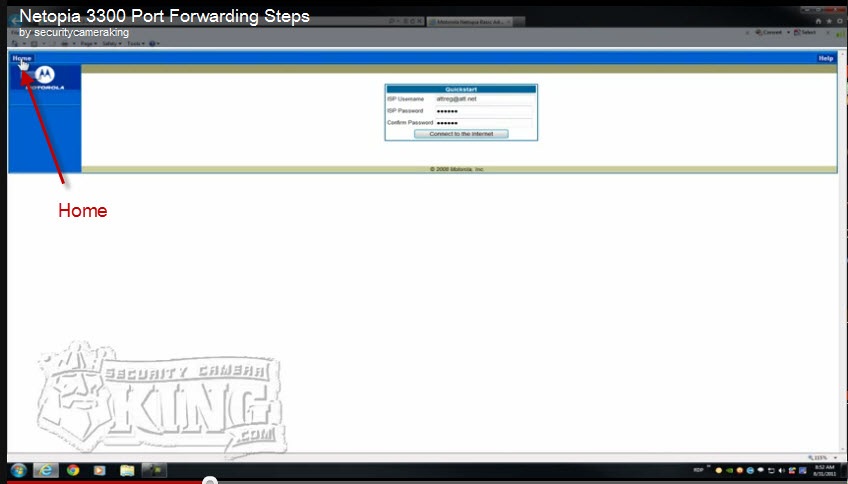
Click on “OK” and you will find an interface like this.
Click on Home; then you will see this interface:
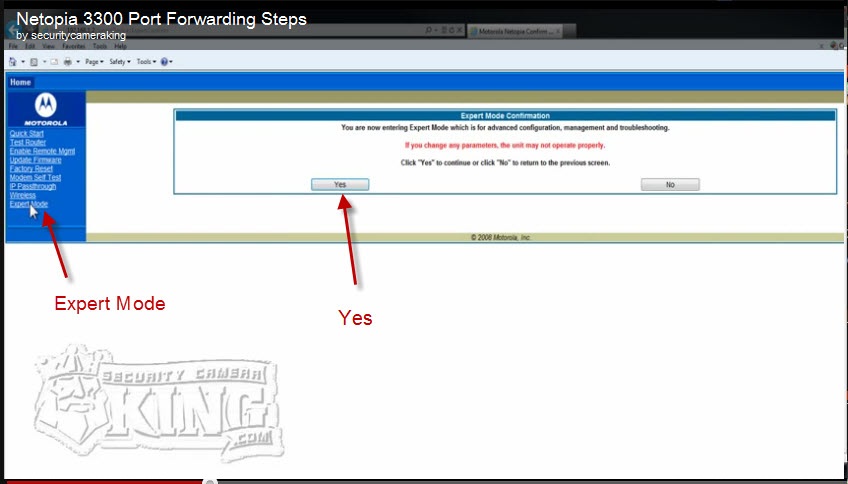
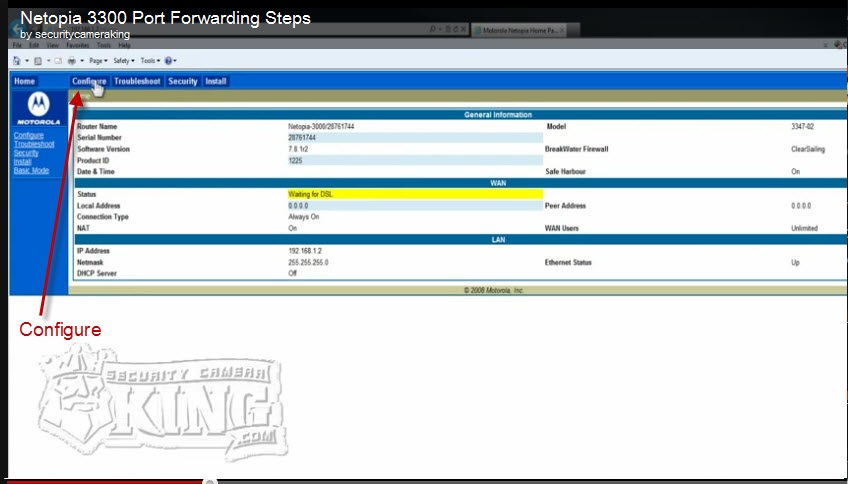
Choose expert Mode. Click “Yes” and you’re going to go to “Configure,”
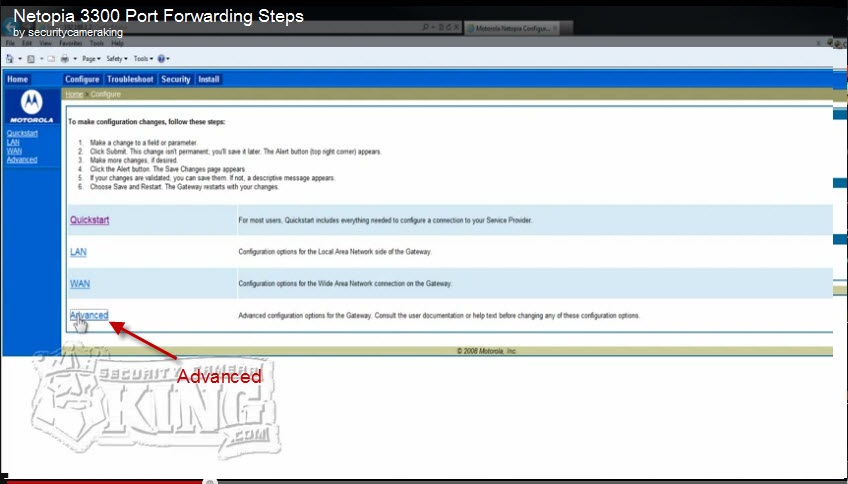
then “Advanced”
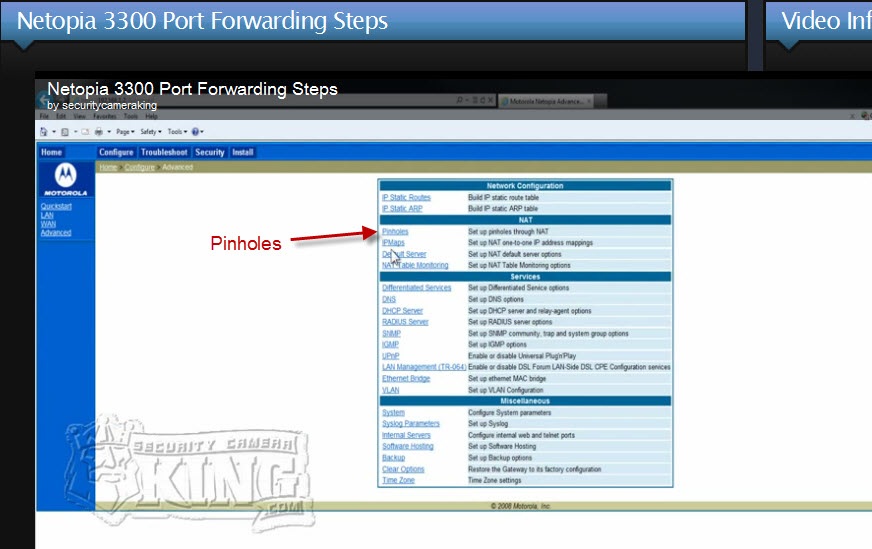
and pinholes.
In the next interface you’re going to have to open 6 ports or you’re going to have to create 6 rules. The default ports are 80, 37777, and 37778. As many videos we have made about opening ports on different routers and setting the ports on your DVR, the http:// port we recommend to be 88 because most ISPs block this port for incoming connections. So on your DVR you are going to have to change that to 88. That will also be one of the pinholes that you create out of the six.
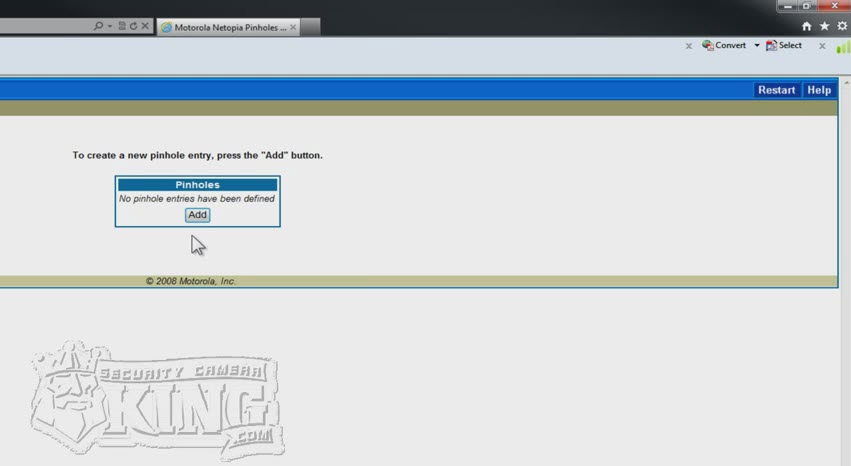
So first we click “Add,”
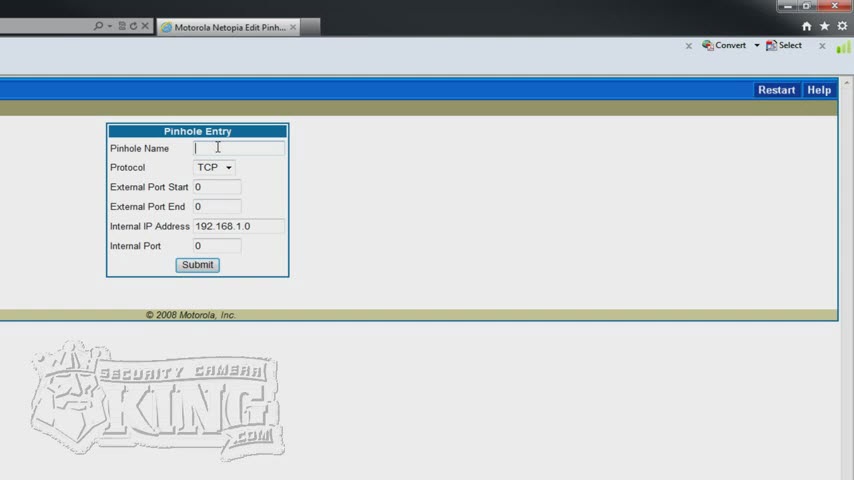
and then you’ll se this interface (Pinhole Entry).
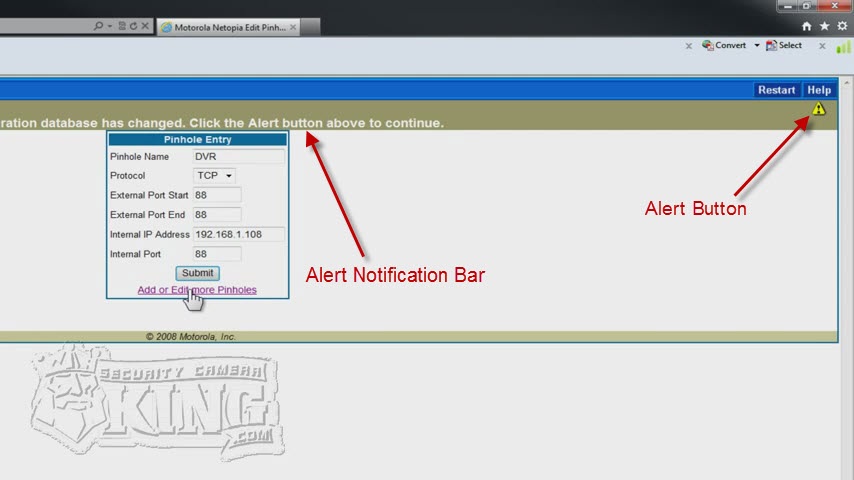
Pinhole Name we put DVR, External Port Start 88 and External Port End 88 and the IP of the DVR which is 192.168.1.108 and the Internal port will be 88. Click “Submit,” then click “Add or Edit more Pinholes.”
At the top of the window is a notice bar that pops up saying, “Information database has changed. Click the Alert button above to continue.” The alert button is the small yellow, triangular exclamation mark in the upper right corner. I’m going to add all the ports first then I will show you what will happen when I click on this alert button.
Next click on “Add or edit more pinholes.” Click “Add” again and provide a different name (I am using DVR2) but same protocol. By the way, the reason you have to open 6 ports is because 3 have to be TCP and the other 3 have to be UDP. External port start 37777 and external part end 37777, Internal IP address is 192.168.1.108 and the Internall port is 37777. Again click “Add or edit more pinholes.” You’ll see the second pinhole that we just created. Click “Add” again.
This will be my third rule on TCP DVR3 for the name, TCP for protocol External port start 37778 External Port End is 37778 IP of 192.168.1.108 and internal port of 37778. Click “Submit.” Click “Add or edit more pinholes.”
Click “Add” again, Pinhole Name, “DVR4,” Protocol, “UDP,” External port start “88,” “External port end “88,” Internal IP address “192.168.1.108.” This router accepts individual TCP and UDP ports under protocol but not both, that’s why you have to open 6 ports, 3 for TCP and 3 for UDP. And another one, Pinhole Name “DVR5,” Protocol “UDP,” External port start “37777,” External port end “37777,” Internal IP Address “192.168.1.108,” and Internal Port “37777.” Click submit then “Add or edit more pinholes.” Enter in the appropriate fields: DVR6, UDP, 37778, 37778, 192.168.1.108, and 37778. Once again the default username is Admin, the password is going to be on a sticker underneath the unit, and the default IP 192.168.1.254.
If for some reason you cannot gain access to the ports using the default information, then is nothing we can do here at Security Camera King. You will need to contact your ISP instead and let them know that you need to open ports on your modem and that you need the Admin, Password, and IP address. Your ISP is the only one that can help you in this case. Once that is taken care of, you can return to this video and open the ports.
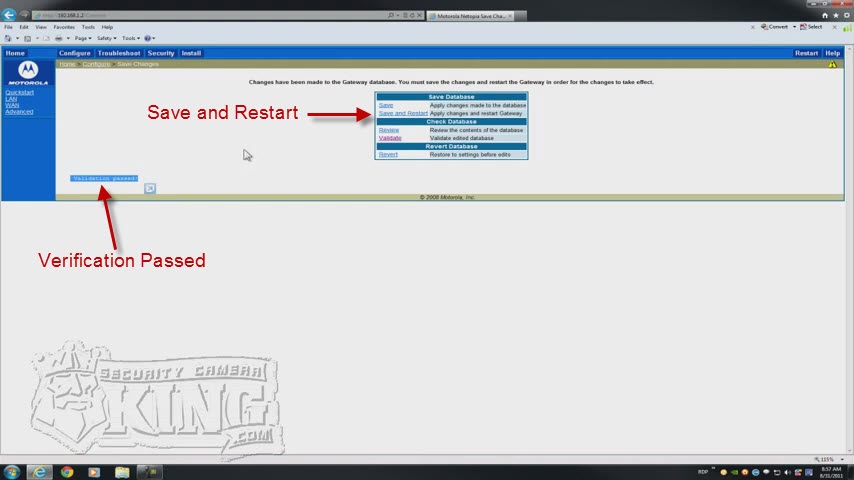
So, I’m done and I click “Submit” for the last port and now I go to the “Alert” button in the upper right hand corner. When I click that button and it says “Validation Passed” I’m good to go:
just click “Save and Restart” and it will take a little bit for the unit to come back and that is it.
I hope this video has been informative for you and I would like to thank you for viewing it.

