This is the second part of an article designed to give you a complete overview of the DVR menu system in our DVRs.
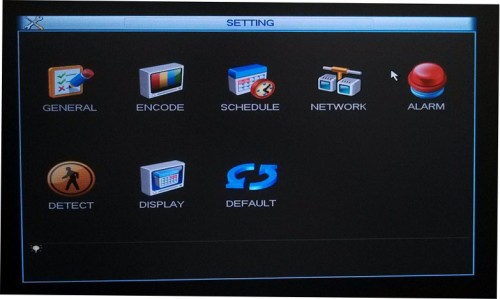
The Setting Menu:
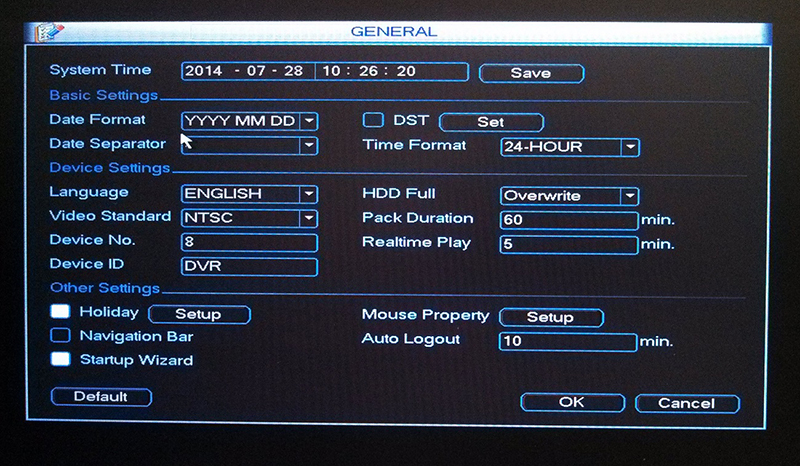
General:
On this page of the DVR menu system you can set the time, date and the format of the information you want displayed. When you change the date and/or time you will have to click on the Save button in the upper right corner and then the OK button in the bottom right.
The HDD Full setting gives you the option to choose Overwrite or Stop Recording. By default our DVRs and NVRs are set up to begin overwriting the oldest footage once the entire storage space become full. If you change this to stop recording, then the DVR will stop recording when the storage space becomes full. With this option, the DVR will not resume recording video until you make more space available by replacing the hard drive or formatting the existing hard drive and completely clear it. It’s highly recommended that you leave this setting on Overwrite.
The Pack Duration setting allows you to adjust the size of the video segments by time, when recording continuously.
Encode:
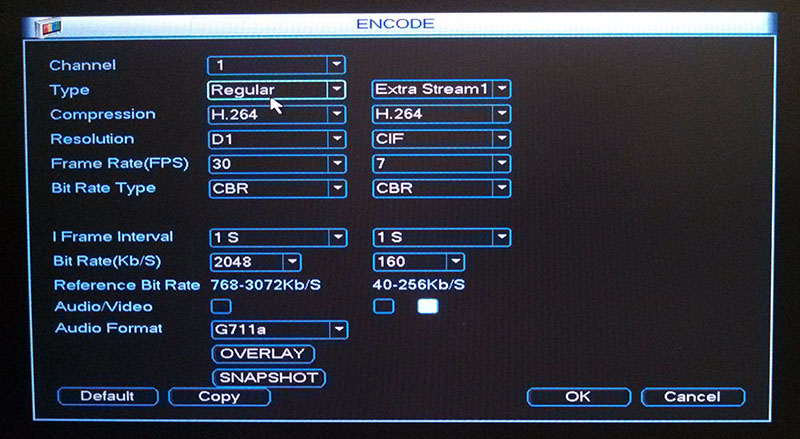
This page allows you to adjust settings for the different video streams that your DVR is handling. Along the left side of this page are the settings for the main video stream. This stream will be responsible for the higher quality video, which will be recorded to your hard drive storage.
The settings along the right side apply to the extra stream or sub stream. This stream will require less data transmission because the video settings here are lower quality. This is the stream that is used when you are remotely connecting to your DVR from a mobile device. This stream can also be selected for viewing from a computer to compensate for latency issues.
In the drop down menu which is labeled as Type, you will be able to select Regular, MD (motion detection) or Alarm. Although Alarm is rarely used, both Regular and MD will let you adjust settings for those types of recording.
When you open the Resolution drop down menu you will see the highest resolution available listed at the top and the lowest one will be located at the bottom.
The Bit Rate is where you can set the data transmission speed of each of your cameras.
If you click on the Overlay button, you will be able to adjust where each channel name is displayed. You can also adjust where the date and time are displayed.
Schedule:
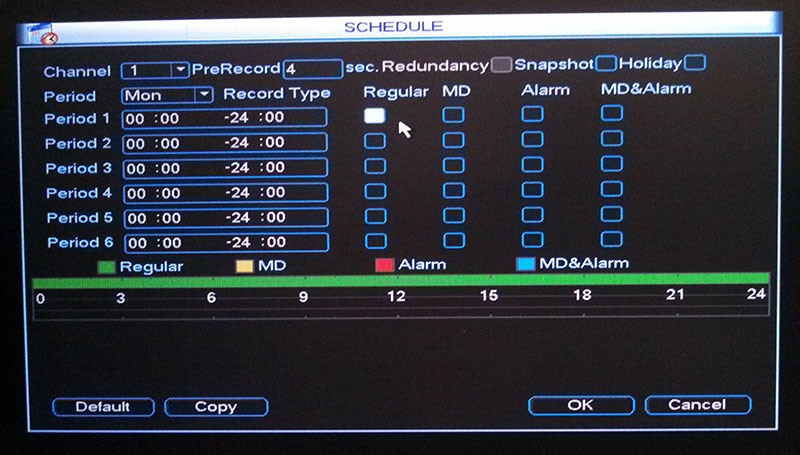
Setting this page up correctly is a key part of making sure that your DVR is recording the way that you want. Typically you will need to select All from the Channel drop down menu and all from the drop down menu which shows the days of the week. After that is done, you’ll need to make sure that either the top box under regular is highlighted (if you wish to record continuously) or the top box under MD is highlighted (if you wish to record based on motion detection).
You can also choose to have your DVR record continuously for part of a day and then record based on motion detection for the rest. In order to do this, you would first need to change the time frame that is covered by the periods along the left side of this page. Next you would need to highlight either regular or MD box next to the periods that you have modified. It’s important to make sure that the periods still account for all 24 hours in the day, if you have made changes to them.
The ‘PreRecord’ setting is only used if you’re going to be using motion based recording. It will allow you to adjust how long your DVR will record before a motion event occurs.
RS232:
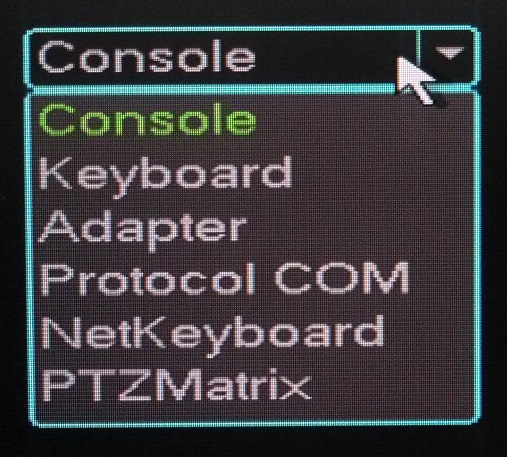
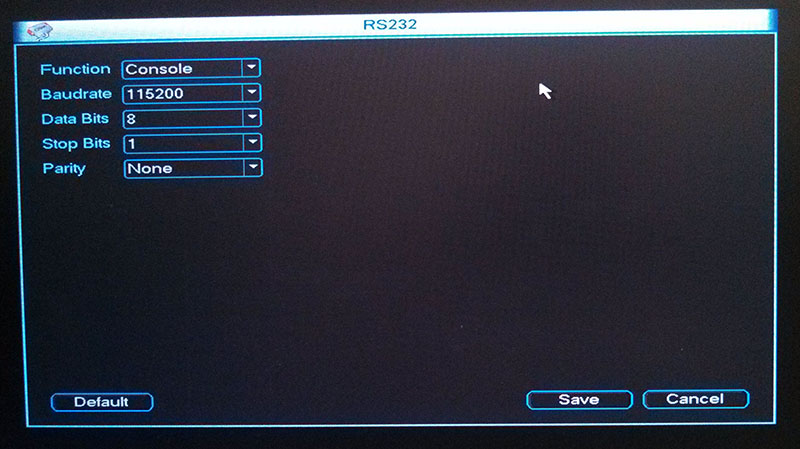
This is the menu page which allows you to configure the DVR so that it will work with any supported RS232 devices. The types of devices that are supported are shown in the picture below.
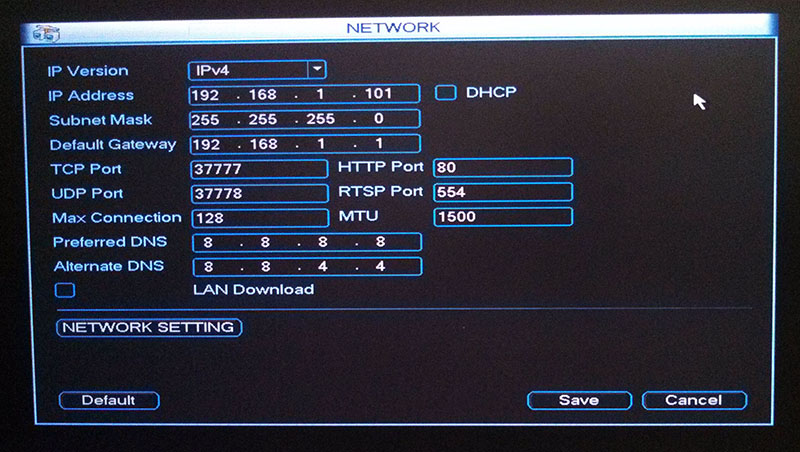
Network:
This page of the menu is where you will configure your DVR so that it will work with your network. Your network’s default gateway will need to be entered here as well as a unique IP address with in that scheme.
The http port should be changed to 88. Once that’s done the TCP and HTTP ports will need to be forward through your network’s firewall. Assistance with this process is the most common reason that our customers call our tech support department, which is free for our customers.
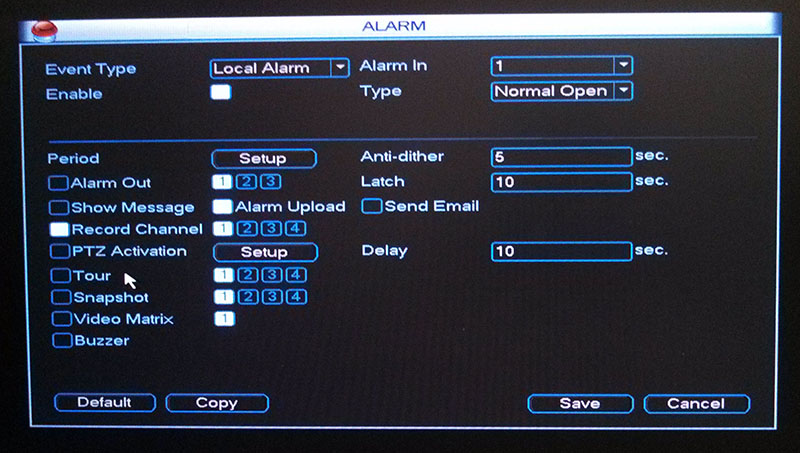
Alarm:
This page of the menu is where you will configure the DVR to work with any alarm input or output that is connected to it.
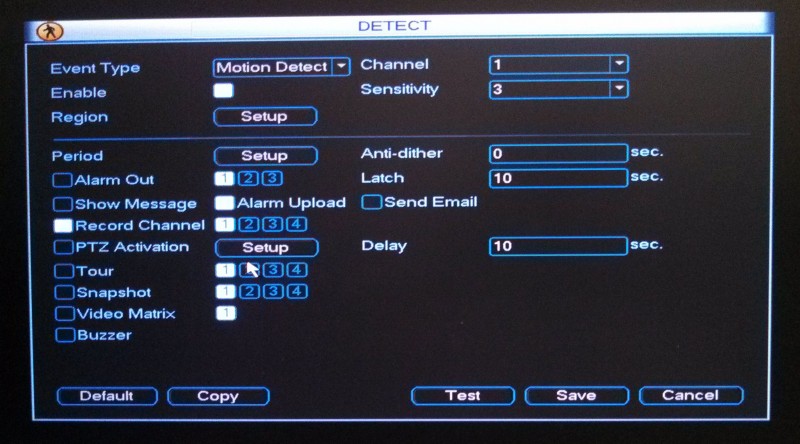
Detect:
Setting up this page correctly is a very important part in getting motion based recording working correctly. It’s important to know that there is a version of this page for each of your video channels. You should never use the Copy function on this page or make setting changes with All selected in the channel drop down menu.
You will need to make sure that both the Enable box and the box to the left of where it says Record Channel are highlighted for each channel. You will also need to highlight the numbered box to the right of Record Channel which matches the channel that you have selected at the top of this page.
The button next to the Region label will allow you to set parts of a camera’s view so that the DVR will not detect motion in those areas
.
The Sensitivity drop down menu allows you to set how much motion has to happen in front of a camera before the DVR will recognize it as a motion event and begin recording. The least sensitive is 1 and 6 is the most sensitive.
The Anti-dither setting indicates how long motion must happen in front of a camera’s view before the DVR will recognize it as a motion event and begin recording.
The Latch setting allows you to determine how long the DVR will continue to record after a motion event has stopped.
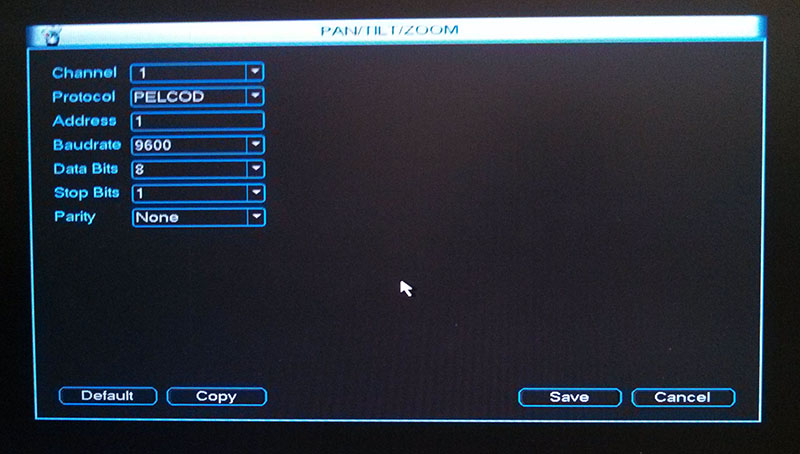
Pan/Tilt/Zoom:
This is the page where you’ll configure your DVR to work with any PTZ cameras that you have. The Protocol, Address and Baudrate settings here will need to reflect those settings in your camera. The Data bits, Stop bits and Parity almost never need to be changed.
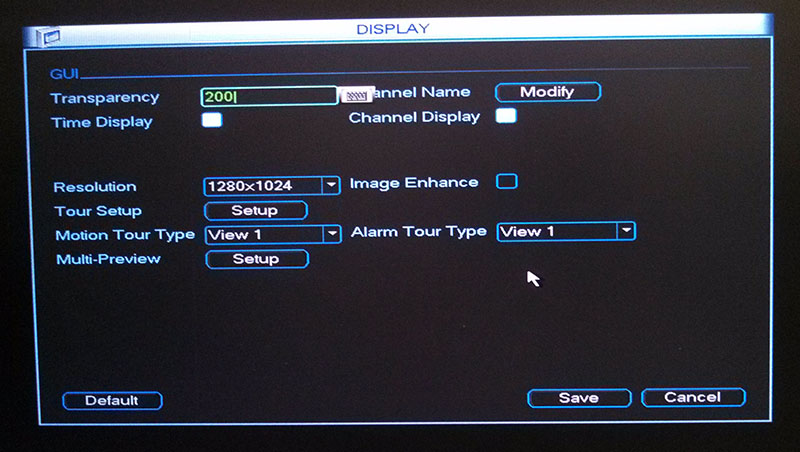
Display:
The Resolution drop down menu on this page allows you to change the resolution that is being output to a monitor which is connected directly to the DVR.
If you click on the setup button next to Tour Setup, you will have the ability to set up a tour of your cameras’ live views. The options that you’ll have for this will depend on the model of DVR that you have and the amount of cameras that can be connected to it. The general idea is that you will be able to display the live video feeds from selected cameras or groups of cameras in succession. It will also leave each camera or group of cameras on screen for an amount which you determine.
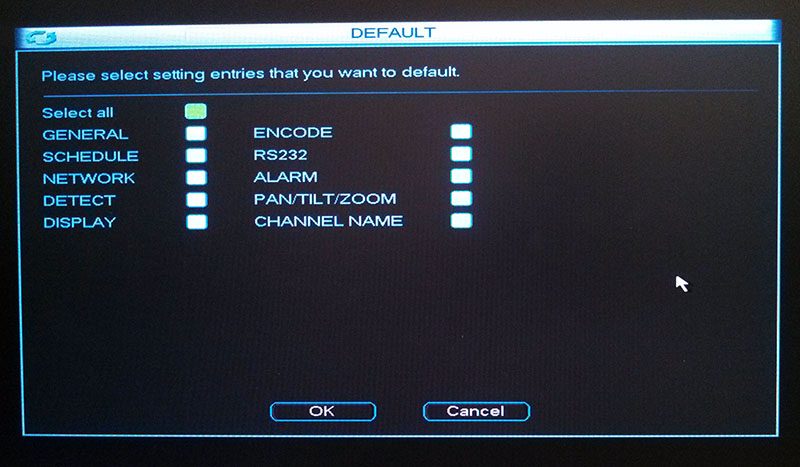
Default:
This page will allow you to reset some of the DVR’s menu pages to their defaults. Which pages that you can affect this way vary depending on the model of DVR that you have.