This article will continue the complete overview of the most recent menu system in TechPro Security Products newest NVRs (Network Video Recorders) and DVRs (Digital Video Recorders). If you missed Part 1 of the series click here. This new menu system is designed to allow you to interact with your recorder more efficiently and quickly once you are familiar with it.
In this article we will be examining the features available through the second row of the main menu; the INFO menu pages (see Picture 1). This section of the menu will provide you with some very useful information about your system and the way it’s operating. There are four main categories shown here – System, Event, Network and Log.

Picture 1
TechPro Security Products DVR and NVR Menu – System
This is the first selection on the info row of the main menu. It will give you information about different aspects of your recording device. You can easily access other pages within the INFO category of the menu by clicking on the page names along the top of any page with in the category. For example, you can get to the Event, Network or Log pages of the INFO category by clicking on that button along the top of this page. This is a big part of how this new menu system will allow you to navigate the menu quicker and easier.
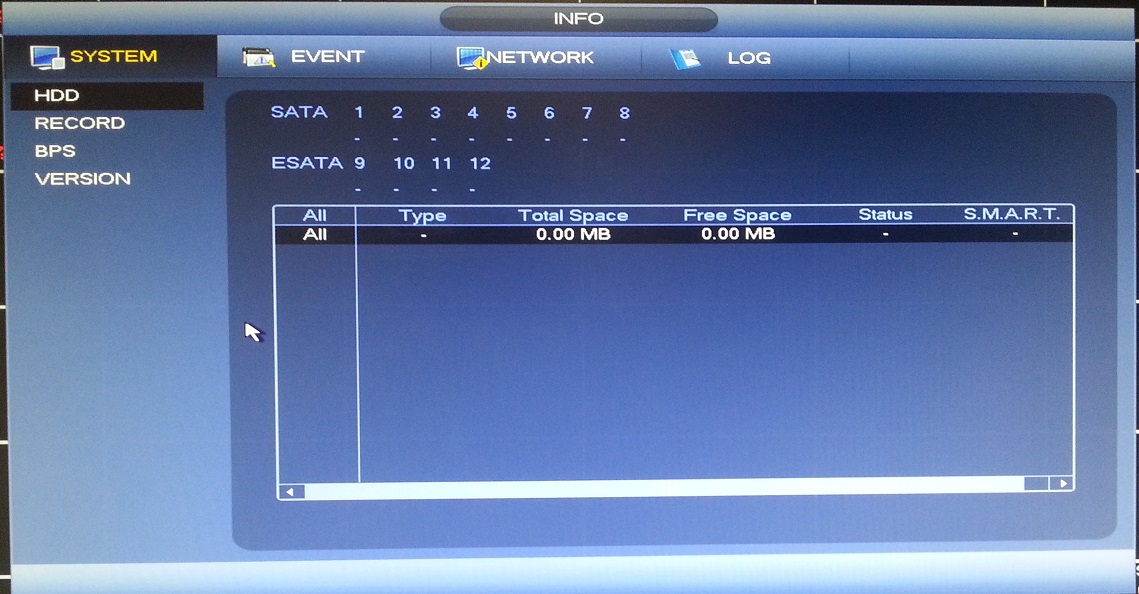
HDD: (see Picture 2)
Here you will see some useful information about the hard drives which are installed in your DVR or NVR. You will see the size of the hard drives, how much free space currently remains on the hard drives, the current status of the any hard drive present, and the S.M.A.R.T status report. The S.M.A.R.T category (Self-Monitoring, Analysis and Reporting Technology) is particularly useful because it checks the hard drive or drives for any indication that a malfunction may occur in the relatively near future.
This page will also show you if any storage devices are currently being recognized by the DVR or NVR. A ‘o’ will be shown under one of the numbers instead of a dash. This indication is separated to indicate if the storage device is attached to the recorder by an internal Sata or external eSata connection.
Picture 2
Record: (see Picture 3.)
This page will show you the record times on each hard drive installed in your DVR or NVR. It also shows you this info for the combined storage area.

Picture 3
BPS: (see Picture 4.)
The BPS (Bits Per Second) page can help you to monitor the bit rates of the video being transmitted by each channel with in your recording device. It will also show the video resolution being transmitted.
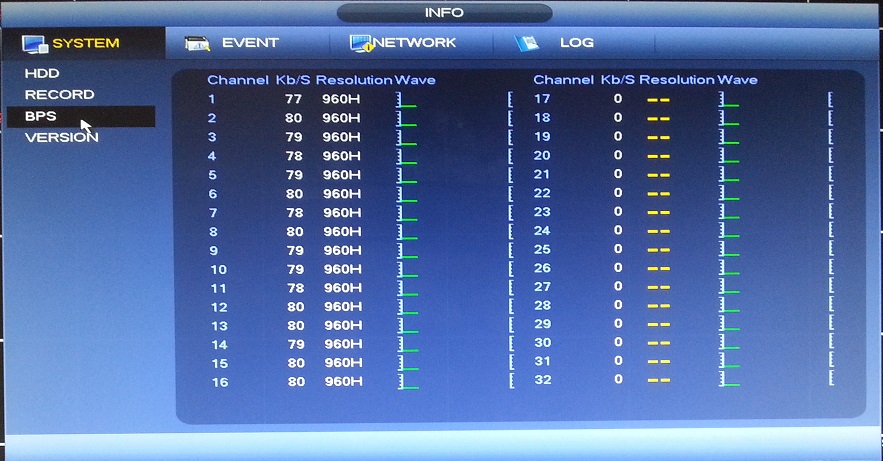
Picture 4
Version: (see Picture 5.)
This menu page displays information about the recording device that you have. The number of video channels, alarm inputs, and alarm outputs which your DVR or NVR has is also shown here. You may already know some of the information mentioned above but at some point you may also need to refer to this menu page in order to learn the system version (firmware version), hardware version, and/or build date for your unit.
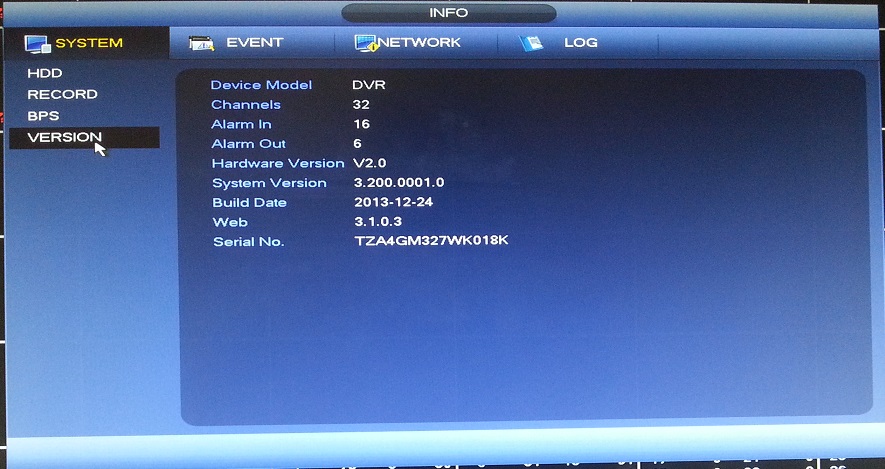
Picture 5
TechPro Security Products DVR and NVR Menu – Event: (See Picture 6.)
You can visit this menu page in order to learn about any events happening on your DVR or NVR at the current time. This page can provide you with data about the status of any hard drives installed in the unit, if the unit is currently connected to a network and the status of any of the channels.
This page of the menu will tell you the status of any alarms connected directly to your DVR or NVR. If you have a NVR then you can also monitor any alarm inputs or alarm outputs on your IP cameras.
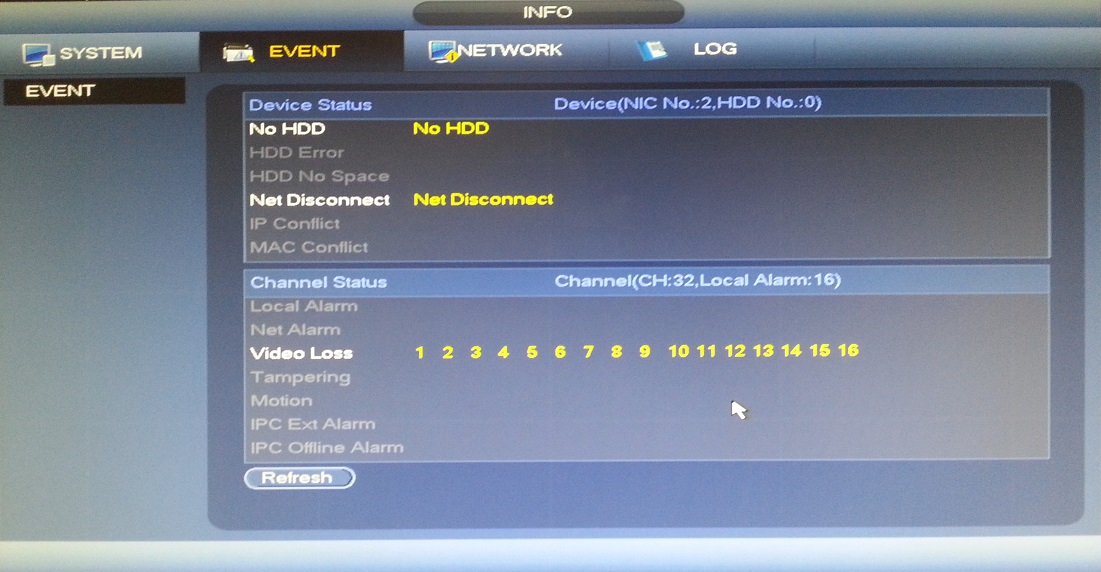
Picture 6
TechPro Security Products DVR and NVR Menu – Network
Online users (see Picture 7.)
This menu page will provide you with a list of the users which are currently logged into the DVR or NVR from a remote device. These users are listed by their IP address and username which they are using to log into the recording device. This page also allows you to disconnect and/or block a selected user for an amount of time which determine.
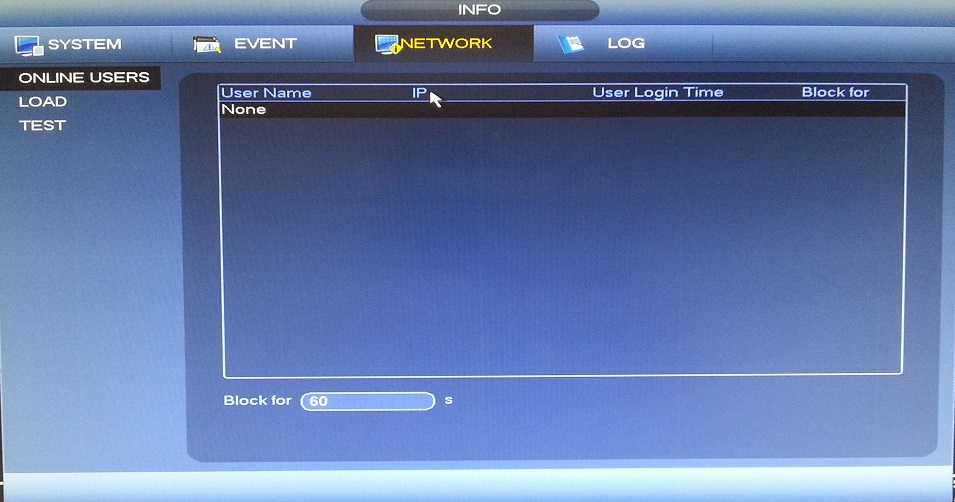
Picture 7
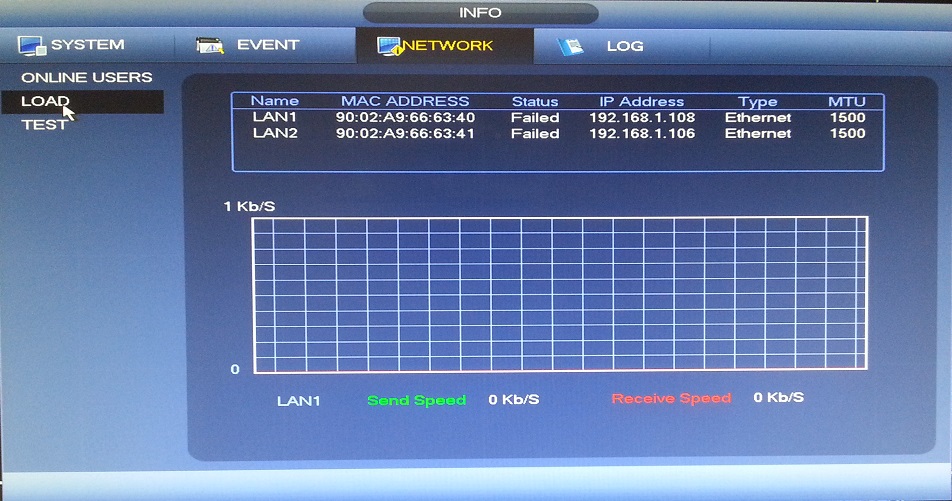
Load: (see Picture 8)
This page will show you the connection status of any network ports that are on your DVR or NVR. The MAC address for each connection port is also displayed toward the top of this page. The bottom portion of this page will display a graph representing the data being transmitted and received between your recording device and your network in real time.
Picture 8
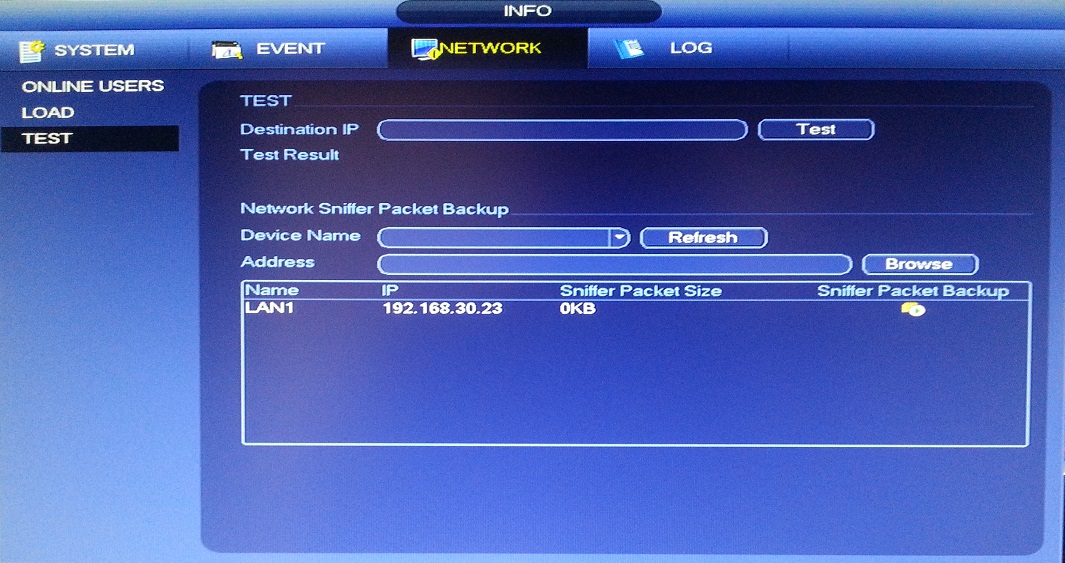
Test: (see Picture 9.)
This menu page will give you the capacity to test how your recording device is interacting with your network. The top portion of the page will allow you to be sure that your DVR or NVR is properly connected to your network by pinging your router’s IP address. This feature will also tell you the average delay, which is an indication of the connection speed between your DVR or NVR and your network’s router.
Users with advanced networking knowledge can gain additional information through the bottom part of this page. This part of the interface will let you export a list of the data packets being sent to a thumb drive. This can be done in order to have them analyzed through third party software.
Picture 9
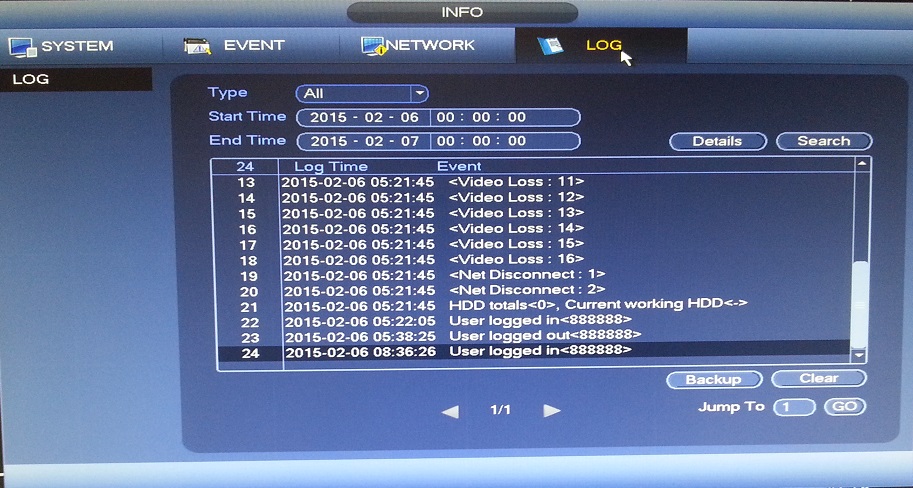
TechPro Security Products DVR and NVR Menu – Log: (see Picture 10.)
This menu page will you allow you to search logs based on time, date, and/or the type of log event. The log events will give you a record of any issues occurring with video loss from any channels, hard drives issues, the recording device or a network connection. This information will be shown by time and date, even if the issue is intermittent.
Picture 10
In the third and final part of this article, I’ll be going over the SETTING portion of the main menu. This portion of the menu deals with configuring your DVR or NVR to record your video footage in the manner that you desire. This part of the menu will also allow you to set your DVR or NVR up to work with any network or alarms connected to it.