CONTENTS
- Know Your Tools
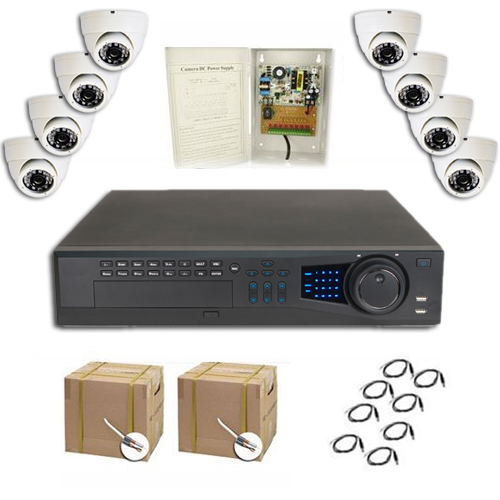
- Analog System with Plug & Play Cable
- Analog System with Siamese Cable
- Megapixel IP System
- Find the Right Location for Each Camera
- Find the Right Location for your DVR
- Running Cables
- Power Supplies
- Connecting Everything Together
- Setting up your DVR
The idea of setting up a security camera system in your home may seem like a hard task when you think about it but in all reality it’s a lot easier than one may think. There are some simple steps and tools you must have in order to install the system successfully but as long as you have what you need, it’s really not that hard at all. One of the main things I tell people is that running the wires is probably the most difficult part of the whole installation and everything after that is pretty much plug and play. The best way to go about installing a surveillance system in your home is to pick a location for each camera, pick a location for your DVR, pick a location for your power supply, run your wires, connect everything together, and then set up your DVR with the proper settings based on your needs.
KNOW YOUR TOOLS
Before you get started with running wires and setting up cameras, you’ll want to make sure you have all the proper tools necessary for the installation. One of the biggest mistakes that people make is to start mounting the cameras first by putting holes in your walls or ceilings and then realize that you don’t have everything you need. A lot of companies will not accept the cameras for a full refund after they have been mounted since they show signs of use and cannot be resold as brand new. Also, not having the right tools can make for a very sloppy-looking installation. If you want to have a clean installation, you’ll want to have the same tools that the professionals use. Knowing which tools you’ll need will depend on the type of equipment you are using.
ANALOG SYSTEM WITH PLUG AND PLAY CABLE
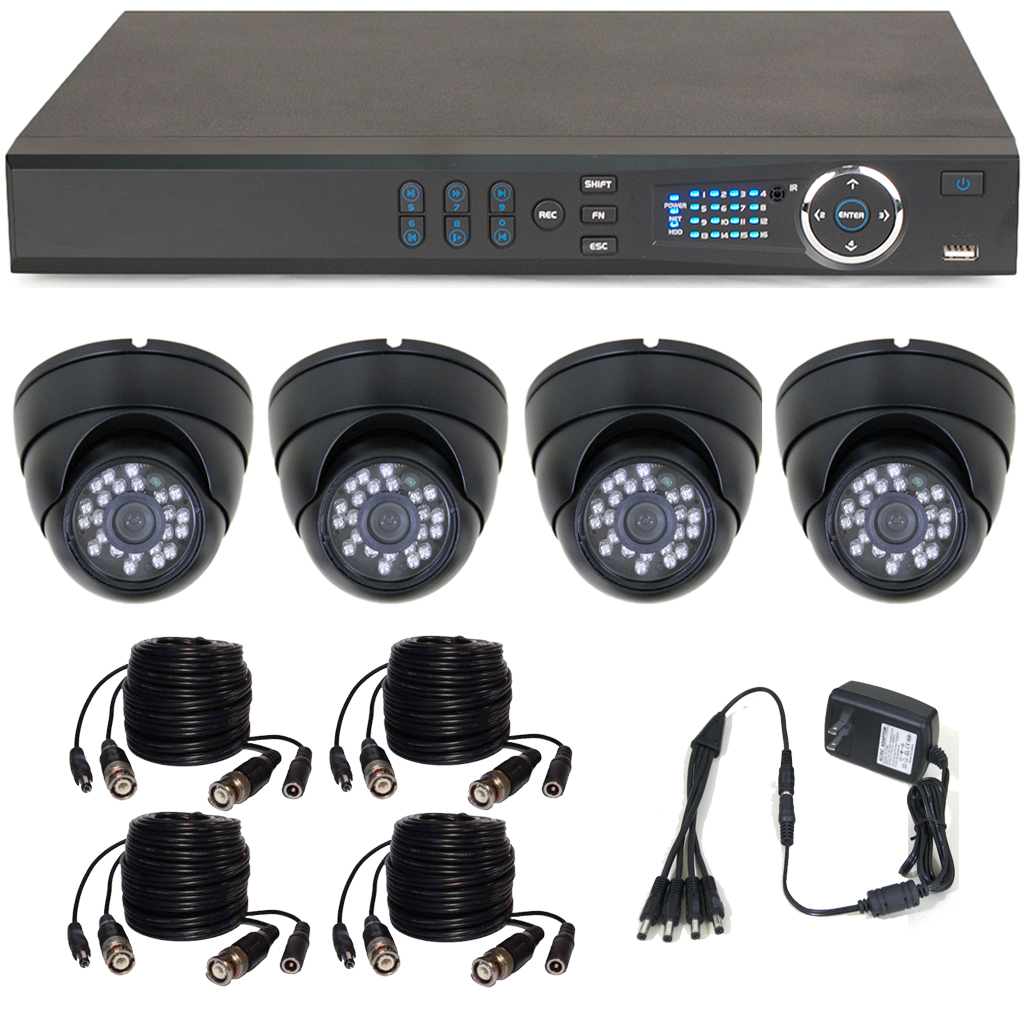
If you decide to go with a basic analog system, most of them come with plug and play cables these days. This means that the wires for power and video will already come in a specific length and pre-terminated with ends on them and you will not need the tools necessary for cutting cable or applying the connector ends. You will however, still need the basic drill, screw driver and mounting anchors in order to run your cable and mount the security cameras.
ANALOG SYSTEM WITH SIAMESE CABLE
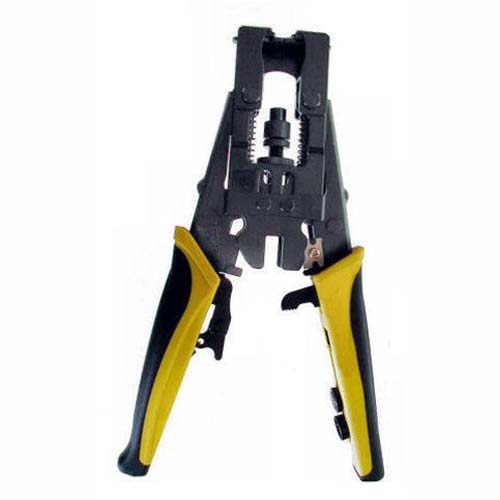
Sometimes home owners will opt to have a better, more reliable type of cable for their security system and Siamese Cable is definitely a higher quality wire. Siamese cable is RG-59 and 18-2 attached together so that you will not have to run a separate wire for video and power. In this line you will have RG-59 which transmits your video signal and 2 wires which are 18 gauge (usually one red and one black) for your power. In this case, depending on which ends you decide to attach to the cable will depend on which tools you’ll be needing. There are Twist-On Connectors available which you can simply twist on using your hand. If this is your choice, you’ll only need a tool for stripping and cutting the cable. There are also Crimp-On and Compression Fittings. This is where you’ll need a specialty tool called a BNC-Crimping Tool or a BNC Compression Tool. These tools will help you put these connectors on the end of the cable and they will be permanently on. The issue with Twist-On connectors is that they can sometimes come off but crimp on and compression fittings are on really tight and provide a good seal between the cable and the connectors.
MEGAPIXEL IP SYSTEM
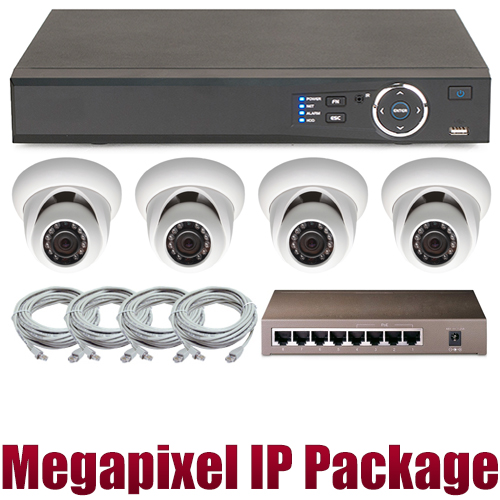
If you decide to go with a Megapixel IP System, you will more than likely be running CAT5 cable, or something similar. In this case, you will need to make sure that you have a cable stripping tool or a RJ-45 Tool which are usually made to also strip cables as well as attaching the RJ-45 connectors to the cable. There are different types of Ethernet cable for you to choose from but you can still use the same tool no matter which one you get. The differences between each type is beyond the scope of this article but you may search online since there are hundreds of webpages with information showing you the technical differences between each one. One of the main things to keep in mind is that there are different transfer speed rates between each type of Ethernet cable.
FIND THE RIGHT LOCATION FOR EACH CAMERA
Before making a bunch of holes in your walls or ceilings, the best place to start is scoping out your location and figuring out the best locations to install each camera. Keep in mind that the type of camera you have purchased will play a big part in where they should be mounted. For example, if you have purchased PTZ Cameras you’ll more than likely be putting them outside. Make sure that you put them in a location where you’re getting the most use out of the angles that these awesome cameras are able to capture. If you put them tucked away in a corner, you’ll only be able to see about 90 degrees instead of the 360 degrees that these cameras are capable of capturing. The best location for one of these cameras would be one where you’ll have the ability to look all the way around without it just pointing at walls.
With Dome Cameras you’ll want to either mount them on a ceiling or a wall pointing at the direction you’d like. My suggestion would be to make sure you’re not pointing them towards an area with a lot of light directed towards the lens. I have seen cameras that were placed facing a glass door where a lot of sunlight came in and it would make the whole room one big silhouette. Some of the modern cams sold now will have an ON SCREEN DISPLAY (OSD) which will allow you to change the setting on how the camera sees. However, even with some of the best features, it’s still best putting the camera in a location where it’s not being blinded by another light source. Dome cameras are now built in such a way where you’re able to hide the wires under the housing which is great because it will keep intruders from being able to clip the cable in order to kill power to that camera thus rendering it useless.
FIND THE RIGHT LOCATION FOR YOUR DVR
Finding the right location for your DVR is pretty important. This is the device that you’re going to be recording all of your footage on. You would not want someone to simply come into your home and take the DVR. You would be left with no evidence of what happened and it would defeat the whole purpose of having a system installed. One of the main things that you can keep in mind is that hiding the DVR is your best solution. Check out my previous article for some great ideas on hiding your DVR. Also, keep in mind that all of the wires for each camera will come back to this central location. You’ll want to make sure it’s a location with a small amount of ventilation as well since most DVR’s these days have a hard drive and if it overheats, you will lose your recorded footage. You may also look into backup options in case anything ever happens to your DVR. Some people have a secondary DVR and even external hard drives in separate locations which will allow for backup of your device. There are also options for remotely backing up your recorded footage. Check out our DVRS which have some great backup features.
RUNNING CABLES
When running your cables, there are some things you’ll want to be aware of. There are some general guidelines to follow to ensure that you’re getting the best performance out of your wiring. First, make sure not to run your audio and video cables too close to high voltage power cables. This could potentially cause interference. Next, try not to make the cables too tight. Always be sure to leave some extra slack so that the cables aren’t being pulled tightly around corners. Make sure not to do anything that pinches the cables because it will impair the performance. If you’re using wire ties, be sure not to make them too tight. Before cutting the cable, make sure you’ve measured the distance so that you have extra cable to account for any bends, turns, or obstacles.
The best solution to running cable is usually to run it from the DVR’s location through an attic directly to the area the cameras are being mounted. This way the wires are hidden and not accessible to anyone trying to vandalize your system by cutting the cameras power or video. If you do not have access to an attic (such as in an apartment) there are other options. You may also run the cable along the edge of a wall, under carpeting, and below baseboards.
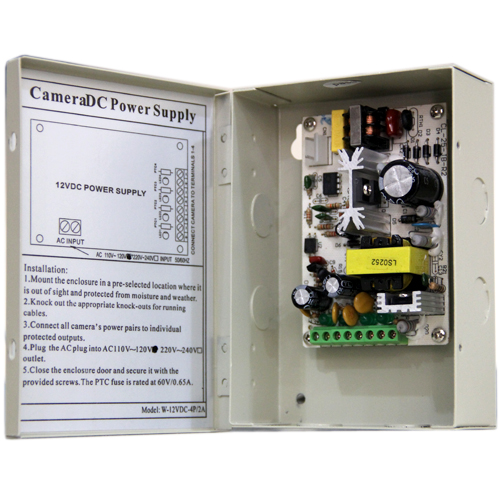
POWER SUPPLIES
 |
 |
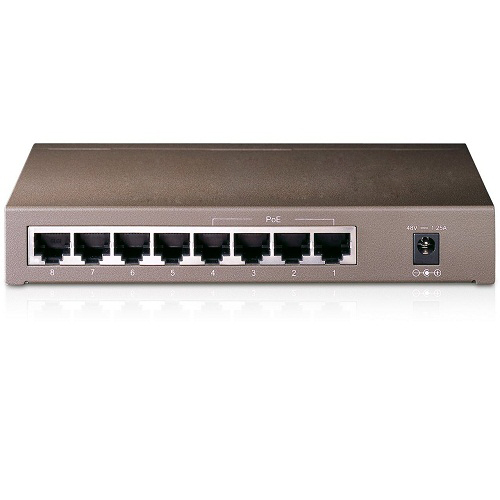 |
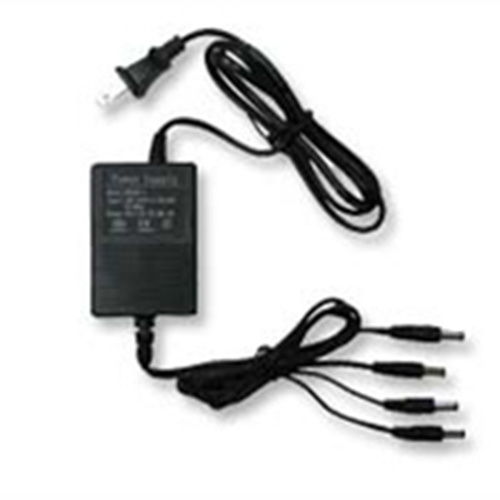
Depending on the type of system you choose will depend on the type of power supply you’ll need. If you are shopping on a budget, there are easy plug and play power supplies available. The amount of channels on a power supply is how many cameras you can hook up to it. There are also power distribution boxes available which are better quality and last longer. Check the power requirements of the cameras you have purchased, most analog cameras will be 12V but there are some which are sold which will require 24V AC instead. If you are not powering the cameras at the source, please note that you will want to check your voltage drops with a volt meter during load (while the camera is on). Especially cameras with IR LEDs. Sometimes cameras will work fine during the day, but will stop working as soon as night time hits and the IRs try to come on. Depending on the type of cable you use, will also depend on the distances you can run your power. There are situations where you can run 24V AC to get longer distances, but if you’re using 12V cameras you have to make sure to buy a power converter so that you don’t fry the cameras. This product will take the 24V AC back down to 12V DC. If you have Dual Voltage cameras, you will not have to worry about this. They will take both 24V and 12V. Check your specifications to be 100% sure before plugging anything in. If you are using a power box with plug and play cables, you’ll need power leads in order to avoid having to cut the connector off the cable just to power the camera. If you’re using Megapixel IP cameras, you can also power through a POE switch which is power over your Ethernet cable.
CONNECTING EVERYTHING TOGETHER
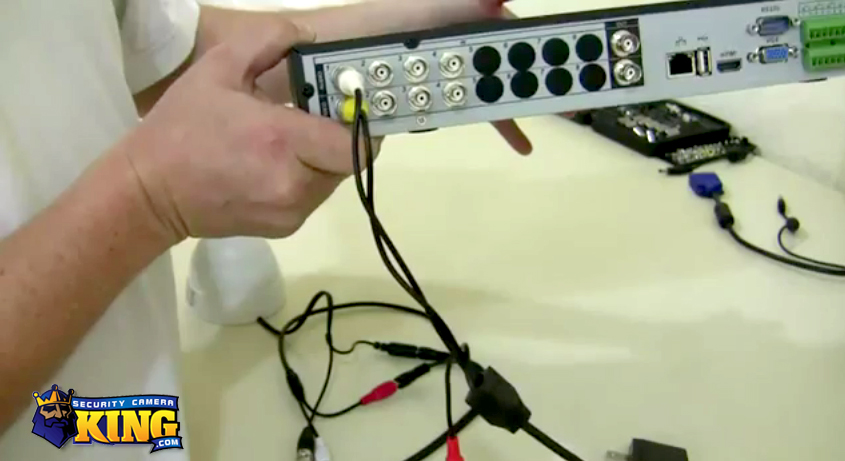
Once you have everything setup and tested, you’ll be able to start plugging everything in. This is usually the easiest part. Just make sure that each camera cable is labeled to make it easier on you. For example, if you have a front door camera and you want it on channel one so it shows up first, you would label the wires so that if you ever have to completely unplug everything, you won’t have to turn every camera on in order to find out which cable is connected to which camera. For monitoring, most DVRs will have multiple forms of output. Most will have HDMI, VGA, and BNC outputs which you can use to monitor your system and our devices will allow them all to work simultaneously so that you can connect multiple monitors.
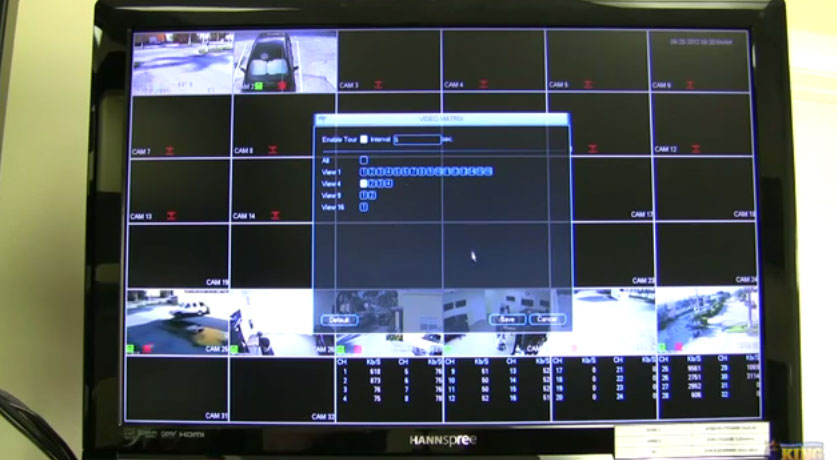
SETTING UP THE DVR
Setting up the DVR can get a little confusing for first-timers. Our DVR systems have a lot of settings which can become cumbersome. The good thing is that we offer full support of our products and if you purchased a TechPro DVR system, you can call us anytime during business hours and we’ll answer your questions. If for some reason you’re looking for help off hours or even instant help, we have put together some really great resources to help you set up your DVR. One of the first places you can search for and ask for help is on our Tech Support Forums. People are on there all of the time answering questions and even some of TechPro’s tech support staff will see the questions come in on weekends and answer off-hours. There is a Learning Center on the site with some great resources as well such as this blog, Comparison Charts, Calculators and much more. Lastly, but certainly not least, there are hundreds of product videos and tutorials on our Video Vault and on our YouTube page. Most of the time you can just type in your product number into the search and you’ll find tutorials and unboxing videos.
In conclusion, there may be a lot of information on this article, but setting up a system in your home really isn’t that difficult. There is a lot of technical information that may scare off some people but as long as you have all of the proper products that work together, you’ll be able to just easily plug everything up in your home and be ready to go in no-time! When you call in to make your order, you can ask one of the sales reps for assistance in picking out the right equipment and they’ll make sure you have everything you need. Just always remember that after you purchase your system, they will not forget about you. You can call in any day Mon-Fri from 9am-6pm EST and they’ll answer your questions and help you set up your system if you’re having a hard time!