CCTV Installation and Wiring Options
Today there are a lot of options when it comes to choosing a quality CCTV security system. You may decide to go with a traditional analog system, HD-SDI, HD-CVI or even an IP network based security products.
One thing all of these options have in common is you will probably have to run some sort wire to the cameras. Yes, there are some “Wireless Security Camera” solutions available on the market today, but if you do some research you will find that there are a lot of limitations to wireless security cameras. Most CCTV professionals would probably not recommend a wireless system in an environment where up-time and security are critical.
I do want to mention that it is possible to reliably transmit video wirelessly using a device such as the TP-LocoM5 – Wireless Access Point/Bridge as seen here at www.securitycameraking.com.
But even then you would still need to have a power wire run to the camera or a local power source near the camera and it only works with IP Cameras.
That being said, we will be talking about a fully-wired system in conjunction with a storage device such as a DVR (Digital Video Recorder) or NVR (Network Video Recorder).
Affordable Security Solutions

NEW INSTALLATION
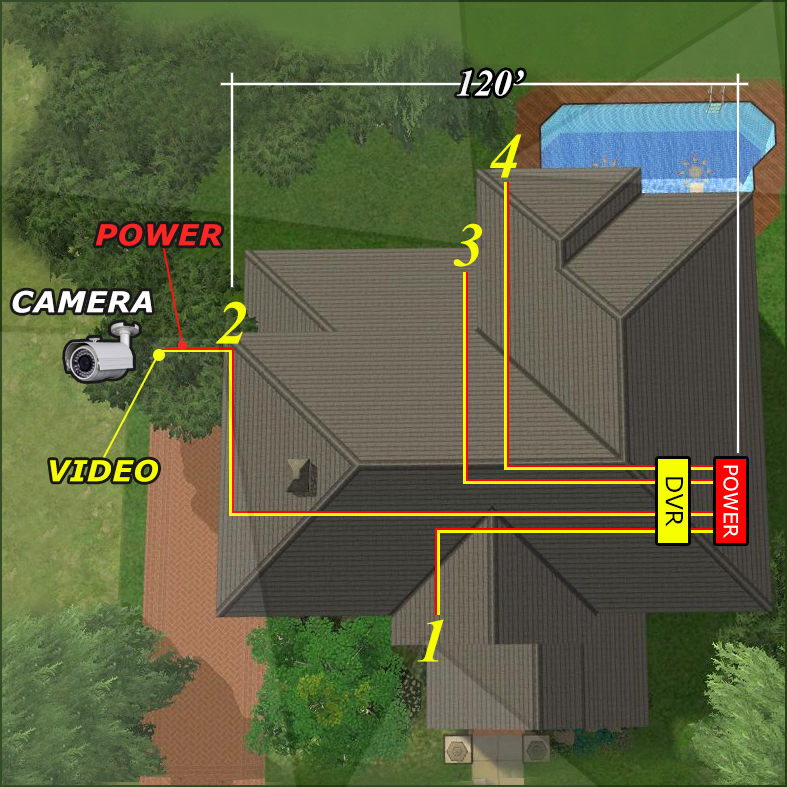
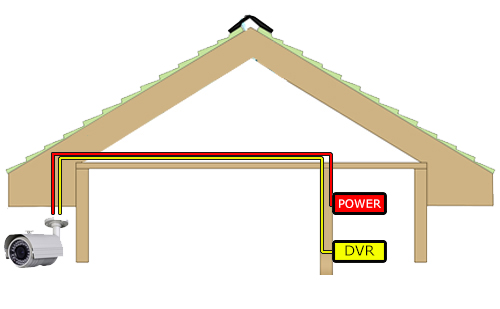
When installing a completely new security system you may want to have the video and power wires come from a single location located near the storage device (DVR or NVR) as shown below.
ANALOG SYSTEMS
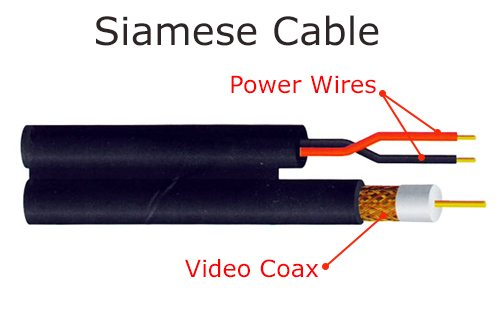
Analog, HD-SDI and HD-CVI cameras will need two wires run to them. One for video transmission and a set of power wires in order to power the camera. You could run a coax wire and separate power wires but most CCTV professionals choose to use “Siamese Cable”. Siamese Cable is a manufactured coax cable with a set of power wires attached to it. The power wires can be split off from the coax in cases where your power source may not be in a close proximity to your recording device.
NETWORK IP SYSTEMS
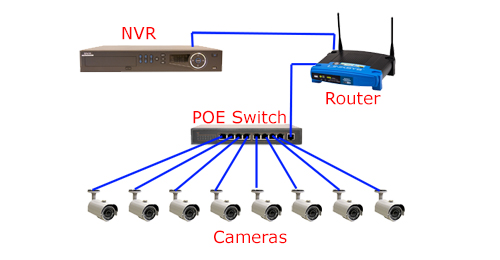
IP cameras use digital video transmission over CAT5 or CAT6 cable. In most cases you run your video and power to and from the camera on the same CAT5 or CAT6 wire, assuming you are using a POE (Power Over Ethernet) power source such as a POE injector or POE Switch.
Some NVRs come with built in POE, but in most cases it is recommended to use an external POE switch like the POE-8MB1G from SecurityCameraKing.com. When using an external POE switch all of your CAT5 or CAT6 will run directly from each camera to a POE switch that is connected to your local network. Then you simply connect your NVR to the network and you are all set.
Most IP cameras also come with an additional power wire if you choose not to use POE and power them with 12v or 24v power as shown below.
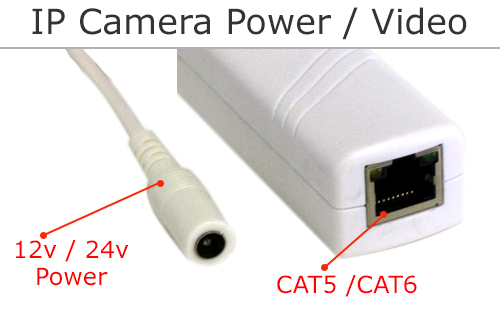
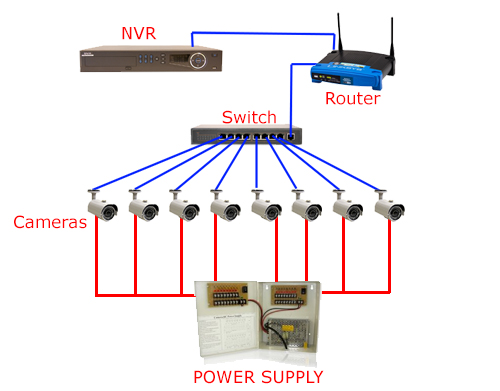
If you are going to power your IP camera with 12v /24v power you will still run all of your CAT5 or CAT6 from the camera to a Non-POE switch (usually significantly less expensive than a POE switch) but you will run an extra set of power wires from a power source to each camera.
RUNNING YOUR CABLES
Now it’s time to run your cable. The following will cover 2 popular scenarios.
Scenario 1: Running your cable through your attic and mounting your cameras to the soffit. This is a common installation option, provided you have access to your attic and your soffits are also accessible.
First you have to choose the placement of you recorder and power supply. Some people simply have them located in an office or a room within their home. Others prefer having them in a more secure location such as in a lockbox, hidden in a closet, or even in the attic itself.
The image below shows the recorder and power supply inside a room of the home. Power and video wires run up the wall into the attic to the location where the camera will be located and out a small hole in the soffit were the camera will be mounted.
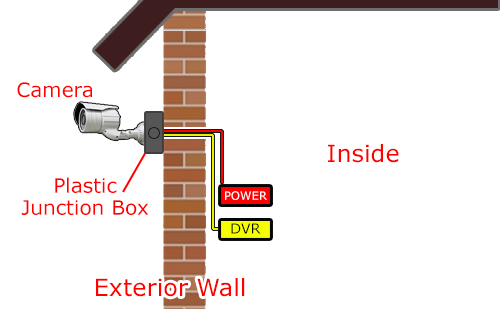
Scenario 2: Another option is to run your cable through an exterior wall and then use conduit on the exterior of your structure to run your cables from one camera to another. This is a great option for those who do not have an attic or limited access to one.
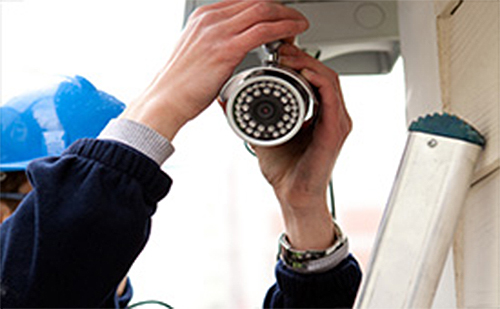
Mounting Your Cameras
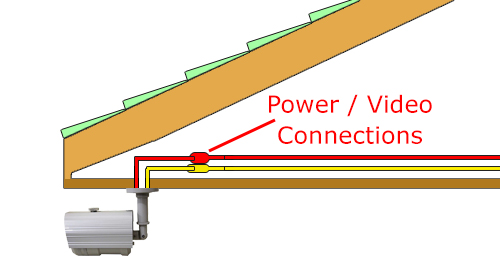
Once you have run your wires to the desired location you can connect your camera. In some cases where the cables are coming out of the soffit it is possible to connect your wires together and tuck the connections up into the hollow area of the soffit, then mount the camera directly to the soffit.
In situations where you’re running your wires through a solid concrete or brick wall that the connections cannot be tucked into, it is common to mount a junction box.
Junction Boxes and Conduit
Junction boxes are particularly useful when running your cable through conduit on the exterior of your structure as they serve as a weather proof container protect your power and video connections from the elements and also provide you with a flat surface to mount your cameras to.
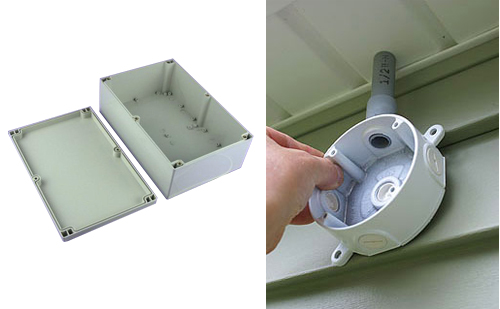
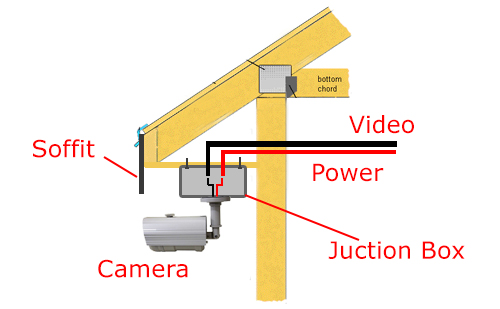
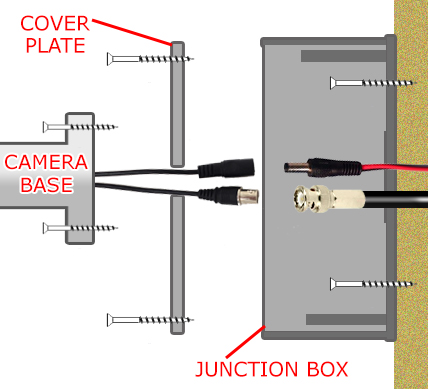
First you will pull your wires through the access hole on the back of the junction box. Then mount the junction box to the wall. You may have to drill a hole in the junction box cover big enough to feed your camera connections through. Next, connect the camera to the power and video connection(s). Then screw the cover on to the junction box. Now you can mount you camera to the junction box. See the diagram below.
When used on a soffit, a junction box will sometimes be helpful in order to lower and drop your cameras below obstructions such as deep fascia boards as shown below.