

The first thing you should do when you get a CCTV DVR (Digital Video Recorder) is to make sure it’s setup correctly. Before you can do this, you’ll need to make sure that you have a monitor and a mouse connected to it. The mouse is located in the accessory box that came with the unit. Now you’re ready to turn the DVR’s power on using the switch located near where the power cable connects to the CCTV DVR.
Once you are able to see the windows where your live camera feeds will be, you should also see the startup wizard pop up. This menu has some settings that aren’t essential to initially setting up your CCTV DVR for the vital functions, so you should cancel out of the menu by clicking on cancel and then selecting the OK button.
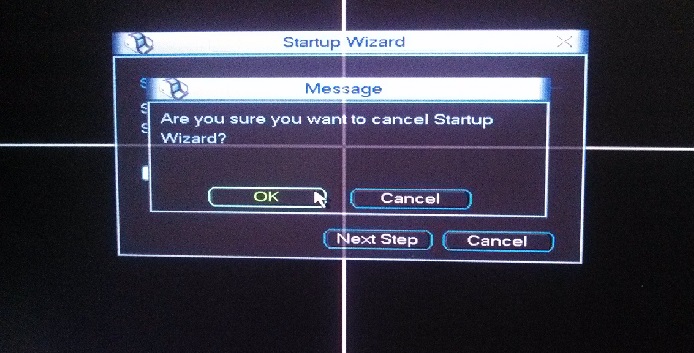
Canceling the startup wizard.
In order to be able to make setting changes to this unit you will need to be able to go to get into the DVR’s menu system. Right click anywhere on the screen and then select Main Menu. At this point you will need to log into the unit. By default the password you’ll need is the same as the username. For example – the password for the admin user name is admin. You will get a virtual keyboard when you click in the password field.
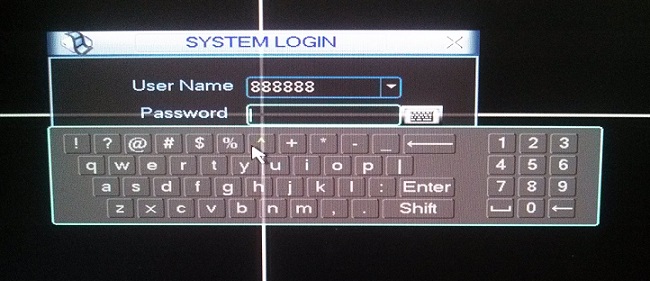
Log in interface.
The first thing that you should do with a new CCTV DVR is make sure that the time and date are set correctly for your time zone. This is done by going to the general page of the DVR’s menu system (Main Menu>setting>general). You will set the time and date along the top portion of this page. Click on save in the upper right and then the ok button in the bottom right in order to confirm your setting changes.
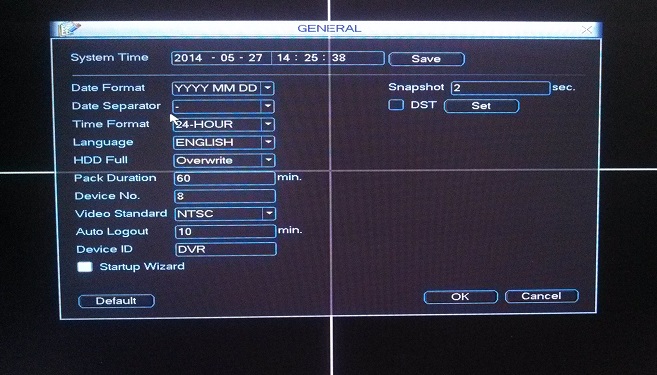
General page.
The second thing you should do is make sure that the DVR is recording video in the manner that you desire. A hard drive will have to be installed in the unit before any video will be recorded. At this point you need to decide if you want to record based on motion or continuously.
Recording based on motion – This means that your DVR will begin recording when it detects motion. In order to get this set up this correctly you will need to visit three pages in the DVR’s menu system.
1. Go to the record page (main menu>advanced>record). This page needs to be set up so that all the dots are set next to schedule for any channels where you have a camera connected. Any channel that does not have a camera connected should be set to stop. Once you’re done making adjustments click on the OK button to confirm the changes.
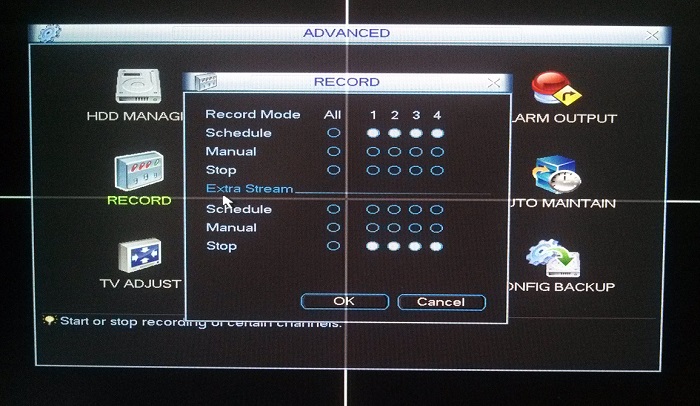
Record page.
2. Go to the schedule page (main menu>setting>schedule). In the top left corner of the page you will first need to select all for the channel and then near that setting you will need to select all for the days of the week. At this point you’ll need to make sure that just the top box under MD is white. None of the other boxes should be white in any of the four columns. Click on the OK button to confirm these changes.
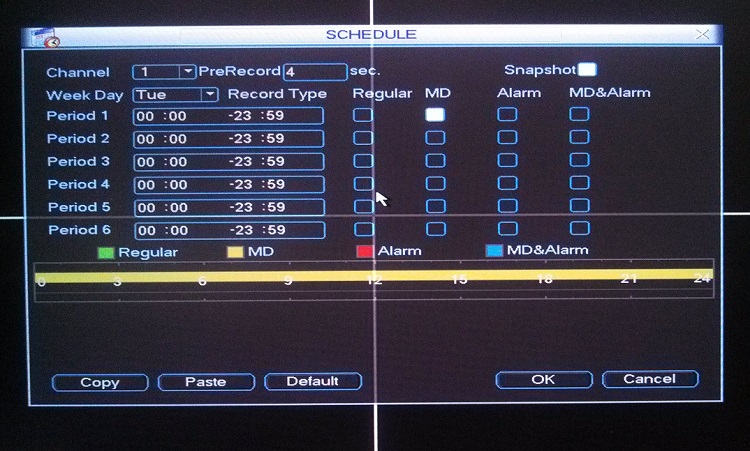
Schedule page set up for motion detection.
3. Go to the detect page (main menu>setting>detect). In order to configure this page correctly, all you need to do is click on the default page. Make sure that the enable box is white and then hit save.
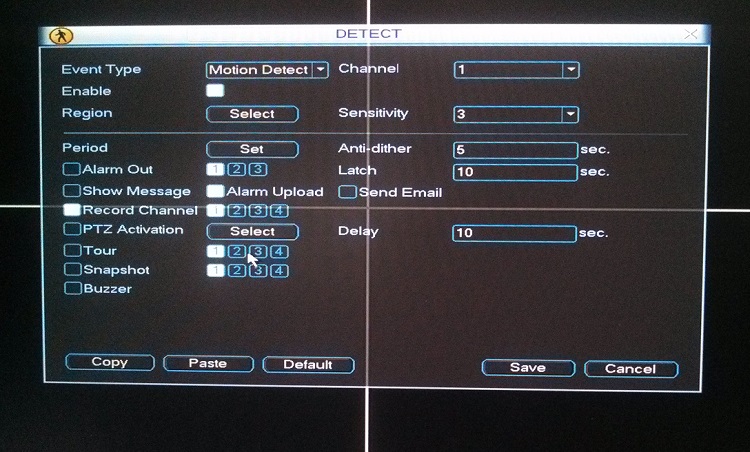
Detect Page.
Continuous recording – This means that your DVR will be recording all the time. In order to get this set up this correctly you will need to visit two pages in the DVR’s menu system.
1. Go to the record page (main menu>advanced>record). This page needs to be set up so that all the dots are set next to schedule for any channels where you have a camera connected. Any channel that does not have a camera connected should be set to stop. Once you’re done making adjustments click on the OK button to confirm the changes.
Record Page.
2. Go to the schedule page (main menu>setting>schedule). In the top left corner of the page you will first need to select all for the channel and then near that setting you will need to select all for the days of the week. At this point you’ll need to make sure that just the top box under regular is white. None of the other boxes should be white in any of the four columns. Click on the OK button to confirm the changes.
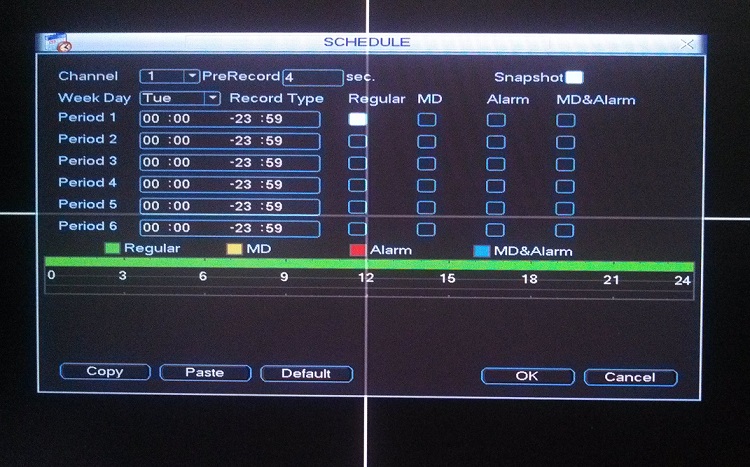
Schedule page set up for continuous recording.
Now your DVR is set up to record correctly in the manner of your choosing. It’s best to be certain of this before you need to rely on your recorded footage. The best way to be certain that your DVR is recording properly is to retrieve the footage. Next we’re going to take a look at how to retrieve the recorded video.
Being able to review the video footage that your DVR records is one of the essential functions of security camera system. It’s a good idea to become familiar with how this is done as soon as possible so that you know how to do it in case a crime occurs. Additionally, reviewing the recorded footage occasionally is also the best way to make sure that your DVR is functioning exactly the way you want.
In order to review your footage you will first need to go to the search page of the DVR’s menu. To get there you’ll need to first right click anywhere on the screen and select Search. Once you’re on the search page you will first need to select one of the blue days on the calendar in the upper right corner (the blue days are the days that have recorded footage).
The tabs located directly below the calendar are where you can select how many cameras that you would like to play recorded footage at the same time. Once you have selected the number of cameras that you’ll be working with, you’ll need to select the particular camera or cameras from the drop down menus located directly below the tabs.
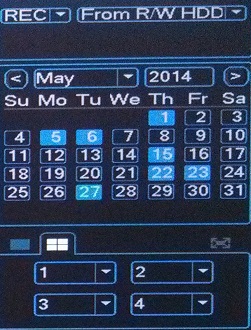
Search calendar.
As soon as you have performed the above steps then you should pay attention to the segmented bar along the bottom portion of the screen. Portions or all of it will become colored, depending on whether you are recording continuously or based on motion. The color key along the bottom of this page will indicate the type of recording that you have for the specified camera and day. This bar’s numbered segments indicate the hours of the day. This allows you to click along this bar and select the time of the recorded video that you wish to review. As long as you see that at least parts of the bar are colored then you know that your DVR is recording footage.

Search bar.