

TechproSS-PC is a software that will allow you to connect to your DVR, NVRs and IPCs. With this software you can configure different sets of features, from multiple camera views, automatic camera opening, extended screens, etc.
In this article I will demonstrate how to configure some of these features in a few simple steps.
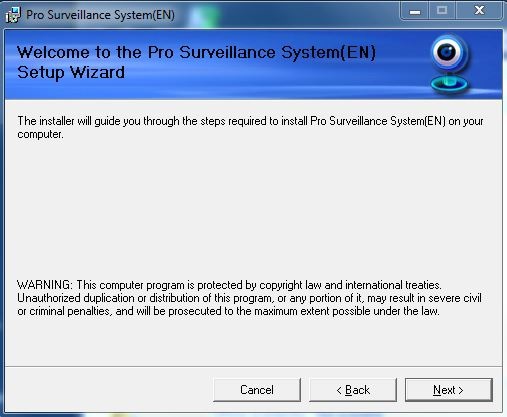
1.- Installation
Installation is very straight forward. there will be 2 installation files. Click on Setup.exe to begin the installation process.
Figure 1
![]()
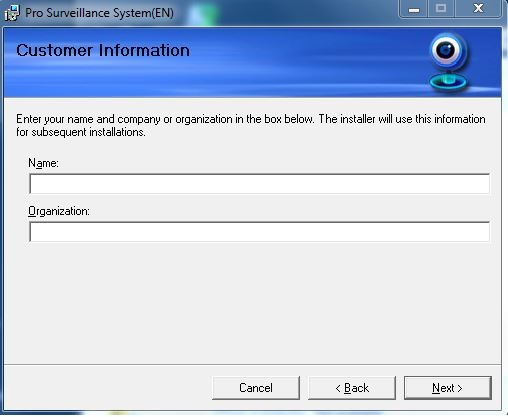
The installation will begin, just click Next and follow the prompts during installation:
Figure 2


2.-Opening the software
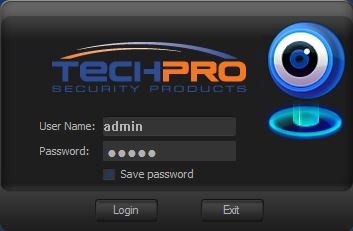
After the installation of the software is completed an icon ![]() will appear in your desktop. To open the software simply click the icon and a pop up will appear asking for username and password:
will appear in your desktop. To open the software simply click the icon and a pop up will appear asking for username and password:
NOTE: The default username and password is “admin” without quotes. You can also check the option to save your password from now on.
3.- Software Main Screen
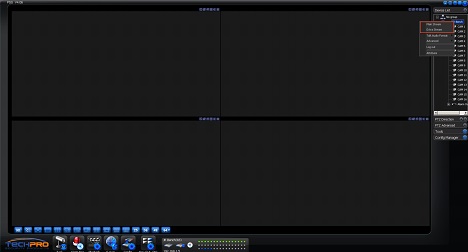
The main GUI interface will display and you will be presented with this page:
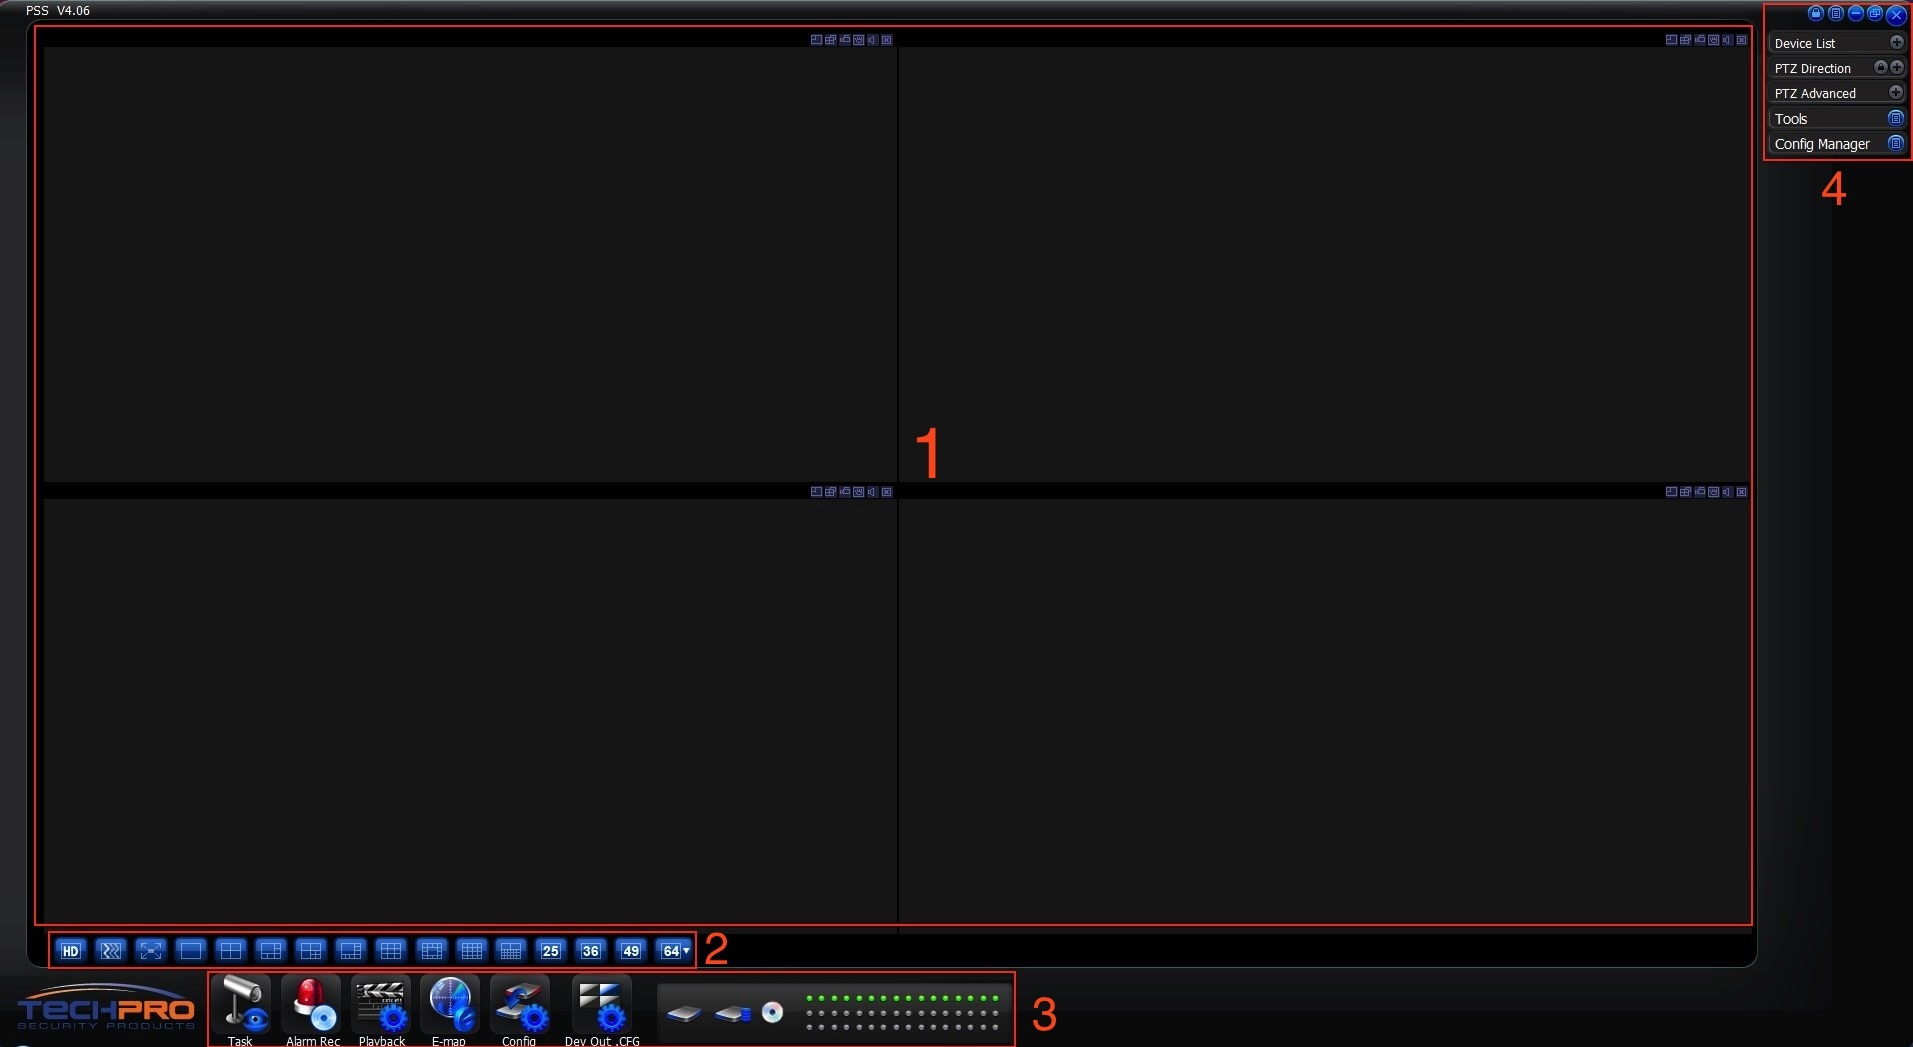
Legend:
1.- Main Interface of the Software.
2.- Screen Display View Mode. Configurable up to 64 camera view.
3.- Function Buttons. This is a group of six buttons that will allow you to access a Task, Alarm Recording, Playback, E-map, Software Configurations and Device output Configurations.
4.- Main Tool Bar. Access your DVR/NVR or IPC cameras from this area. View your devices under groups and categorize them as you wish.
– Device List: Displays current DVR, NVR and IPC cameras that are logged in.
– PTZ Direction: Allows you to control Pan/Tilt/Zoom Cameras. Control Zoom, Focus* and Camera Iris*.
– PTZ Advance: Allows you to execute stored presets set in the camera, patterns. etc.
5.- Tools. Activate Alarm outputs, execute a record plan, search for specific logs, change your device color settings, and much more.
6.- Configuration Manager. This is the CORE of the software in terms of configure your devices, connections, tasks, extended screens and even saving the software configurations to an XML file.
4.- Adding a devices in TechproSS-PC
In order to get your Video Recorder stream video to the software it is necessary to add some information about the Recorder.
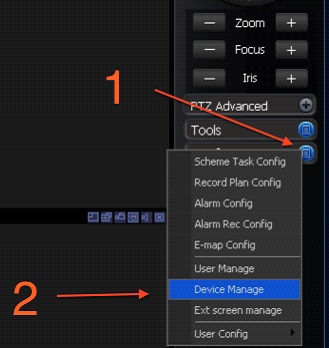
Click “Config Manager” & “Device Manager”
In this interface you will have the chance to either add the device by searching the network or manually.
Auto Search
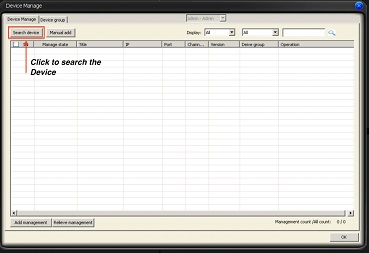
Manual Add
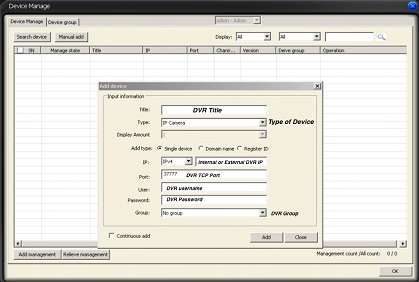
To add a device manually click “Manual Add” and the interface above will display the following information:
Title: In this field you can add a title to the connection between the Recorder and the software.
Type: Select the type of device you are adding to the software, you can add DVRs, NVRs, IP Cameras, etc.
Display Amount: In this field you can select the amount of channels your recorder have. For IP cameras choose the number “1”
Add Type: Add the device to the software by its IP address or a Domain Name.
IPV4: Select the appropriate IP Protocol depending of the network configuration you are implementing this device, one of the most commons are IPV4.
Port: In this field you can add the TCP port of the Recorder. The default is 37777 but, if you change this port you will need to add it in the software.
User: Input the default username your Recorder have, the default is admin.
Password: Input the default password your Recorder have, the default is admin.
Group: From this drop down you can choose the default group or a group you have created previously. To add a group simply go to the Device Group tab and create a new group.
Continuous Add: If selected, you can add multiple devices without closing these main window. When done adding devices to the software click close and the “OK” button.
After the information of your DVR has been put in this window, click OK and the device will now be added to the software.
5.- Stream video of cameras in TechproSS-PC
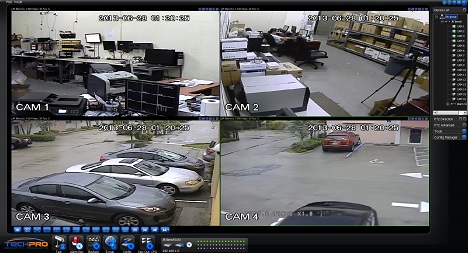
Now is time to add the cameras to the windows, to do so go to Device List and double click on the name of the DVR you have created. See Figure 1
If the unit is online, a pop up window will appear on the bottom corner indicating the unit has been successfully logged in. See Figure 2
Figure 2


Choose your preferred camera layout and start adding the cameras to the windows. You can go to the Device List, right click on the Device Name you created and select Main Stream or Extra Stream. The cameras will appear on each window based on the layout you have selected previously.
You can double click on each window to see the camera in full screen mode, you can move cameras by simply dragging each of the widows to other widows to arrange your cameras as you like.
This software also allows you to take snapshots, digital zoom, record the current channel to your computer, listen to audio on a single camera if microphones are connected to the DVR and close a single window. See images below:
Digital Zoom: Click on that icon and draw a square in the window that’s streaming video. The bigger the square, the less zoom you’ll get.
Screen Split: Change from a single channel view to four channel view on the fly.
Channel Recording: This option will allow you to record live video to your computer. once you click on it the software will start storing that data to your Hard Drive. The Data will be located under C:\PSS\Record. The software will create a sub folder where the data will be stored.
Snapshots: Click on this button to take a picture of the current live video. The snapshot will be located under C:\PSS\Pic.
Audio: Click on this button to listen to audio on the current channel live video is streaming. A physical microphone needs to be connected in that channel in order to be able to hear audio.
Exit: Close the current window.
NOTE: If you want to close all of the cameras at the same time click on any of the windows, right click and choose “Close Video on all Windows”.
6.- PlayBack footage in TechproSS-PC
Other than been able to stream video and watch your cameras live on TechproSS-PC, you will be able to review footage you have recorded in your DVR, to do so you will see on the bottom of the software interface an icon labeled “Playback”.
Click on it and the following interface will appear:
(Figure 1-1)

In this window (Figure 1-1), you can see the DVR Device Name, Camera Number, also you will have the option to choose if you want to add more than one channel up to 4 to playback simultaneously. Under parameter choose the date, beginning time and end time you would like to search video and click search. On the result’s page you can see the start time and end time un 24Hour Format. Double click on it and the video will start playing back in the next window.
The Following windows will look like (Figure 1-2)
(Figure 1-2)
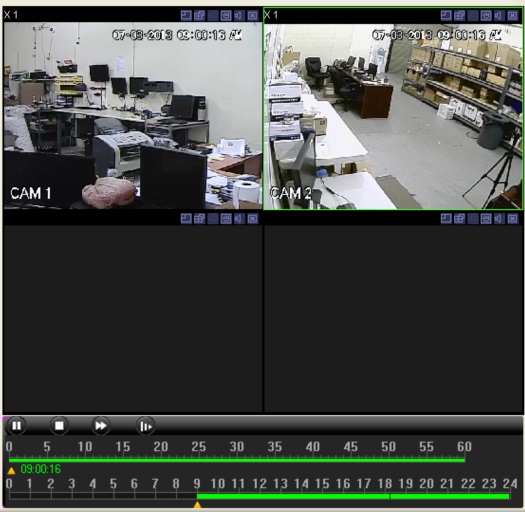
In this window you can see 2 of the cameras playing back. You can Pause, Stop, Fast Forward and Slow Motion playback. You can also see the time line in this window, You can distinguish if the footage recorded is non stop recording or motion. 24/7 recording will display green in the time line, and Yellow if motion was captured by the camera.
Overall, this software will allow to stream video, take snapshots and playback footage and connect to multiple DVRs and NVRs all from your PC.
Jesus Ragusa.