

 The Prime line of cameras, Network Video Recorders (NVRs) and Digital Video Recorders (DVRs) are now available at securitycameraking.com, so it’s time to learn how to get started with one of these new devices. You will first need to get familiar with the Prime SADP tool that is designed to find NVRs, DVRs, and IP cameras connected to the same router as your Computer.
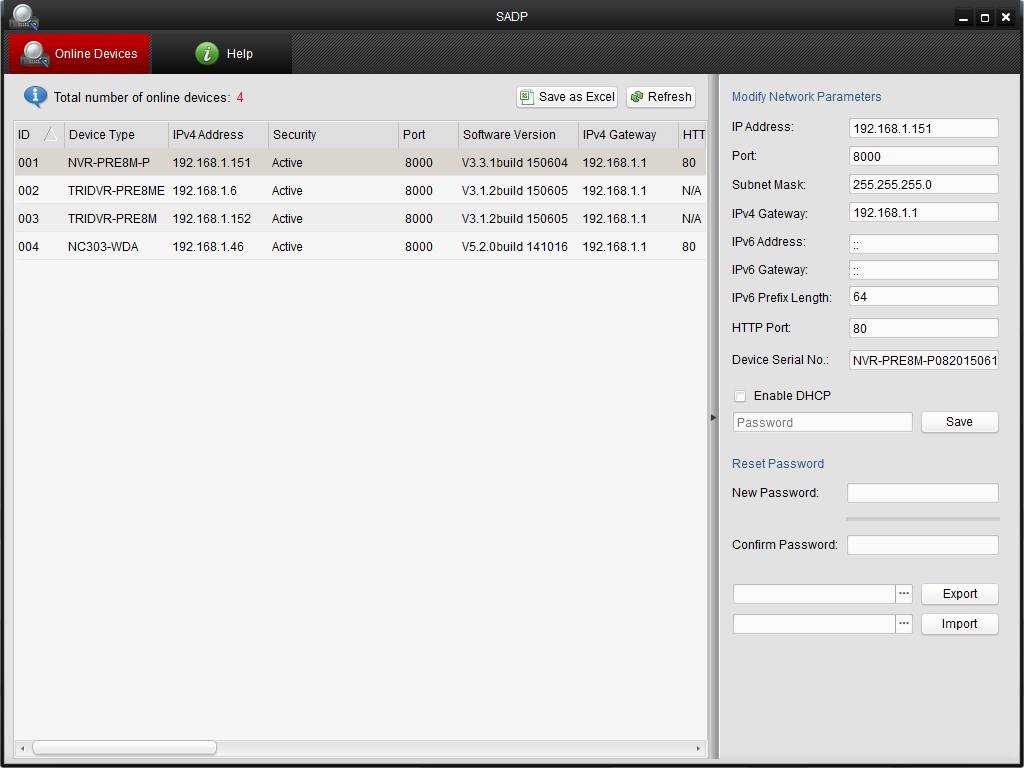
The Prime SADP tool will let you change the IP address of any device it finds, so you will want to match the network scheme that your router creates. To figure out your network scheme, you will need to open a DOS prompt in Windows and type ipconfig or open a terminal in MAC and type ifconfig. This should tell you the IP address of your computer and the Windows command will give you the gateway as well. The gateway will generally be located at .1 like 192.168.1.1 for example. You could have a network that looks like 10.0.0.1 that you may find with Comcast and other providers. An IP camera and DVR will have a default password of 12345 for the admin account, but an NVR requires you to set it up with a monitor and mouse when you first turn it on. Once you have a password created for your NVR, then you can use the SADP tool to change the network scheme. Of course if you have a monitor and mouse, you can always change the network information directly in the NVR or DVR.
Take advantage of the Web Service
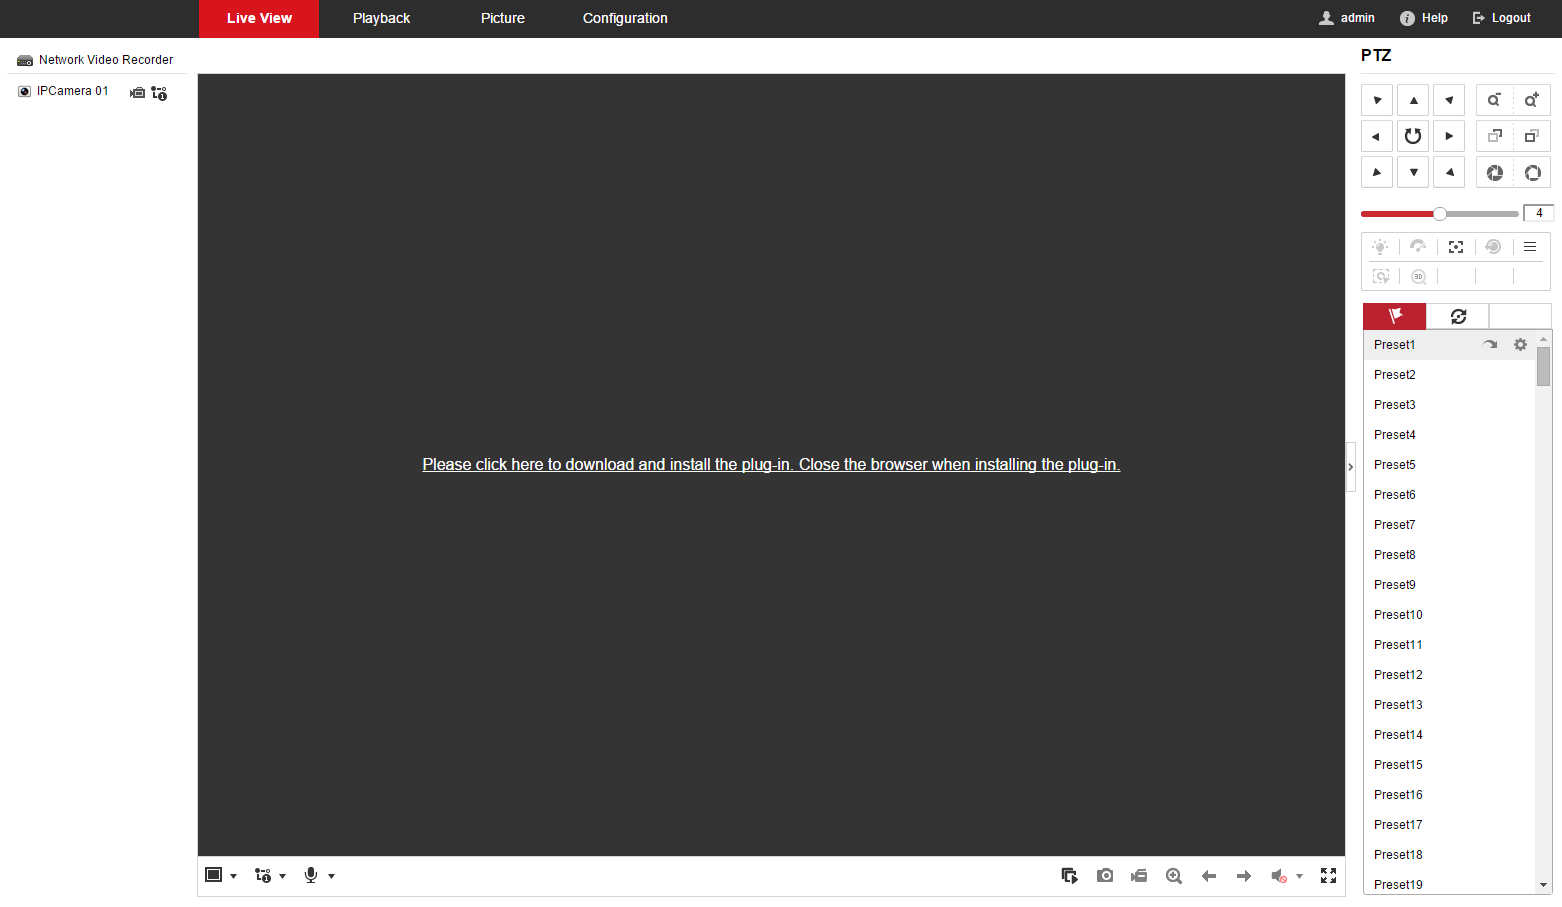
Once the DVR or NVR is on your network, you can access the web service with your computer to make changes. Type the IP address in Internet Explorer and run the plugin file to set up the access. It is good to add the website address to Compatibility View and allow for unsigned Active X downloads like you did with the Elite series of DVRs and NVRs. Other browsers may work with the Prime series, but not all have been tested at this time. The web service works different than the Elite series in the sense that only the plugin is needed for the video. You should still be able to access the Configuration with browsers even if the video plugin will not install. I was able to access the Configuration section in Chrome in Firefox, but not the video. I have confirmation from MAC users that this web service will work natively on Safari.
Add a user right away
The most important thing to do first is to add Operator accounts for each person using the DVR or NVR. Navigate to Configuration > User Management and add some users so you can have access from other accounts.
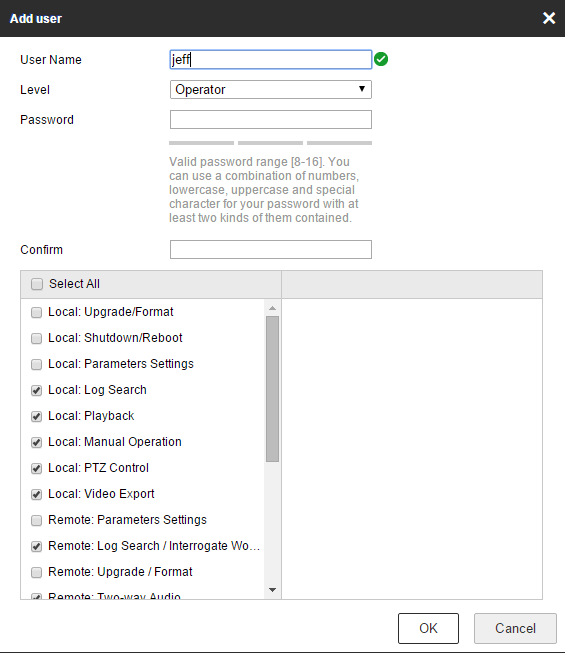
You can add all the permissions to make the account close to the admin level. The Prime series has 3 predefined groups of admin, operator, and user which cannot be changed. However, you can still customize each person by setting the permissions that you see fit.
The last thing that you would want to happen is to be logged out because everyone is using the main admin account. Too many hands in the cookie jar can create a bad situation and having many accounts will be a proactive response for you to avoid that scenario.
It’s about time!
The next important setting we can address will be the time. Navigate to Configuration > System Settings > Time Settings so that the time can be adjusted for your time zone.
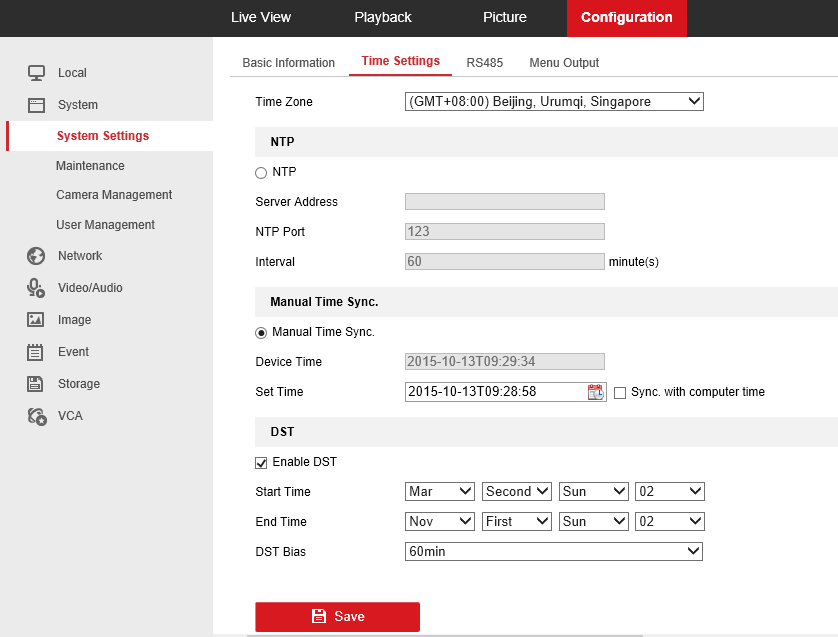
If it is an NVR, we find that leaving the time zone set to +8:00 Beijing along with manual settings works the best with DST enabled. Of course you can synchronize with your computer to get an immediate time change to your correct time, and there is a check box to make that happen after you hit save. With Daylight Savings Time enabled, you need to set it to March 2nd through November 1st so it will change twice a year automatically. The reason these settings work well for an NVR is that they are general settings that work best with ONVIF cameras. Some NVR owners may mix ONVIF and private cameras, so these settings are also recommended for that type of setup.
If you plan to use NTP, make sure your server information is correct and check your GMT settings as well. The Florida Greenwich Mean Time right now is -4:00 and California is -7:00 for example. You need to have the correct GMT so every 60 minutes it will synchronize time with the server. If you are using ONVIF cameras, this setting will not carry forward to the cameras as some features do not synchronize. With IP cameras, all encoding and settings are done at the camera level so they may need to be configured prior to plugging them into an NVR.
Adding Cameras
With a Tribrid DVR, analog or TVI cameras are plug and play. If you have no video from TVI cameras, you may want to check your cabling or power. Old existing cabling may not be good enough for TVI, so check with our sales team about the cost of RG59 Siamese cable since it will allow for the needed high quality video.
When it comes to adding IP cameras to an NVR or Tribrid, you have to navigate to Configuration > System > Camera Management.
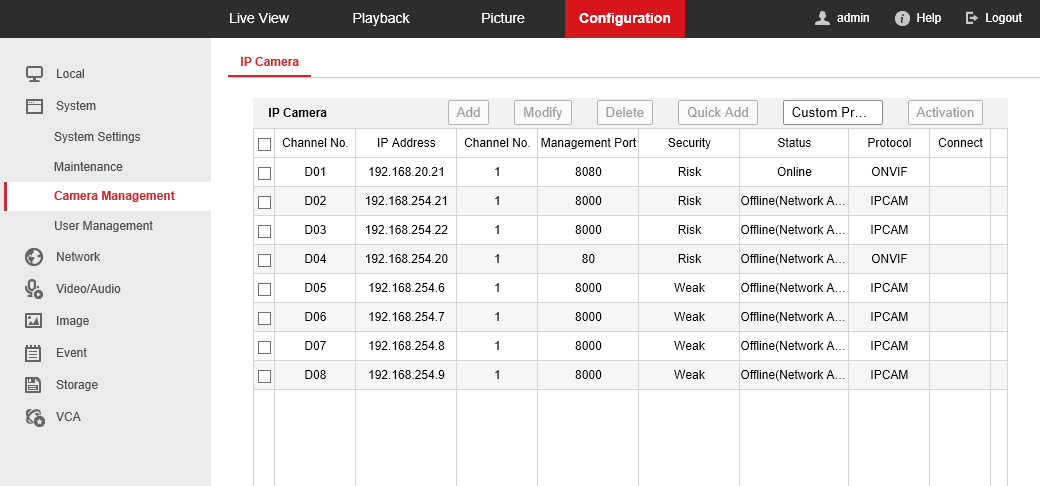
In this section, you can Add, Modify, Delete, Quick Add, Custom Protocol, and Activation. If you have an NVR with a built in POE switch, it will create a 192.168.254.1 network. Therefore, if you are setting up you cameras as static to connect to that network, you will need to set them to 192.168.254.X so they can be found by the internal switch. The advantage to a built in switch is that video traffic will not reside on your main network, and should provide faster access without the congestion.
This concludes the getting started with the Prime Line guide. If you need further assistance with the setup of your NVR or Tribrid, call our knowledgeable tech support team at 866-573-8878 option 3.


