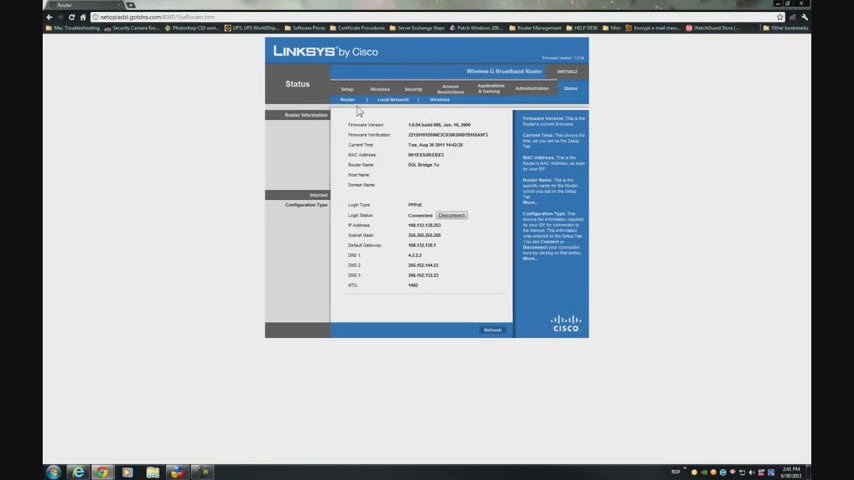
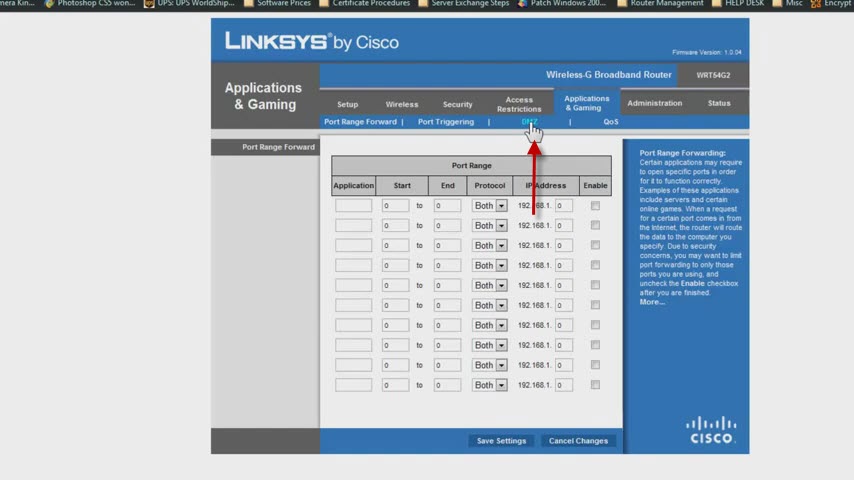
In this video I’m going to show you how to open the ports on a Linksys router for you to access your DVR remotely. For this demonstration I will be logging in to one of our routers and this router is remotely tied into our network. So the IPs I’m going to use to access it are going to be different than yours. But by default this unit has an IP address of 192.168.1.1 to be accessible from anywhere on your network. So if you are in front of your computer within your network you have a Linksys router you have to open Internet explorer and put that IP 192.168.1.1 to see an interface like this:
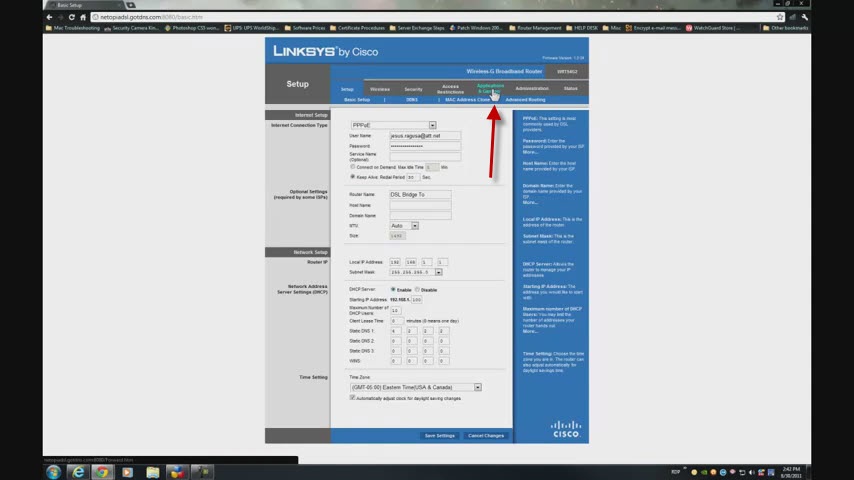
Then you need to forward the ports, meaning you need to open some ports for your DVR to be accessible from anywhere around the world.
So you have to go to “Applications and Gaming:”
Click on it:
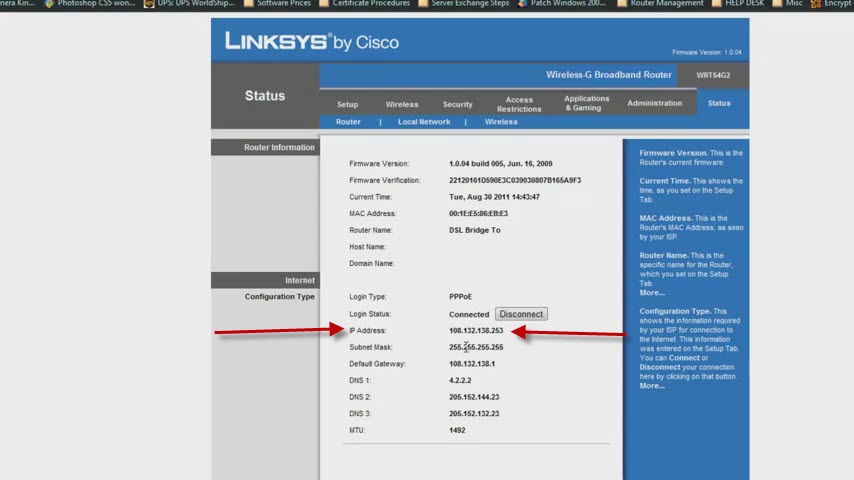
And you have two options. If you have your Internet Service Provider (ISP) router and you have a Linksys Internet router you are going to be able to do this using DMZ. If you don’t the configurations are going to be slightly different. In this scenario I have my IP router and my wireless Linksys router. First you’re going to have to go to “Status” and confirm your IP.
For example if you get an IP like this under Internet, if you get an IP like 108 or 57.74.3.55 you pretty much have the scenario I described before.
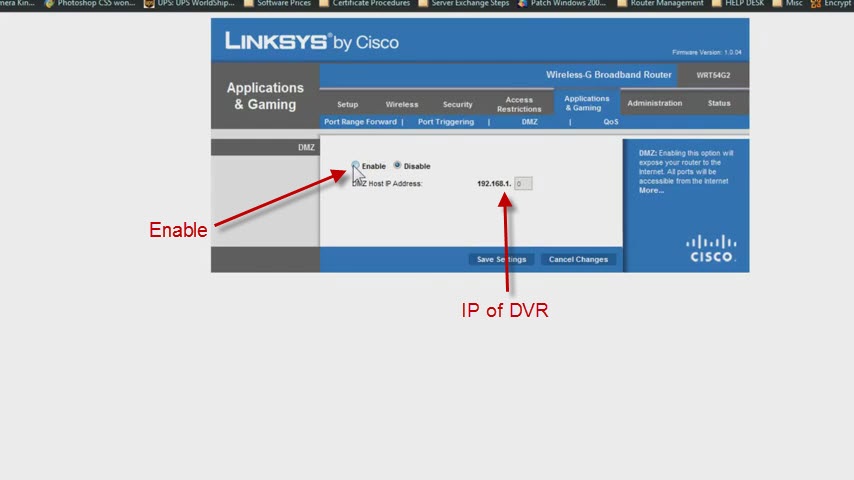
One router from your ISP and your wireless router connected. So what you have to do now that you no you have this scenario, you have to go to “Applications and Gaming” and you can go to DMZ:
And enable the option:
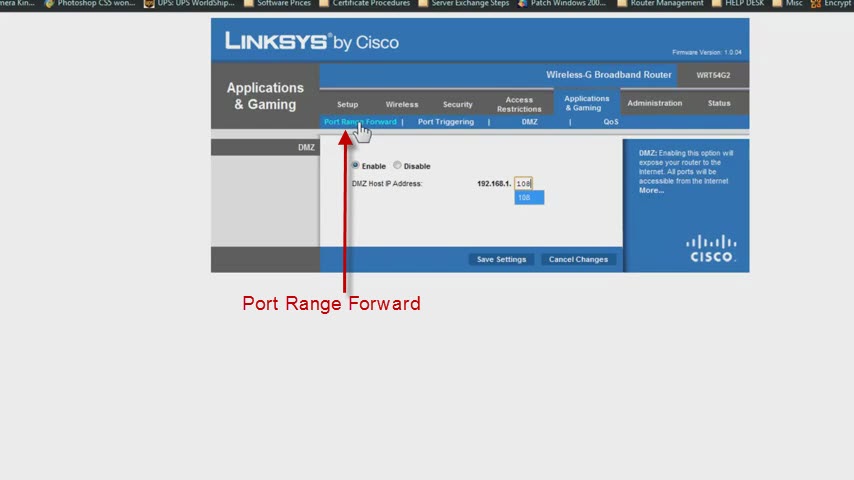
and put the IP of the DVR our IP is 192.168.1.108, then you click “Save” and your done. All of the ports will be forwarded without any other configuration.
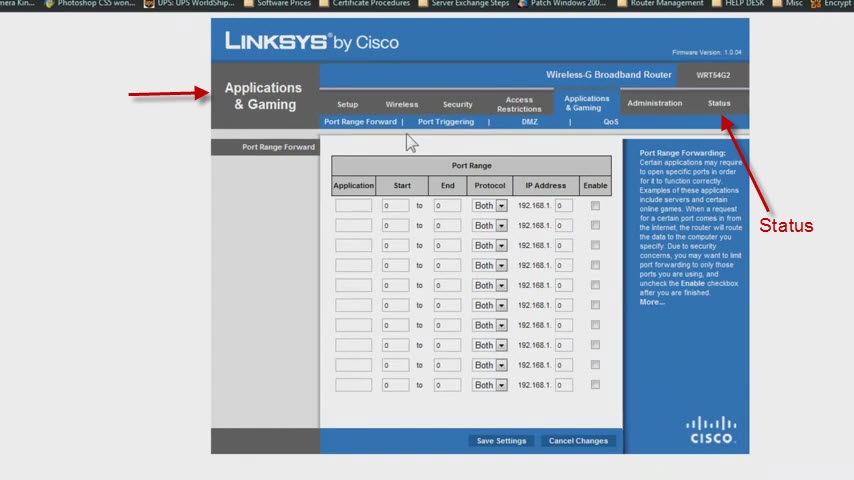
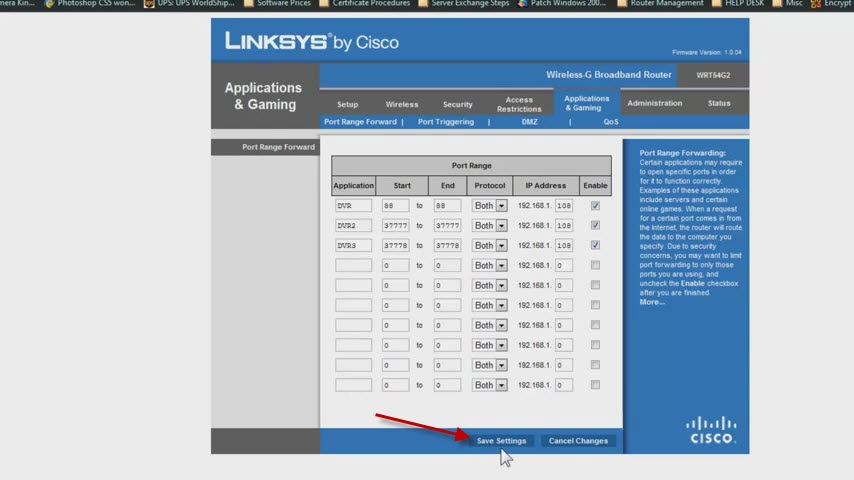
Now if you want to open them individually, you can go to “Port Range Forward”
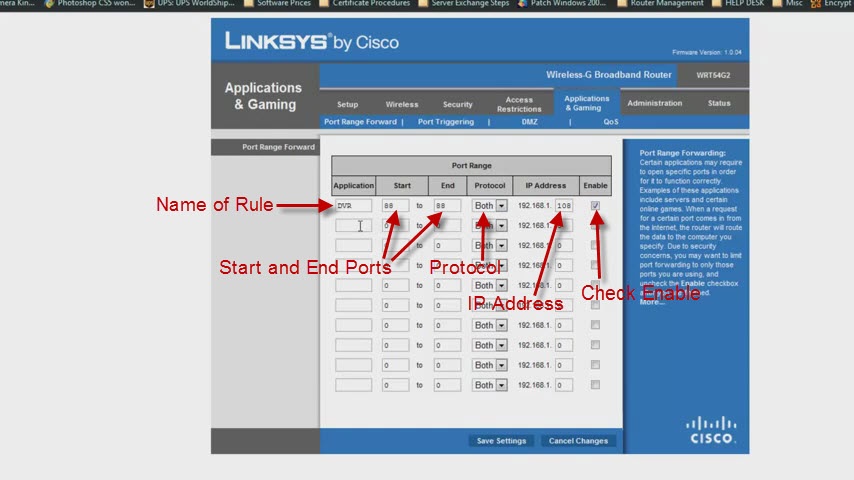
You’re going to have to add 3 rules. So the first rule, you can name it what ever you want, its going to be your port http://80 we recommend that you change it to 88 so once you change it on your DVR you’ll need to put it as a “Start Port” and an “End Port.” The protocol will be “Both” and here you put the IP of the DVR and “Enable” the rule.
The second port is going to be 37777 as a “Start Port” and an “End port,” again “Protocol” will be “Both” and again the IP of the DVR, and enable it.
The third port will be 37778 the same for “Start Port” and “End Port,” “Protocol -Both,” the IP of the DVR and enable. Once you’re done click “Save.”
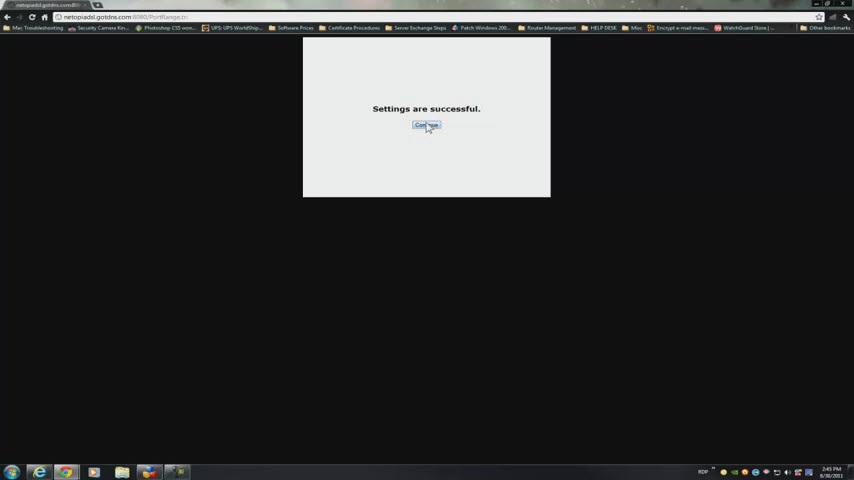
This page will show up here:
Click continue and you’re all set. I hope this has been informative for you and I would like to thank you for viewing.

