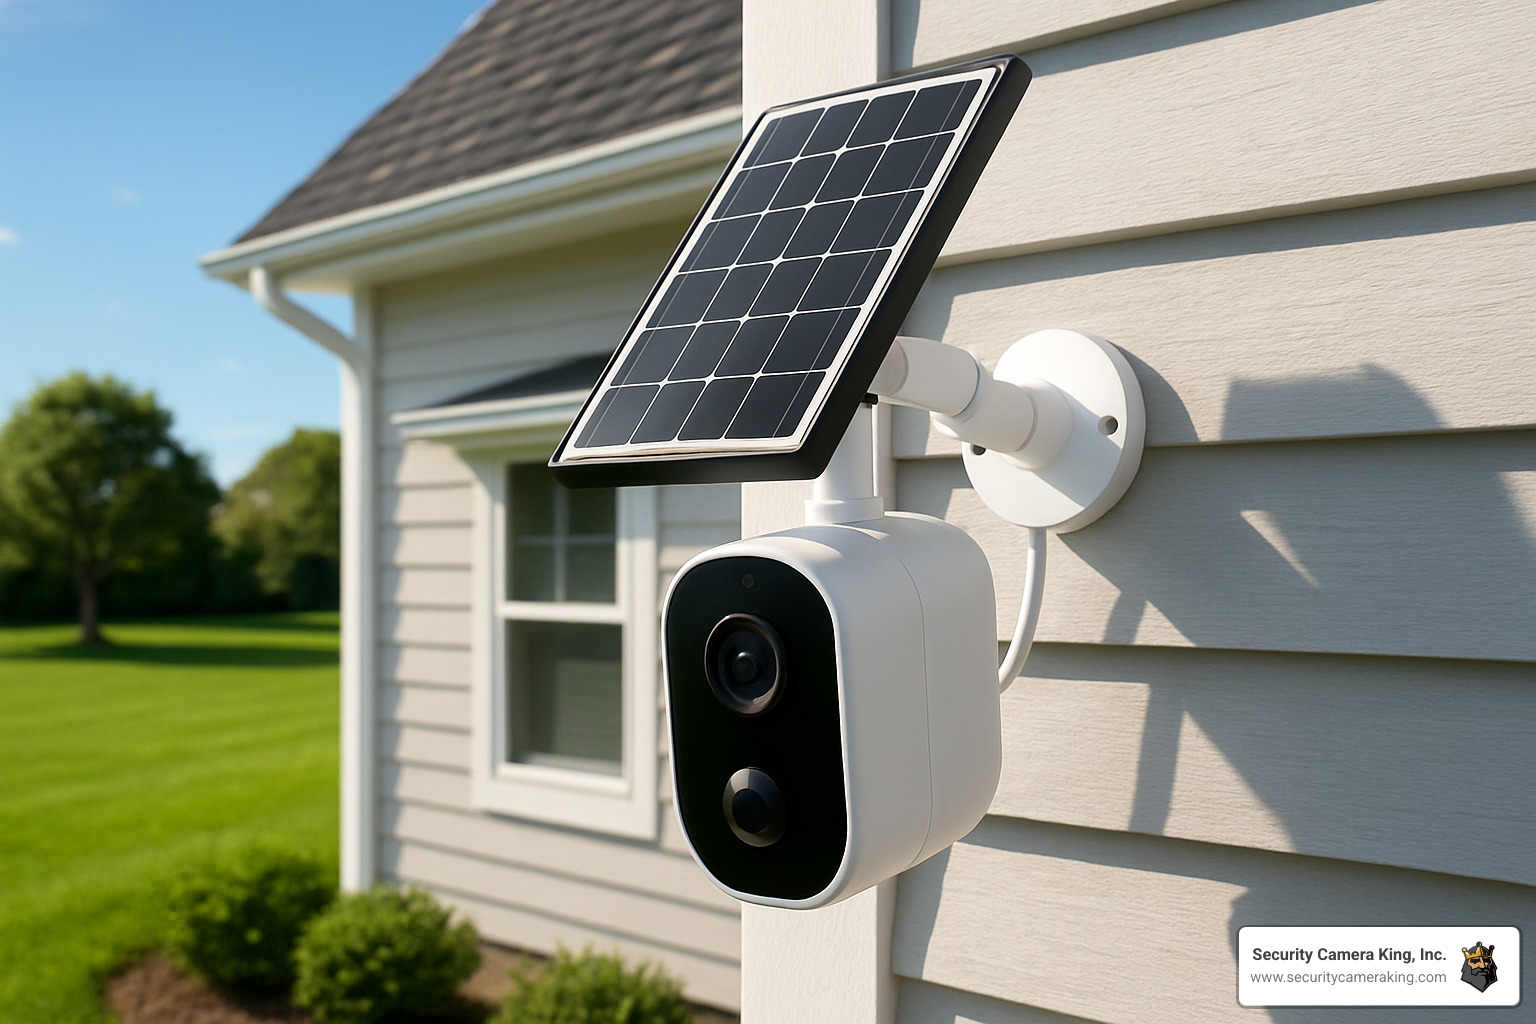
[vc_section][vc_row][vc_column][vc_column_text]Installing a bullet camera can enhance your home or business security by providing clear, wide-angle views of your property. This guide will walk you through the process step-by-step, ensuring a secure and effective installation.
Tools and Materials Needed:
- Bullet camera
- Mounting bracket
- Screws and wall anchors (appropriate for your wall type)
- Drill and drill bits
- Screwdriver
- Level
- Tape measure
- Cable clips or conduit (for cable management)
- Power adapter (if not using Power over Ethernet)
- Ethernet cable (if not using Power over Ethernet)
- Smartphone or computer (for configuration)
Step-by-Step Installation Process:
- Choose the Location:
- Determine the Best Position: Identify the optimal location for your camera, ensuring it covers the desired area and has a clear view.
- Avoid Obstructions: Make sure there are no obstructions like trees, lights, or other objects that could block the camera’s view.
- Mark the Mounting Holes:
- Use the Template: Most bullet cameras come with a mounting template. Hold the template against the wall or ceiling and mark the screw holes using a pencil.
- Measure and Level: Use a tape measure and level to ensure the marks are aligned correctly.
- Drill the Holes:
- Select the Right Drill Bit: Choose a drill bit that matches the size of the wall anchors.
- Drill the Holes: Carefully drill holes at the marked spots. If you’re drilling into brick or concrete, use a masonry bit.
- Insert Wall Anchors:
- Insert Anchors: Place wall anchors into the drilled holes. Tap them gently with a hammer until they are flush with the wall.
- Attach the Mounting Bracket:
- Align the Bracket: Position the mounting bracket over the wall anchors and align the screw holes.
- Secure with Screws: Use screws to attach the bracket to the wall, ensuring it is tightly secured.
- Connect the Camera to the Mounting Bracket:
- Attach the Camera: Align the camera with the mounting bracket and secure it using the provided screws or locking mechanism.
- Adjust the Angle: Adjust the camera to the desired angle and direction, ensuring it covers the intended area.
- Run the Cables:
- Plan the Cable Route: Determine the best path for the cables, avoiding areas where they could be damaged or tripped over.
- Use Cable Clips or Conduit: Secure the cables using cable clips or conduit to keep them organized and protected.
- Connect Power and Network Cables:
- Power Connection: Connect the power adapter to the camera and plug it into a power outlet. If using Power over Ethernet (PoE), connect the Ethernet cable to the camera and the PoE injector or switch.
- Network Connection: Connect the Ethernet cable to the camera and the router or network switch.
- Configure the Camera:
- Access the Camera’s Web Interface: Open a web browser and enter the camera’s IP address to access its web interface.
- Set Up Network Settings: Configure the network settings, such as IP address, subnet mask, gateway, and DNS.
- Adjust Camera Settings: Adjust settings like resolution, frame rate, motion detection, and recording schedules according to your needs.
- Test the Installation:
- Power On: Turn on the camera and ensure it powers up correctly.
- Check Video Feed: Verify that the camera is transmitting a clear video feed to your monitoring device or recording system.
- Adjust as Needed: Make any necessary adjustments to the camera’s position or settings to optimize performance.
Additional Tips:
- Weatherproofing: If installing an outdoor bullet camera, ensure it is weatherproof and rated for outdoor use.
- Regular Maintenance: Periodically check the camera and its mounting to ensure it remains secure and functional.
- Backup Power: Consider using a UPS (Uninterruptible Power Supply) for continuous operation during power outages.
[/vc_column_text][/vc_column][/vc_row][vc_row][vc_column][vc_column_text]I am text block. Click edit button to change this text. Lorem ipsum dolor sit amet, consectetur adipiscing elit. Ut elit tellus, luctus nec ullamcorper mattis, pulvinar dapibus leo.[/vc_column_text][/vc_column][/vc_row][vc_row][vc_column][vc_separator][/vc_column][/vc_row][/vc_section][vc_section][vc_row][vc_column][vc_column_text]
Related Products
[/vc_column_text][/vc_column][/vc_row][vc_row][vc_column]
Frequently Asked Questions (FAQ)
- Can I install a bullet camera indoors?
- Yes, bullet cameras can be installed indoors as well as outdoors, depending on the camera’s specifications.
- What is the best height to mount a bullet camera?
- The ideal height depends on the area you want to monitor, but typically, mounting the camera at a height of 8-10 feet (2.4-3 meters) provides a good view.
- How do I know if my camera is weatherproof?
- Check the camera’s specifications for an IP rating (e.g., IP65, IP67). Higher ratings indicate better weather resistance.
- Can I use a bullet camera without an Ethernet cable?
- Yes, if your camera supports Wi-Fi, you can connect it wirelessly to your network.
- What should I do if the camera doesn’t power on?
- Check the power connections, ensure the power outlet is working, and verify that the power adapter is functioning properly.
[/vc_column_text][vc_separator][/vc_column][/vc_row][/vc_section][vc_section][vc_row][vc_column][vc_column_text]
Any Questions? Contact Us Today
[/vc_column_text][/vc_column][/vc_row][vc_row][vc_column]