

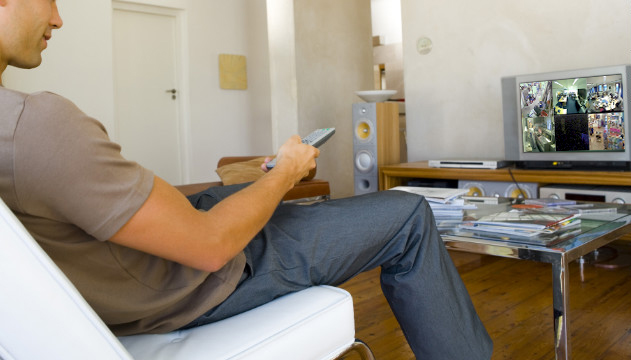
So you got yourself a Security Camera System and you have your DVR setup either in your bedroom or in the garage and every time you have company or hear a noise outside your home you have to pull out that mobile device and run an application or go where your DVR is located to view those cameras, Here is the solution to that problem so you can view these cameras in all your TV’s just by going to a specific channel on any TV in your home, now you aren’t going to have the ability to change any settings but having the image in all your TV’s gives you peace of mind and it’s a simple shortcut that saves time since you aren’t going to have access to your mobile phone at all times or have the ability to go to the DVR’s monitor. You can also view it in your kitchen while you are cooking as long as the TV is connected to the same system either on a satellite system or a cable system.
What you will need
Satellite TV System
- Perfect Vision PVDP2 Diplexer Dual Satellite Dish TV Antenna Combiner (PVDP2) Note* Any Satellite Diplexer should work, Perfect Vision Diplexer is prefered
- Any RF Modulator
- BNC to Video connector
Cable TV System
- Any RF Modulator
- BNC to Video connector
Adapter (Optional)
- “Y” RCA Splitter / Adapter RCA Splitter
Quick links:
Systems:
- Setting up your Satellite TV System
- Setting up your Cable TV System
- *Optional Adapter
- CATV Digital Transport Adapter
- Wireless A/V Transmitter & Receiver
Affordable Security Solutions

Setting up your Satellite TV System
Note* this is for Dish Network System. Some Satellite systems have a switch that has an Antenna input if you are able to provide power and install the RF modulator in a weatherproof box you can do so without the need to add 2x Diplexers for each TV. Consult with your system manual. Illustration 6 shows this type of connection.
Sample system is a Dish Network System (Dual Tuner receiver with agile modulated output) Notice this system serves 2 TV’s.
Connections:
Find the lines that come from the LNB to the satellite receiver. NOTE* many of these have a switch connected from the Dish LNB that goes to all the splitters or diplexers .
Tap into the line that goes from the Satellite Switch in this case a Dp Plus 44 Switch see Illustration 1, without the Dp Switch see Illustration 2, it is the purple line marked SAT. Connect the sat cable “purple line in illustration” into line in, then the other side of this cable connect the line into the sat in/out. Make sure these connections are like the ones in illustration 3, there is a current going through this line and it could backfeed into the RF Modulator causing it to malfunction or in worst case scenario rendering the RF Modulator useless as it would burn up the internal components.
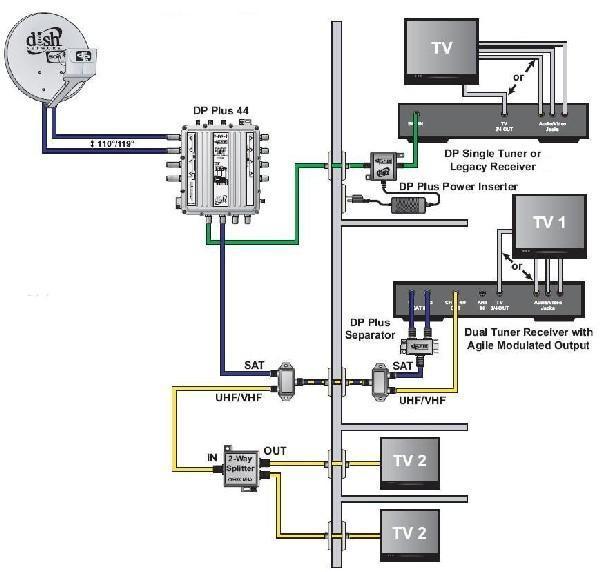
Illustration 2: Without a DP Switch
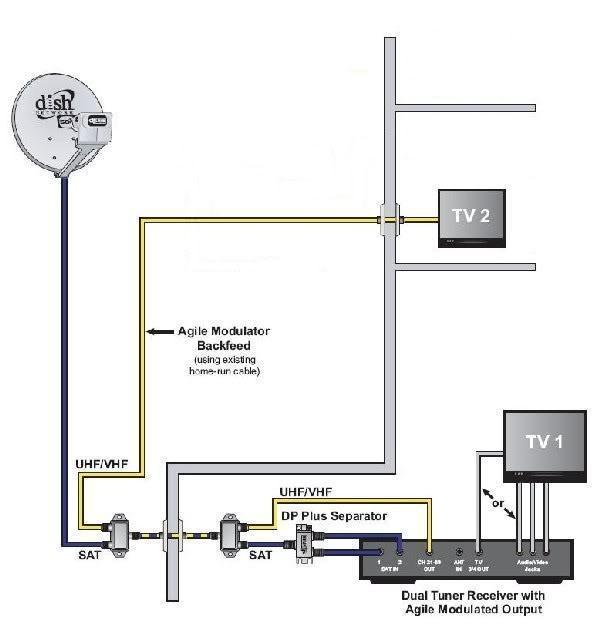
Illustration 3: Rf Modulator to Diplexer
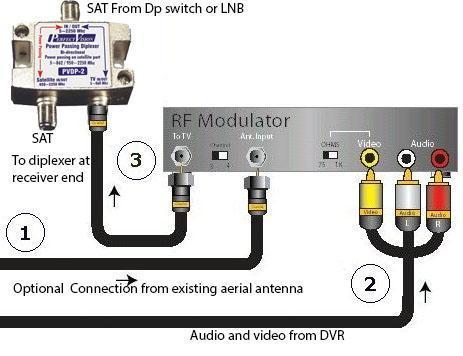
Illustration 3 shows the connection required from the RF Modulator to the diplexer which is injecting an RF Signal to the existing line.
Setting up your Adapter
Adapter is optional and it will only work in single channel mode, meaning one channel has to be in full screen for that one channel Adapter to work unless the Adapter is tapped from the microphone to the DVR using a ”Y” splitter Adapter cable. No Adapter connection is needed at the receiver end since it will be added to the RF Signal . See Illustration 4 for the cable needed.
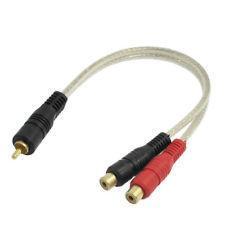
Illustration 5
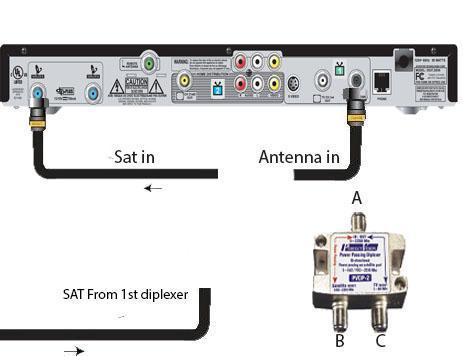
Connecting the Satellite Receiver is very simple, on Illustration 5 connect SAT Cable from the first diplexer we already installed to the top in/out ‘A” on the diplexer after that connection is made connect the antenna to the TV in/out on the diplexer “C” and finally connect “B” Sat in/out to the Sat in on the Satellite receiver.
Once you have done this you are done when it comes to making all connections the rest is done via the on screen settings in your receiver.
Searching for your local channels after the connections are made
Power up your Satellite Receiver and go to the Menu by pressing the menu button in your remote then select option 6 which is “System Setup” , go to option 8 “local Channels” on the new window select local channels , select “Scan Locals” your receiver will now scan your local channels , the local channels that the receiver found will not be displayed on the left of the screen. You can highlight each channels to see the channel strength after that you can hit “DONE”, then you can press “CANCEL” twice to exit the menu, finally go into your guide and search the channel that the RF Modulator is on, Channel 65 or a channel that is not being used by any station is required since those channels will cause interference.
Once you have selected the channel in your RF Modulator and tuned into the same channel in your TV you should see all your cameras in that channel as well as Adapter only if you have installed the optional Adapter splitter or selected the Adapter out from your DVR.
Setting up your Cable TV system is much easier than setting up a satellite system with your DVR and RF Modulator.


