This is the third part of an article designed to give you a complete overview of the DVR menu system in our DVRs. You can find Part 1 to this article here. And you can also find Part 2 here.
DVR Advanced Menu:
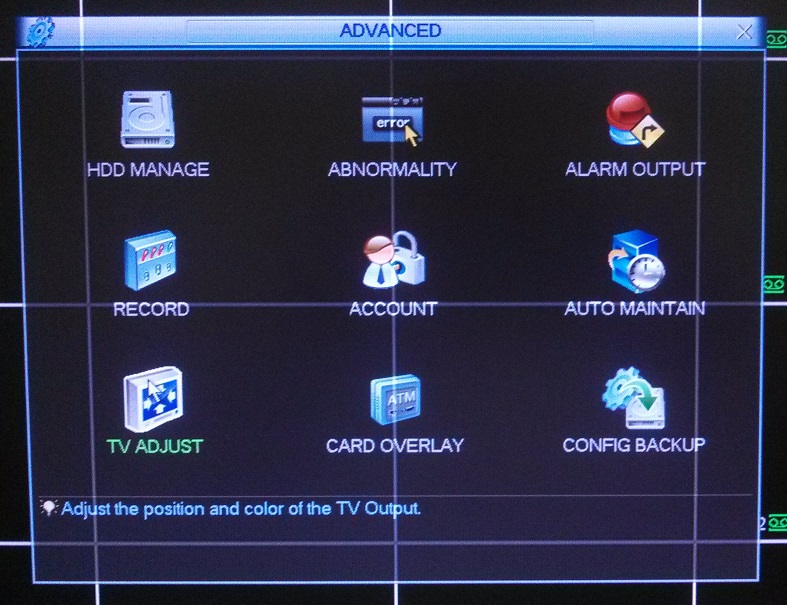
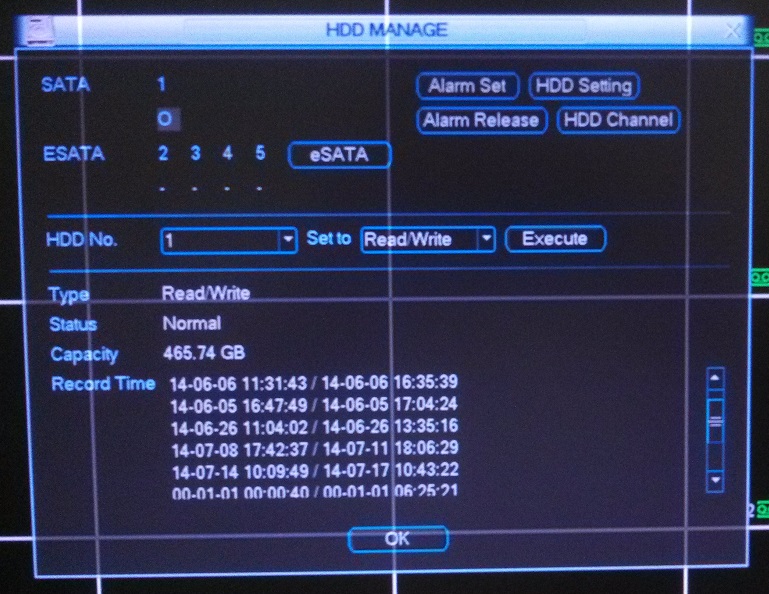
HDD Manage:
This menu page allows you to adjust some options that affect the interaction between your DVR and any hard drives which are installed in it.
eSata – Clicking this button will allow you to configure an external hard drive which is connected to the DVR’s eSata port.
Set to – The most important action that this drop down menu allows you to do is format any hard drives which are installed in the DVR. This will completely clear the selected hard drive and restructure the storage sectors within it.
You would first need to select the hard drive through the HDD No. drop down menu. After that is done you will need to select format from the “Set to” drop down menu. Then hit the Execute button and after a few moments the DVR will prompt you to reboot.
Alarm Set:
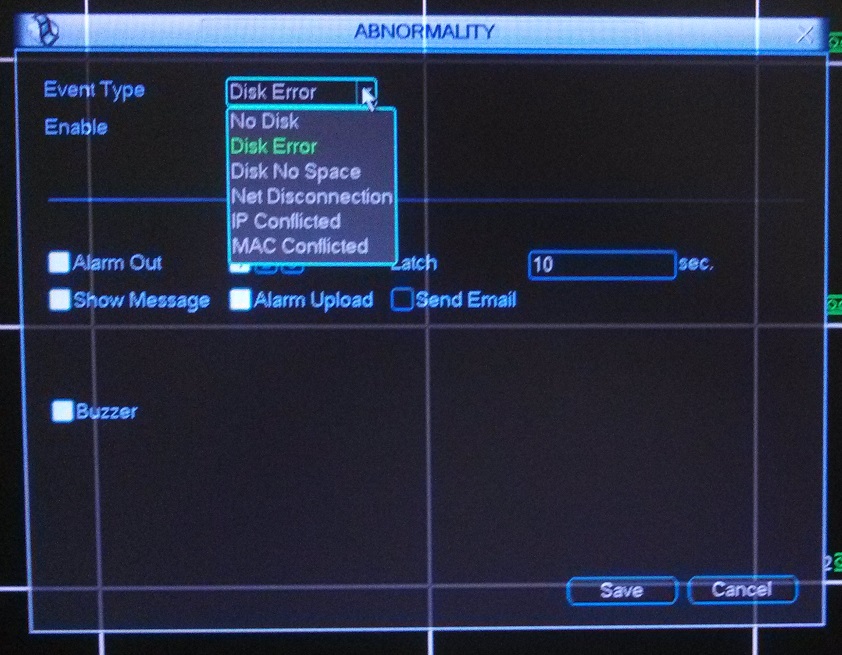
This menu page will allow you to set the DVR up to notify you if there is a problem with a hard drive installed within it. The triggering events that are most commonly used are No Disk, Disk Error and Disk No Space. If one of these events occur then you can have the DVR trigger an external alarm device (like a siren), show a message on display device which is connected to the DVR, notify an alarm monitoring service, send an email, and/or trigger the DVR’s internal buzzer.
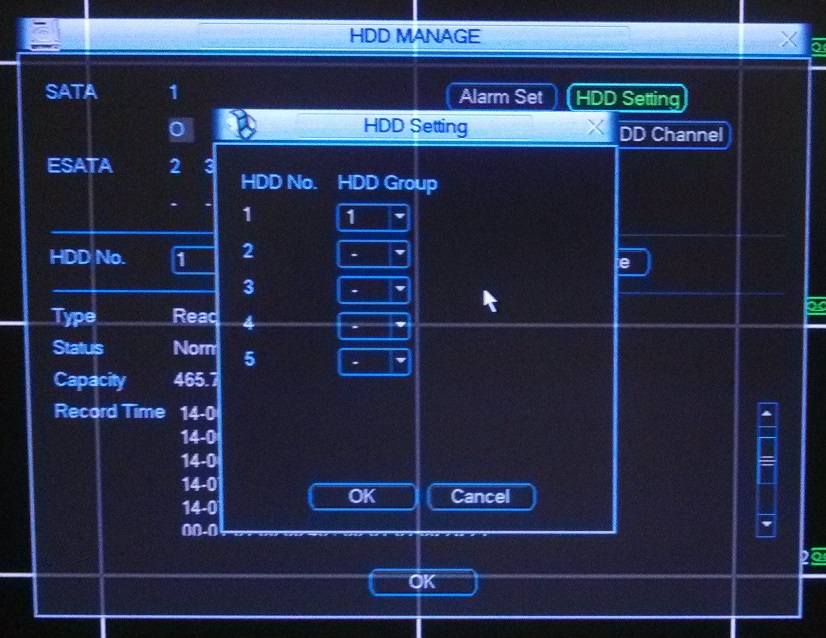
HDD setting:
This menu page will allow you to assign hard drives to group. You can use this feature to effectively create separate storage spaces.
Alarm Release:
This button will let you to disarm the DVR’s internal buzzer if it has been triggered.
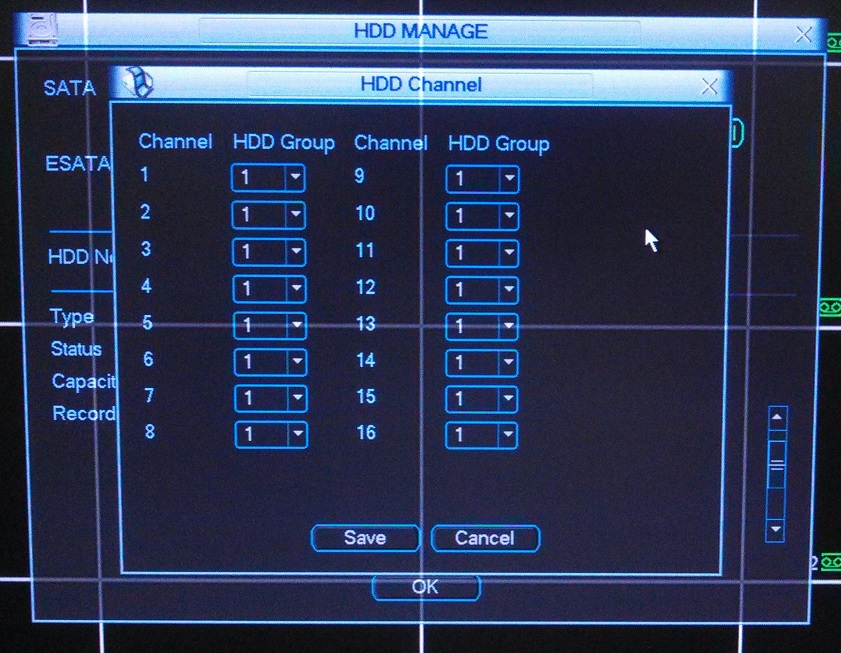
HDD channel:
This menu page will allow you to assign individual cameras to record to the groups of hard drives which have been set up on the HDD setting page.
Abnormality:
This page of the menu system is exactly the same menu page as the Alarm Set page which is accessible through the HDD manage page.
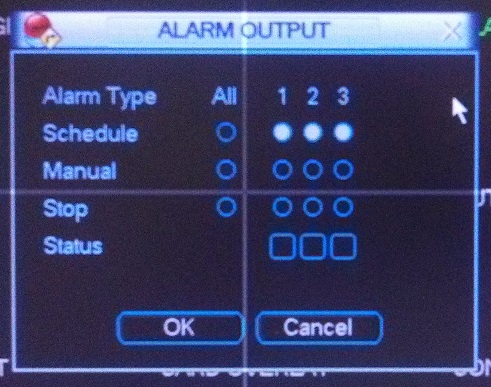
Alarm Output:
This small window will allow you to set how your DVR will handle alarm outputs with three different options for each alarm output. Only one of these options can be selected for each output.
Schedule – Selecting this option will mean that an alarm input will trigger the alarm output based on time frame set up on the schedule page (Main Menu -> Setting -> Schedule).
Manual – Selecting this option will make it so the DVR triggers an alarm output until it’s manually stopped.
Stop – This selection will disable the alarm output.
Status – This indicates when an alarm output is being triggered.
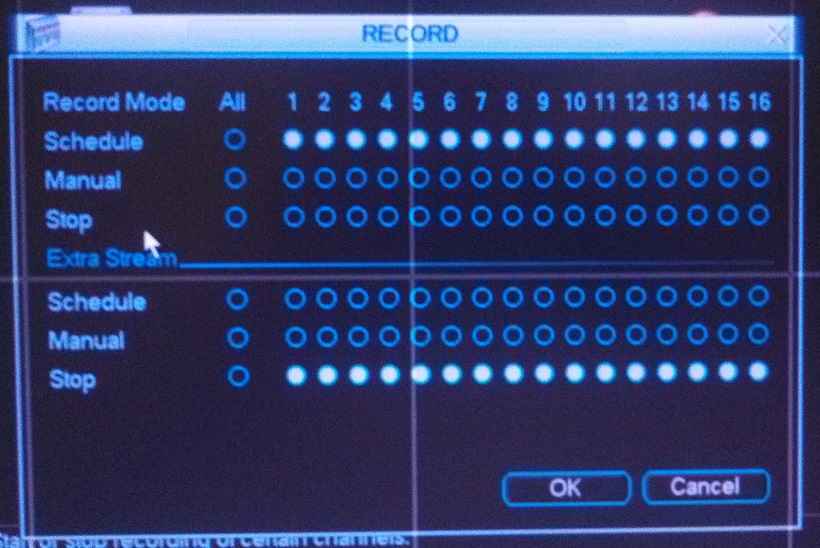
Record:
This menu page will allow you to customize the way your DVR records video streams with three different options for each video channel. Only one of these options can be selected for each channel.
The most common way that this page is configured is to select schedule for any channel where a camera is connected and to select stop for any channel which does not have a camera connected to it.
Schedule – Selecting this option will mean that camera’s video will be recorded in the way that it has been set up on the schedule page (Main Menu -> Setting -> Schedule).
Manual – Selecting this option will mean that camera is being recorded continuously.
Stop – This selection will make it so this channel is not recording.
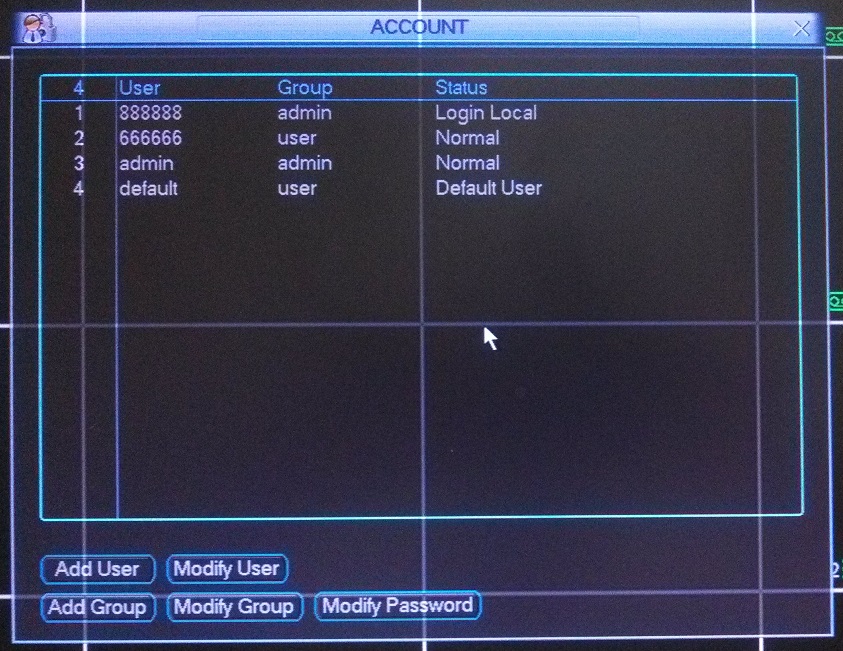
Account:
This menu page allows you to modify how user accounts can interact with the DVR, add users, delete users and change passwords for any of the users. It is very important that you NOT delete any of the default user accounts; although you are free to change the passwords for them.
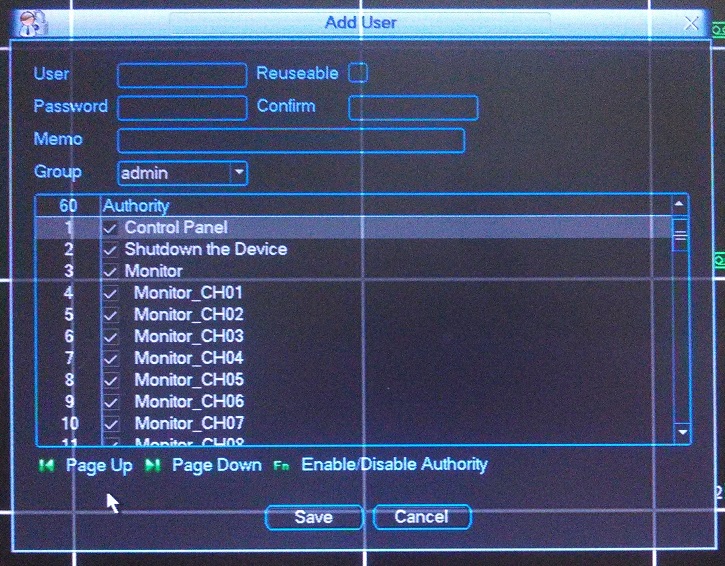
Add User:
This menu page will allow you to set up new users for the DVR. You can create a new user and its password here. If you enable the reuseable feature then multiple people will be able to use that user account at the same time. If the reuseable is not enabled then a user will be denied access to the user if it’s already in use by another user.
You can choose which type of account you’re making with the Group drop down menu. The two types of accounts are admin or user, with the user account offering less possible permission to assign to the account.
The bottom portion of this page will allow you to set the permissions for specific users. This is where you can deny access to the menu option or only allow access to certain cameras for that user.
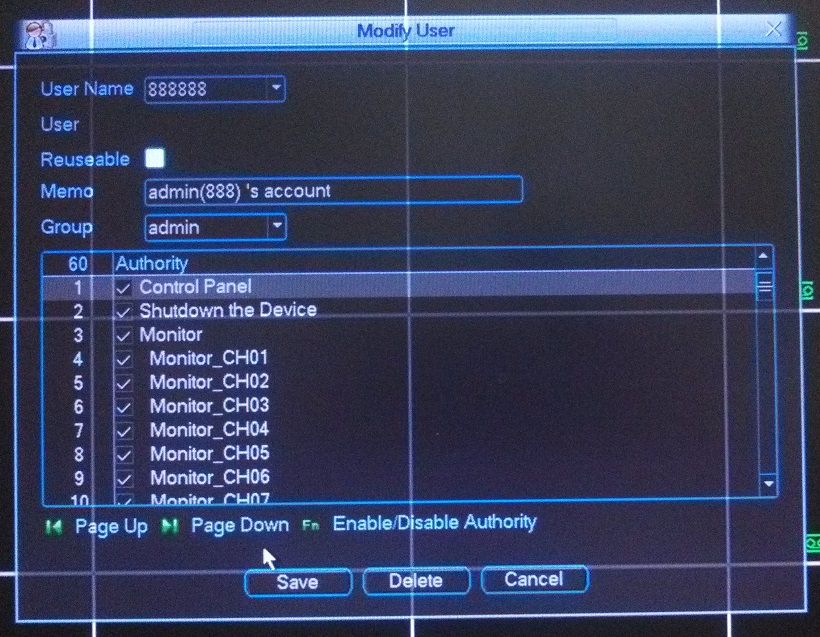
Modify User:
This page will allow you to modify the permissions for a user. You can also enable or disable the reuseable feature here.
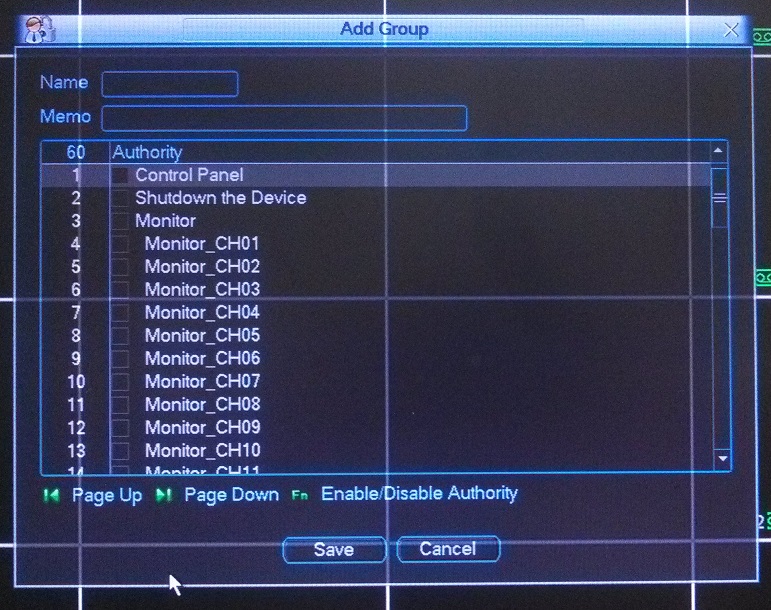
Add Group:
This menu page allows you to create a user group. Creating a group will let you set the default permissions for any user created within it.
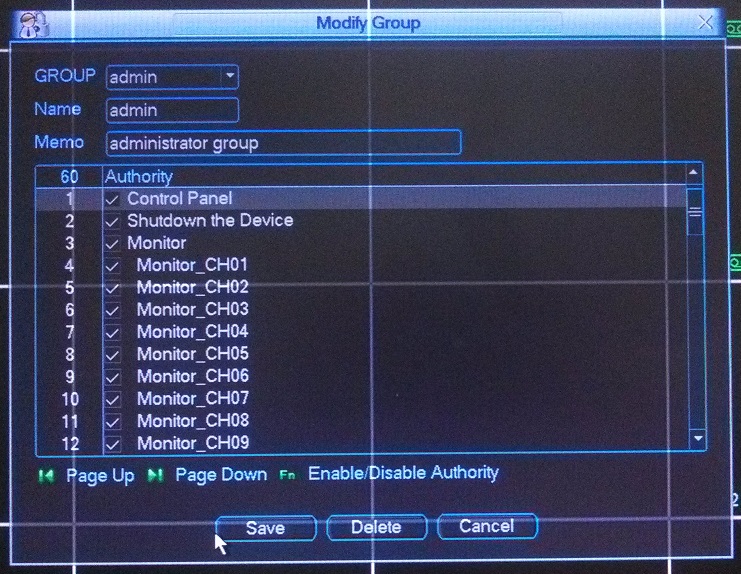
Modify Group:
This Page will allow you to modify any of the default permissions for any user groups.
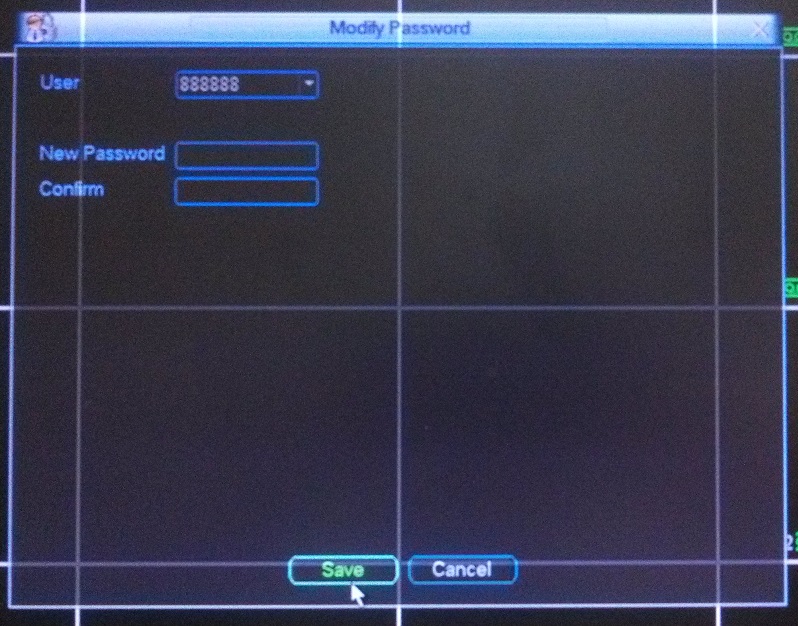
Modify Password:
On this page you will be able to change the password for any of the DVR’s users.
Auto Maintain:
By default, the DVR is set up to automatically reboot at 2:00 am every Tuesday. This feature helps the DVR to function properly over an extended period of time. You can adjust when or if this occurs on this menu page. It is recommended that you leave this on.
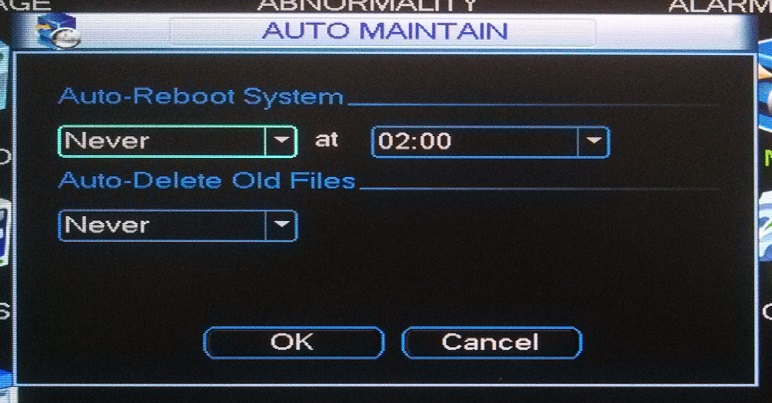
This page also allows you to set up the DVR to automatically delete video files after a variable amount of days.
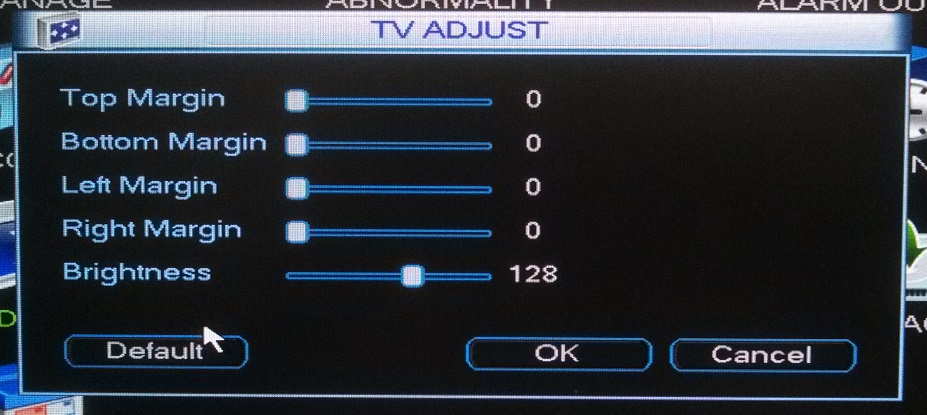
TV Adjust:
This menu page allows you to adjust how the video shows up on a display device connected directly to the DVR. You can move the top, bottom or either side so that it takes full advantage of the display device’s viewing area. You can also adjust the brightness here for that display device.
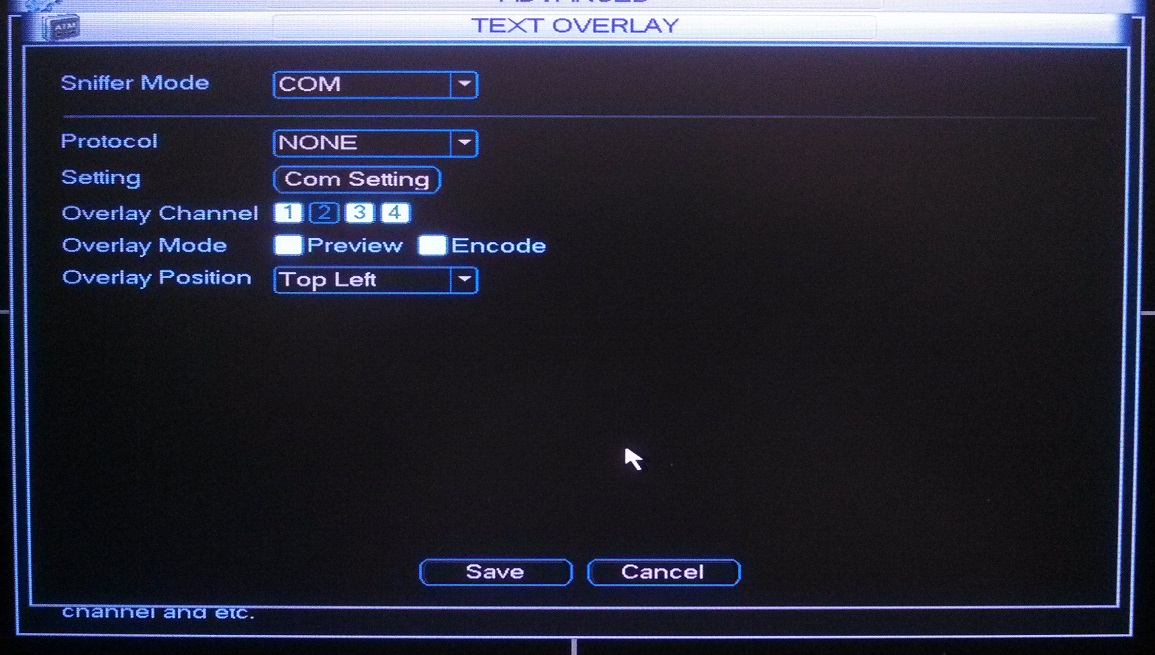
Text Overlay:
This menu page is where you would configure the DVR to work with a POS system, so that the transaction information will be displayed over a cameras video.
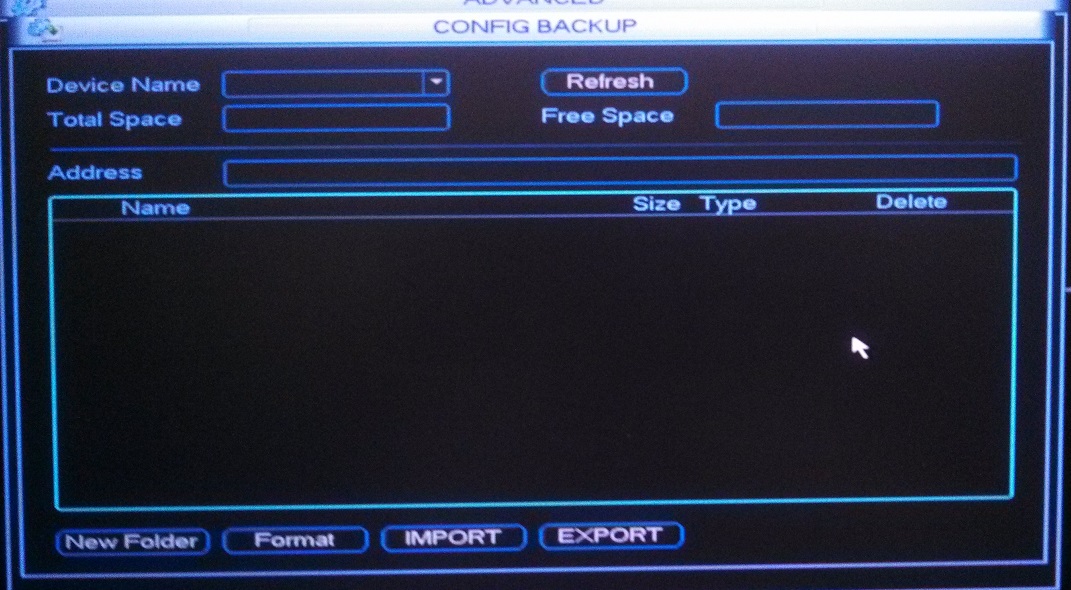
Config Backup:
This menu page allows you to back up all the settings from the DVR so that it can be uploaded to another DVR. This feature is particularly useful if you are setting up multiple DVRs.
This concludes an overview of a DVR’s menu system. Our units are constantly being upgraded, so you may see some slight variations in your menu system.