
Many software developers strive to make improvements to their software to accomplish improved performance, security and even a complete revamp of its interface. In our industry the changes to these type of things happen quite fast, from software management to Web Interface of the recorders and cameras. Today I will be showing you some of the main features of our DVR CMS software called Smart PSS (AKA new Pro Surveillance System)

This complete software has been quite redesigned and its interface is fresh and easy to navigate. First I will explain some of the main icons and some features I find the most important in this software from connecting the CCTV recorder, creating groups, and scheduling tasks to navigating through some of the tabs.
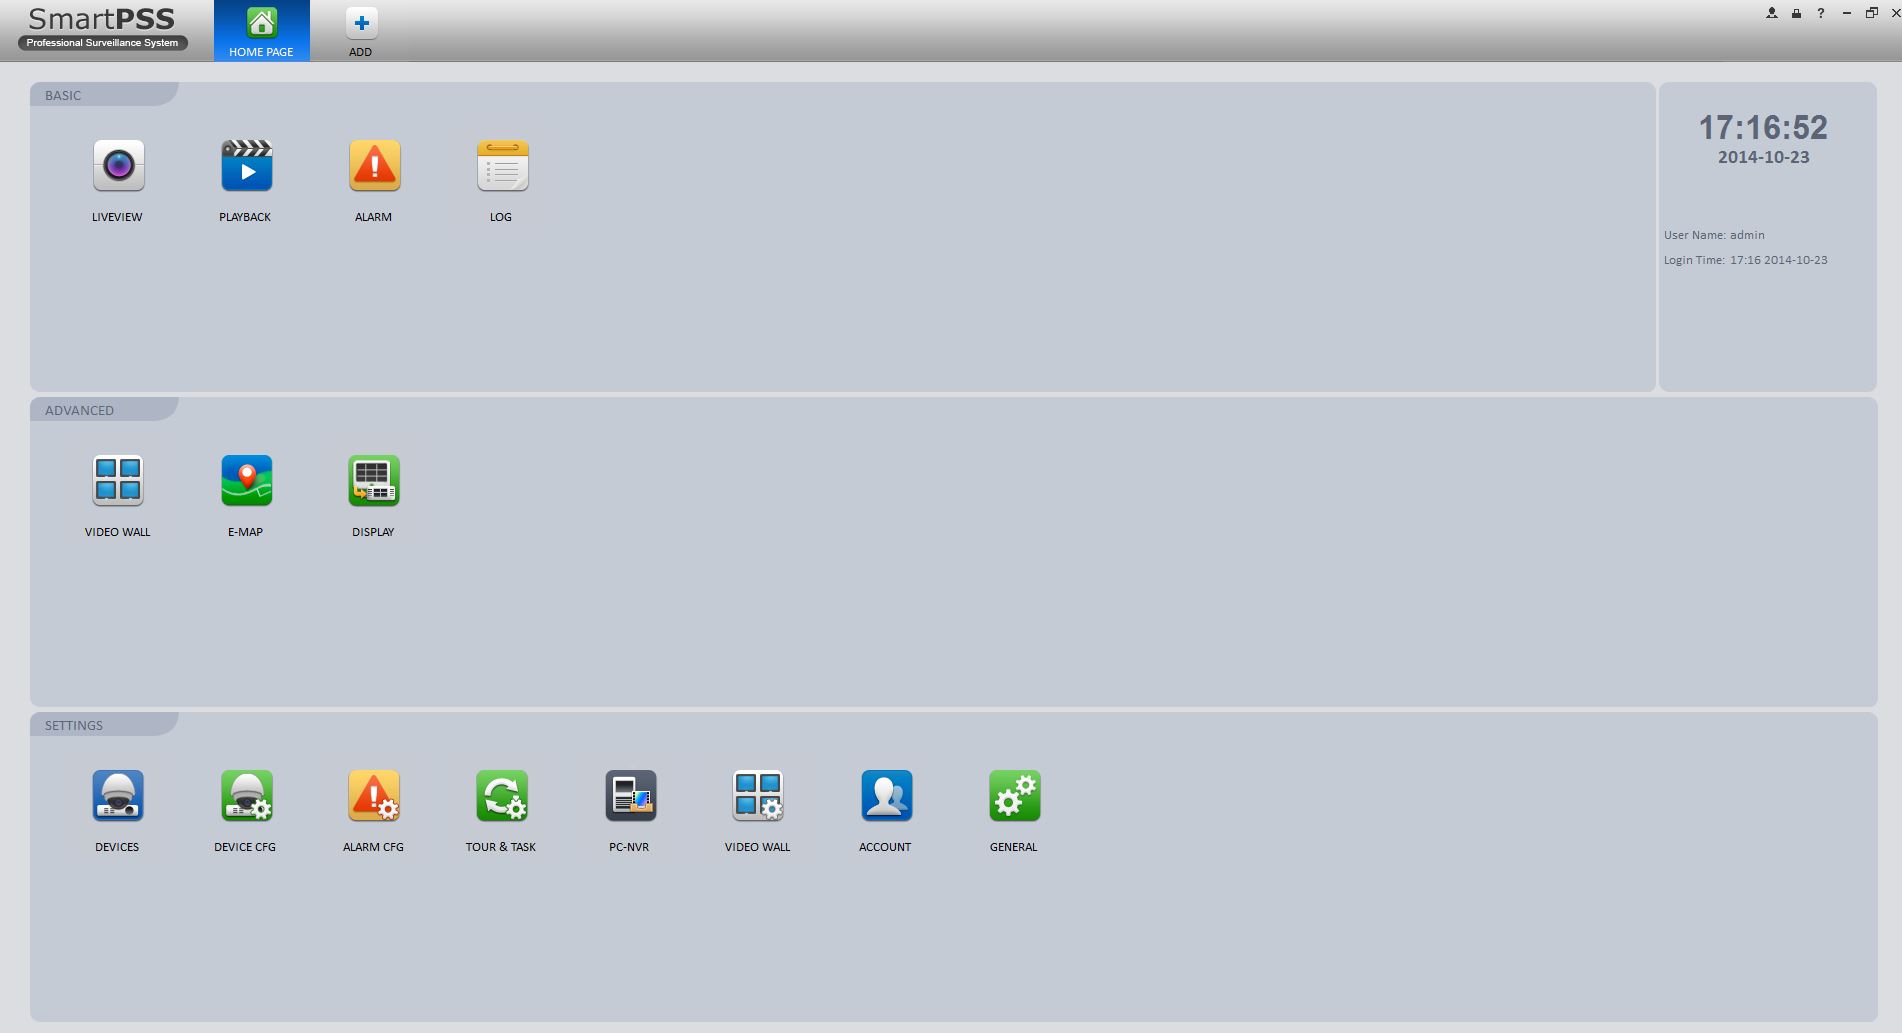
There are 3 main sections in the software. They are divided as follows:
BASIC: In this section of the software you will find 4 icons: these are Live View, Playback, Alarm and Log.
ADVANCE: In this section of the software you will find 3 icons: Video Wall, E-Map and Display
SETTINGS: In this last section you will see options such as Devices, Device SFG, Alarm CFG, PC NVR, Video Wall, Account and General.
The Live View basically is where you will stream and view your live video. In here you can stream one or multiple cameras. This section also provides different Layouts in which you can select as your main layout to view your cameras.
![]()
In the layout section you can configure a multitude of camera views from 1 view window to 64 View window. Also you can make your own layouts. Beside the layouts, you can configure the aspect ratio of the windows, from Original, to 4:3, 16:9 or 9:64.
The next option will be to make the live preview Full Screen so no menus show up. To bring the program and features back, simply right click with your mouse, or simply click the Esc button in your keyboard.
This first section also provides playback footage functionality. In here you can view previous recordings, Fast Forward, pause, and also download footage to your PC.

To play back files you will need to add a recorder to the software first. Go to the Devices tab and you could click Add or Manual Add. For this demonstration I will click on Manual Add and the following page will pop-up:
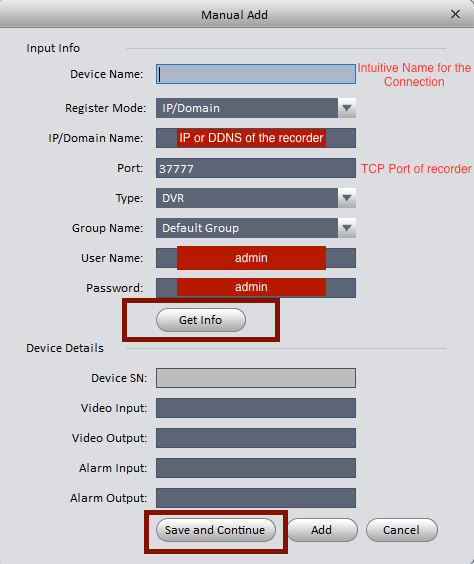
In this picture it will show some of the info you will need to have handy to add your security recorder. First, type an intuitive name for the connection between the software and recorder. Often you will name it something like Home security cameras.
Second, type the IP or DDNS name of your recorder. The Internal default IP address is 192.168.1.108. If your network is within that range then you can use that, if not you might need to arrange that according to your network scheme. Follow this link to learn more about how to configure your DVR for remote access.
Third, If you have your security recorder as default, the port, username and password should be as shown in the above picture. After you have input all the settings, you can click on Get info. This will fill the rest of the empty fields such as Device SN, Video Input, Video Output, etc. At this point you can click on Save and Continue.
NOTE: By default the connection name will be added to the Default Group. If you want to group your connection, simply go to Live view and on the right hand side clock on New Group, then drag the connection name to the new group.
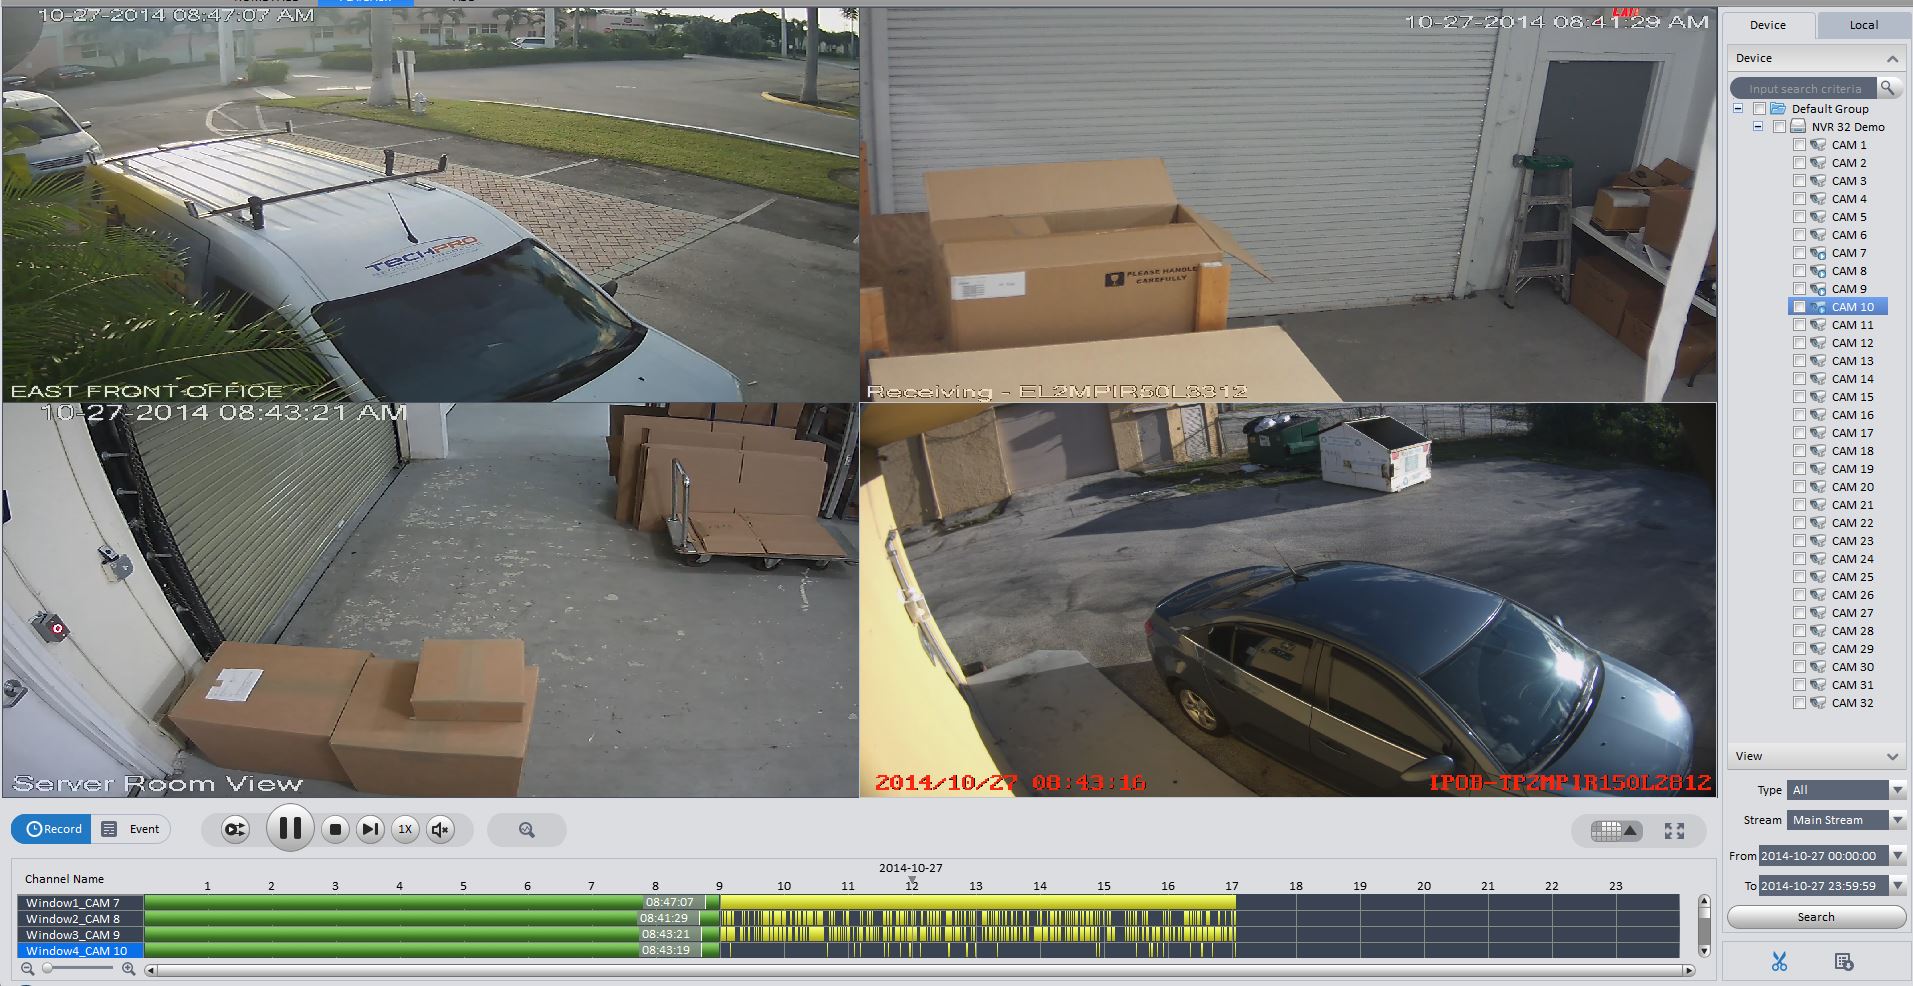
Now that we have added the security recorder to the software, we can now playback files. Click on the Playback icon and the playback window will appear.
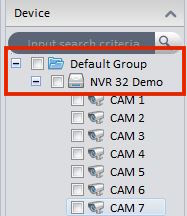
From the left hand side you can locate the Group and Security Recorder you recently add to the software, Click on the “+” sign to expand the group and unveil the recorder channels.
Select the channel you want to play footage by selecting the channel and selecting the box next to it.
On the bottom of the page click the from and to to select the time frame you want to search for.
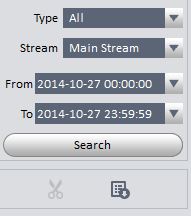
After that you can click on search and and the Time Line will display the recording files. There will be either green or yellow depending of how your schedule is setup. Green indicates that Continuous recording is setup in place and Yellow Indicates Motion detection.
![]()
If you click on any of those colors the video will start to play back right away. Noticed that each stripe represents the channel, so if the first green stripe is clicked then that will be the first channel you have selected in your search box and so on. Here is a sample of the playback:
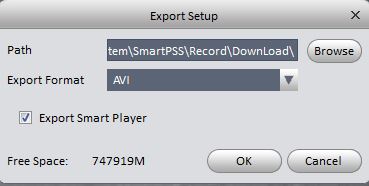
If playing a single line then you could just cut a time frame you like. Noticed when clicking a stripe in the time line, a scissor icon shows up. If clicked once that will put a mark in the file as your beginning time then if clicked again it will marked that the file as the end time. After that, a window labeled Export Setup will open showing you where to save the file. You can change the the export format if you like. You can also check or uncheck the option to download the Smart Player to playback the file.
The Alarm icon will display any alarm notifications if you have your recorders displaying realtime alarm information.This setting can be set if you want to receive an alert in your computer screen when motion happens on a channel.
In the Log Icon we can see the recorders Log events based on different types. these types are System, Config, Storage, etc. You can select a time frame and pick a device you have in the software then you can select different types of events.
The lasts 2 sections will be will be more for configuring the security recorder itself.
Under Advance you will find Video Wall, E-map and Display. Unfortunately Video wall and Display will require a special hardware that we do not carry at the moment.
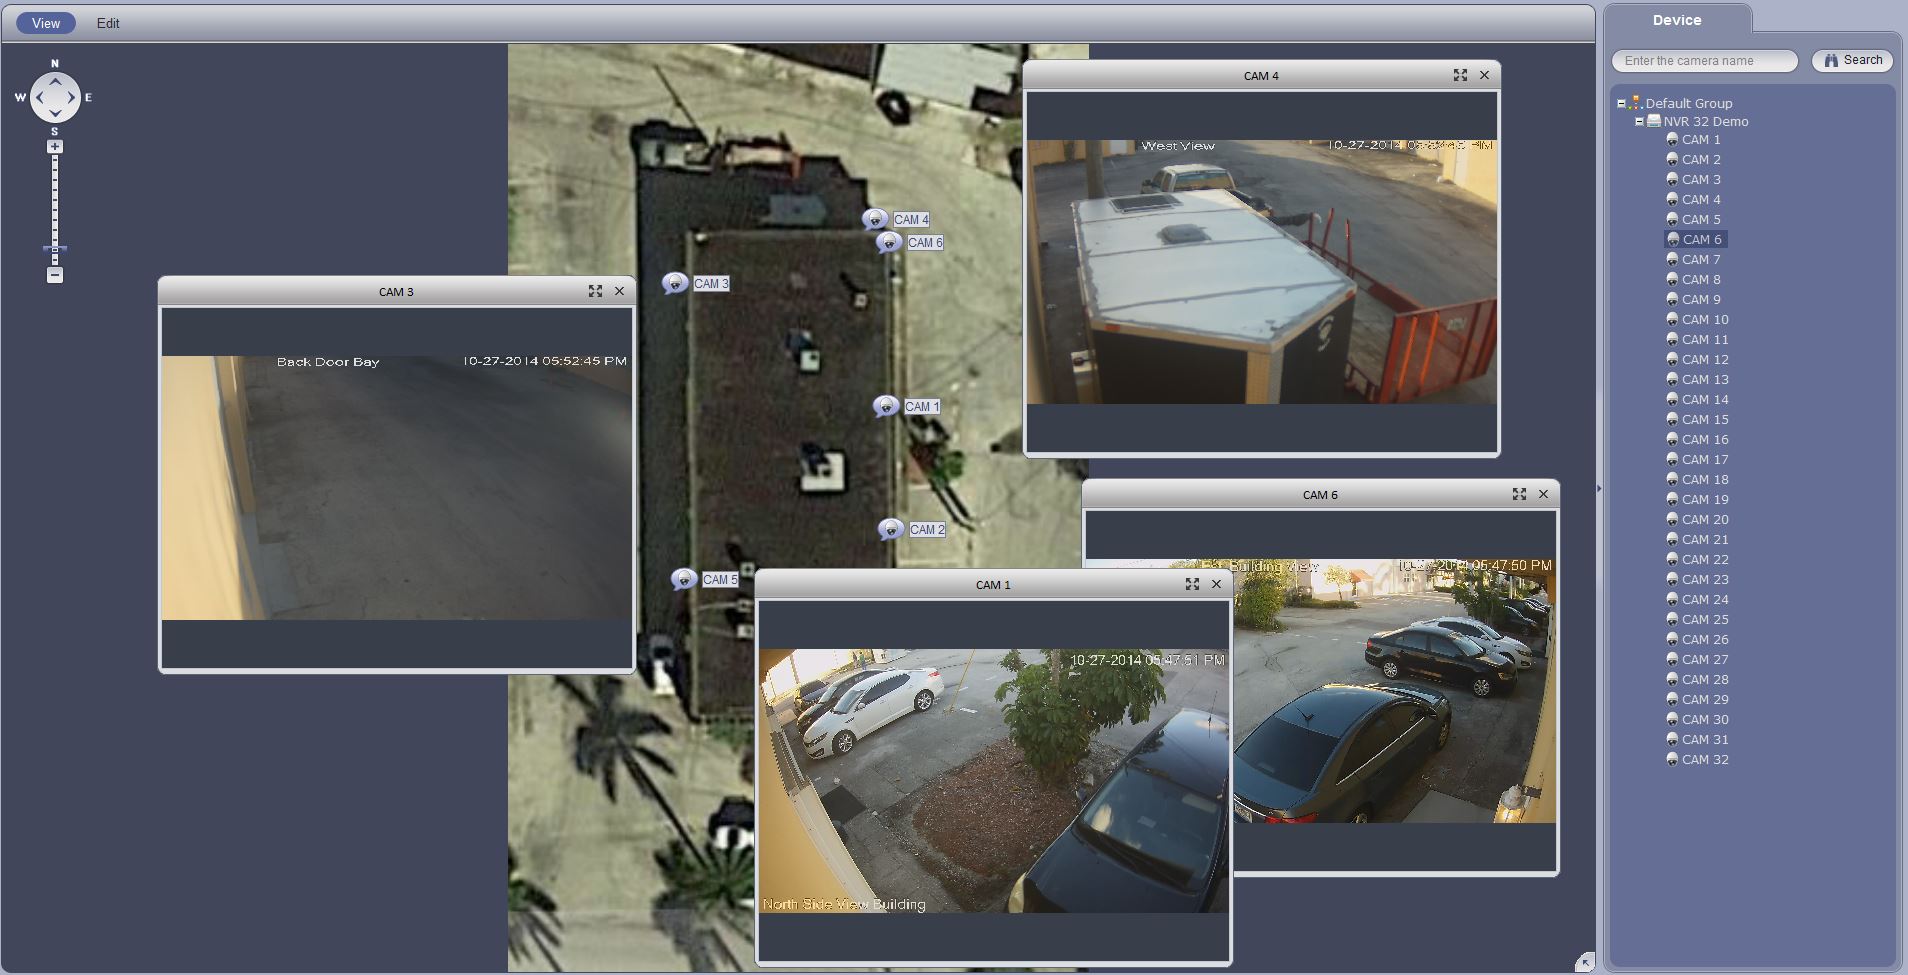
E-map is a cool way to identify your cameras based on your home or business layout. In the picture below I can simply click on the camera and a window will display the camera location. It is required to add a layout of your location where the cameras are installed then drag the cameras to where they are actually installed in that picture. Double click on the camera name and a window will start streaming live video of the camera in question.
The last section labeled settings will be primarily to configure the recorder settings, Add devices, Alarm configuration, Task, etc.
DEVICES: In this section you can add, delete and modify devices you add to the system.
DEVICE CONFIG: It allows you to configure the recorder’s Network settings, add cameras, disk management, manage accounts etc. This section is like accessing the recorder’s setting from the WEB SERVICE but with a better interface. Also If you have IP cameras connected to an NVR then you can access the cameras’ individual settings.
ALARM CONFIG: This is a cool feature that SmartPSS and even the older version of PSS offer. Here is a link that will explain the process using the old version of PSS. This feature allows you to setup alarm events when motion detection occurs, also when cameras lose connection (ANALOG DVRs ONLY). You can also receive alerts when the camera is covered by an object or spray painted. Basically you link an event to a channel of the recorder then you link an alarm to it. You can set the schedule when you want this alarm to pop up in the software then save the settings.
TOUR & TASK: This feature allows you to set and enable channel groups and layouts. This allows you to setup different windows on a particular layout or view then it can rotate on a fix format.
PC-NVR: When setting this feature, your computer becomes an NVR. This feature will allow you to record only 16 Channels and you can connect to IP cameras, DVRs and NVRs and have their channels stream and record to your PC. It is recommended to use the computer as the NVR and store machine only instead of using both the client and playback PC.
VIDEO WALL: Video wall allows you to connect and configure how the TV from the Video wall will interact and display video. This device is a standalone unit that its entire purpose is to stream video and display it in the monitor, just as a giant monitor. There are many layouts you can have on each of the monitors and each work independently.
ACCOUNT: Allows you to configure the users that will operate the this software. This is not the users of the recorder, so if you create a new user here it will not sync to the recorder.
GENERAL: This section allows you to configure the basics of the software. You can set to start the software using the last video layout used before you closed the software, auto login PSS, setup the file path location for snapshots, recording etc.
The current version we have of this great software can be found below:

