

 You bought a TP series ONVIF IP security camera for the excellent picture quality at an excellent price point, but now realize that they are not as plug and play as the EL series IP cameras. This article will help you make sense of it all, and give you a baseline to get started. If you have not done so yet, read my article on networking IP cameras by clicking here.
The TP series IP camera is first and foremost an IP camera, so there has to be a network in place in order to have the camera work. If you do not know much about networking, then definitely read my other article above to get familiar with what will need to be done involving IP addresses and networking schemes.
The TP series cameras will need to be set up completely manually, so I want to set your expectations to be ready for static IPs and image adjustments. You first need to find your TP series camera with the TP Finder Tool available on our website here.
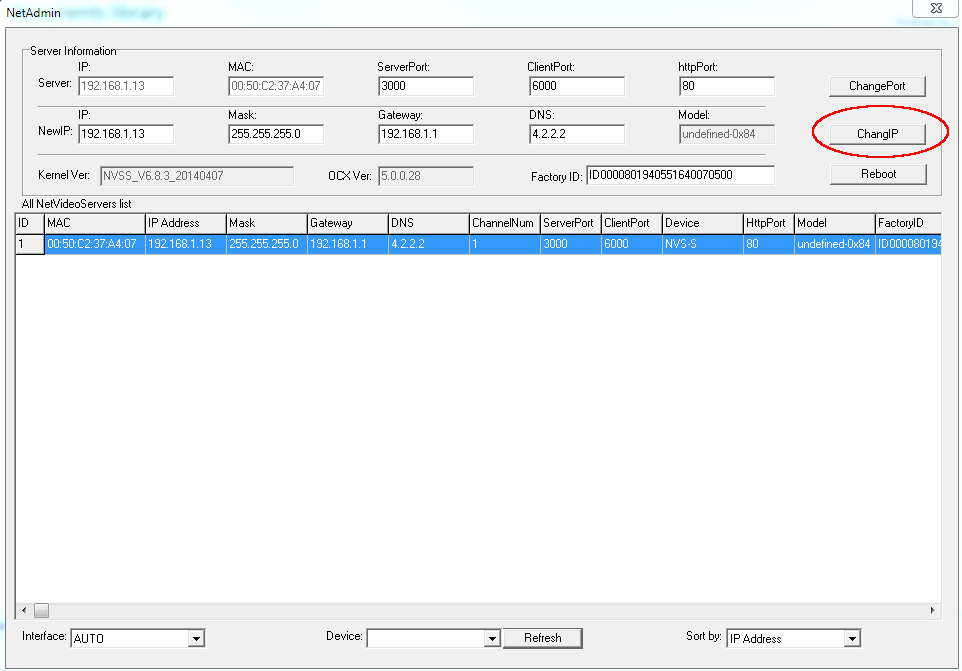
It is essential that you are on the same network of the camera or you will not find it. If the camera is plugged into a built in POE switch port in the back of the NVR, then you will need to plug your computer in an open POE port in the NVR in order to be on the same network. The computer will receive an IP address from that POE port on the NVR. Change the IP address to your network scheme, the Gateway, and the DNS and hit the ChangIP button. The DNS can be the same address as your Gateway. If you have a POE built into your NVR, you likely need to put this camera on the network of 10.1.1.1, which is the default. Once all of that is done, you can attach the camera to the NVR by going into the remote section and clicking the Manual Add button. In this section, you will choose the channel number you want, the static IP address that you assigned, and you will set the Manufacturer to ONVIF, and set the HTTP port to 8080. Please note that you do not change the HTTP port in the camera settings or using the NetAdmin tool. Once all of this is done, your camera should be attached to your NVR and ready to view and record.
A good baseline of settings to get you started
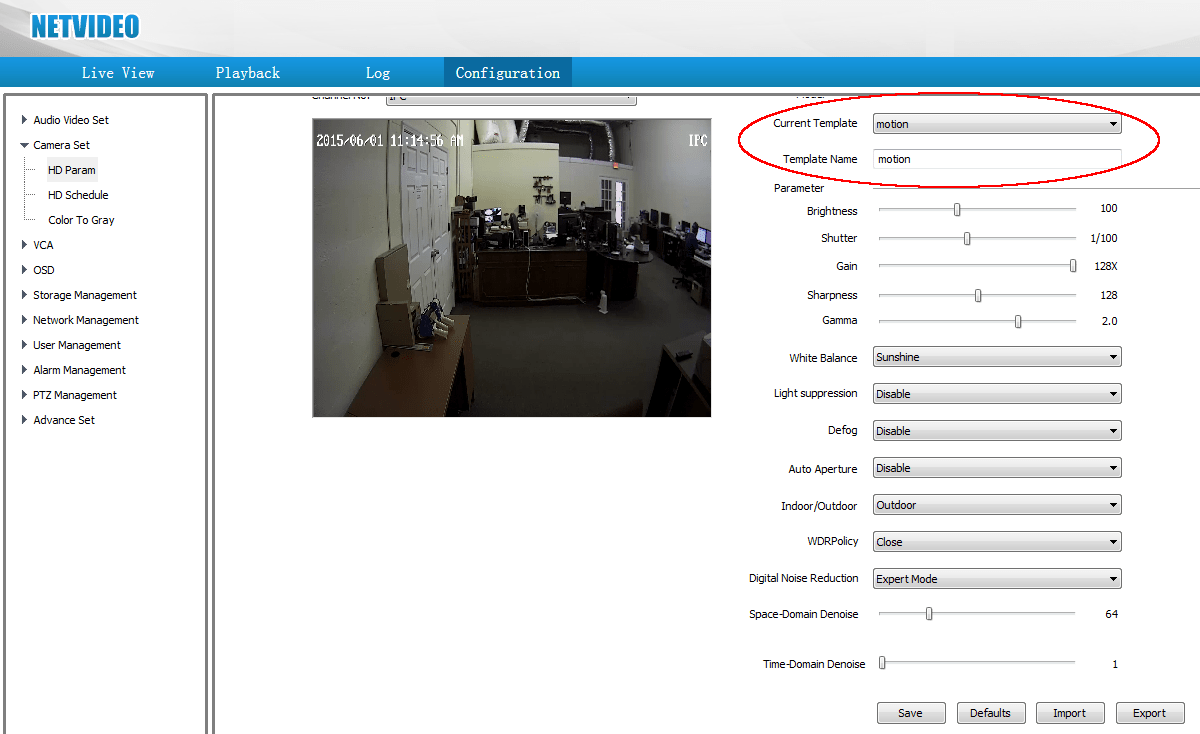
We have compiled some settings that will get you started and work well in outdoor as well as indoor environments. The TP series cameras have several templates to choose from, but we recommend the motion template and the settings that go with it as a great starting point. The setting in this section that can cause problems for people is the WDR Policy, and this template sets it to off or Close. A helpful use for that WDR is for a camera inside that is pointing at a doorway that is very bright outside. What is WDR? Wide Dynamic Range (WDR) is an imaging system attribute that can record greater scene shadows and highlights than a normal setting. If you have a look that is solarized or too bright, make sure this value is closed or off to correct that issue.
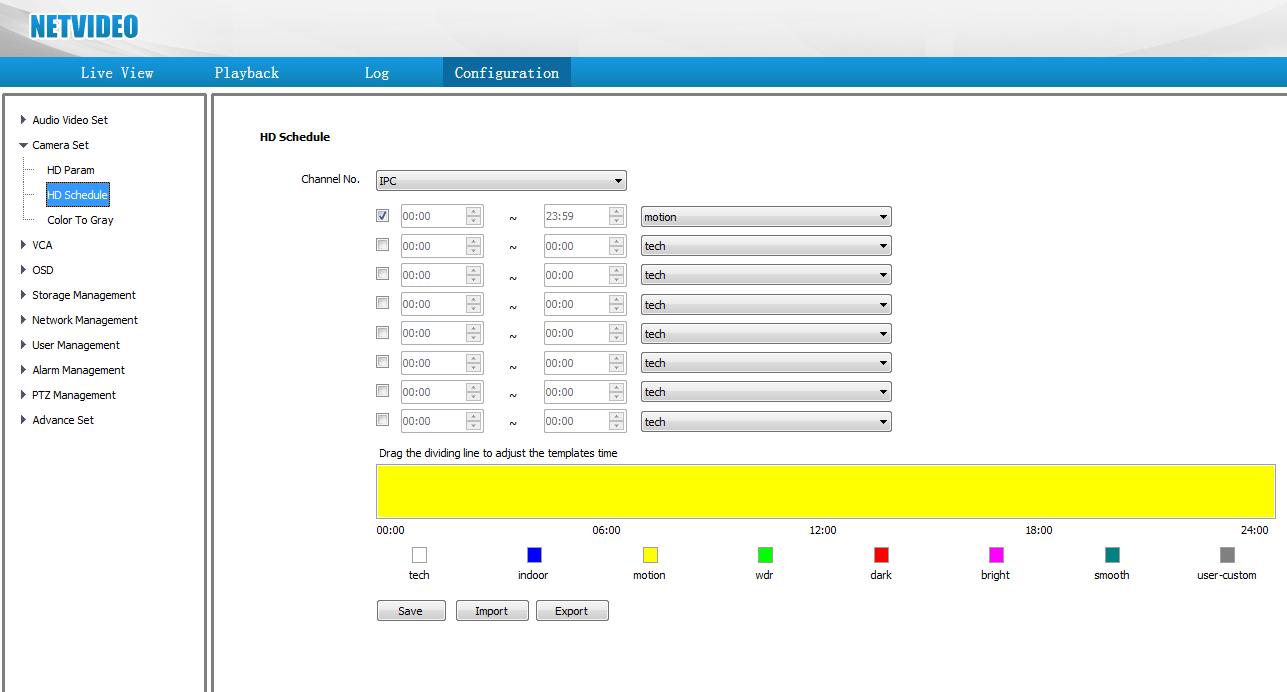
Then we will set the HD Schedule to motion as well. This schedule should also set the Template to motion, but I like to do them all manually to make sure they stick.
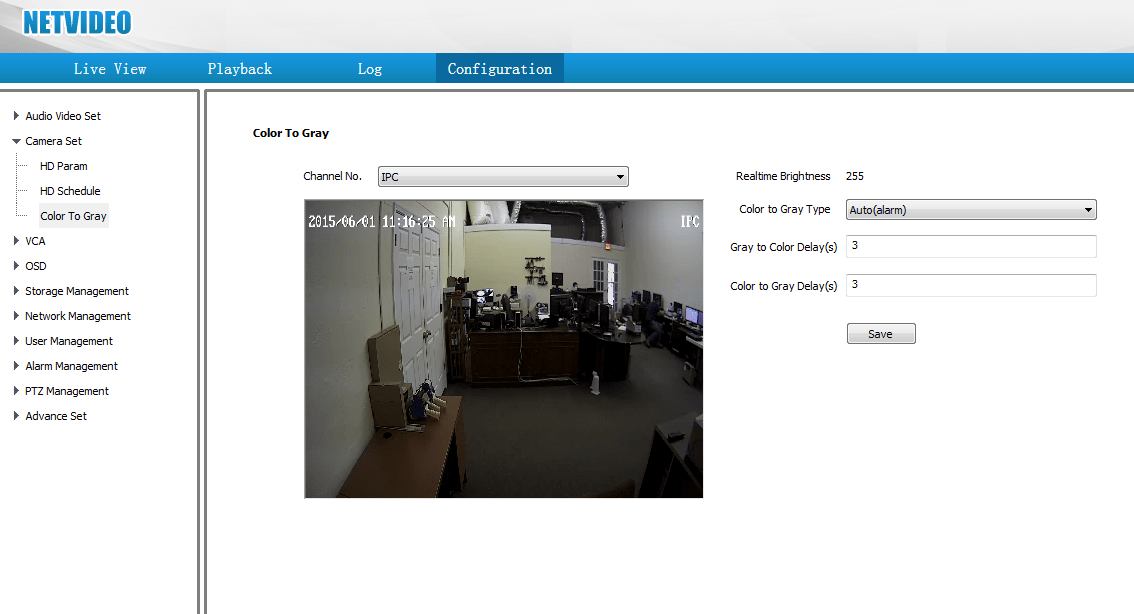
And finally, set the Color to Gray to Auto (alarm).
These settings will give you a great place to start, and allow you to tweak custom settings if you are curious. However, there are other templates to try before you start changing the individual settings.
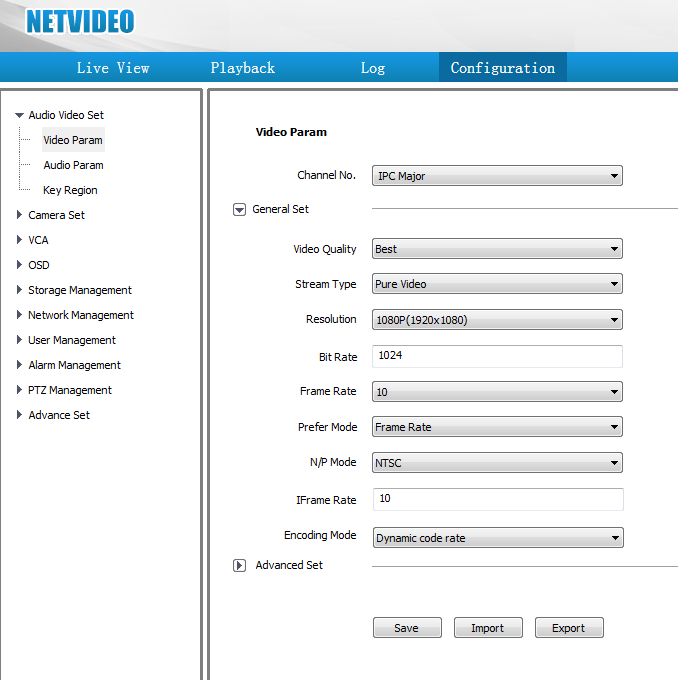
The audio video settings should be set based on the specifications of your NVR, as well as the bandwidth restrictions of your network. It is a good idea to start low, and then slowly increase quality over time to see how it performs. Resolution, frames, and bit rate are the settings that control the quality and bandwidth requirement.
Why is the time out of sync with the NVR?
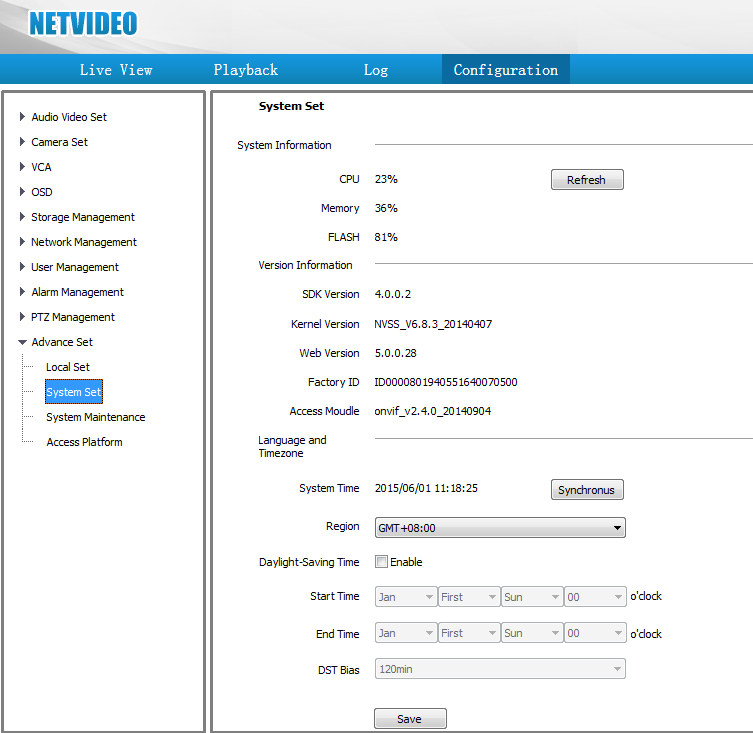
There is an issue with the time where it is out of sync with the NVR. To fix this issue, the GMT on the NVR and the TP camera must be set to +8. You cannot use NTP if you have a TP camera since they are ONVIF and lack the ability to synchronize with NVRs that are not natively ONVIF. Finally, you can set the DST at the NVR level so that it will adjust the time during daylight savings.
Summary
While many NVRs support ONVIF, you will notice that not all features work or synchronize. Therefore, you will always need to log directly into the IP camera to check the settings. Our settings have been tested for indoor and outdoor use, but they may not be perfect for all environments. It is only a place to start and see how they work for you. The settings that are available in the NetVideo may not all apply to your camera, and may work with other models. If everything is working perfect, there is no need to make any changes.
I always recommend setting up TP cameras on a networking while labelling everything with masking tape or some other sticker. For example, if your gateway is 192.168.1.1, you can network your TP IP cameras in a row starting at 192.168.1.200, 192.168.1.201, 192.168.1.202, and so on. Of course, you should always make sure the IP addresses are available by pinging the block that you choose to use. If you need help with networking IP cameras in general, then refer to my other article listed in the introduction so that you can have an idea of the planning involved.
Finally, make sure you plan the placement of your new TP camera to maximize it’s potential. If you have it angled outdoors pointing in a direction where the sun rises or sets, you can end up with difficult lighting challenges. The picture could look perfect during the day, but may end up unusable during that sun rise or set process.