How to terminate and test Ethernet Cable
Hi everybody, Joe here, and we have for you a tutorial article and accompanying video guide on yet another important topic regarding CCTV hardware and networking which is: “How to terminate and test Ethernet Cable”. If you go to your local electronics, office supply, or even department store, you’ll likely find ethernet cables already prefabricated in various lengths, and a few different types. As you may already know, Cat5e and Cat6 are common types of ethernet networking cables. There are some small differences between them, and we cover that in our article and video “what’s the difference between cat5 and cat6. Purchasing prefabricated ethernet cable is fine for small jobs, or quick solutions. This could be for something such as setting up a single home computer or adding one to an already existing office network. However, the cost of prefabricated cable or even the availability of it at extreme lengths and in total amounts starts to become very expensive. This is why CCTV installers and networking contractors fabricate their own cable on-site to precisely meet the specific demands of any particular cable run.
Ethernet cables, both Cat5 and Cat 6 have to be terminated a certain way, and correctly in order to function properly and achieve continuity at both ends. We are going to explain the process in this article, and show you how visually in the video guide to terminate and test an Ethernet cable properly. We highly recommend following along with the video guide as well. Before we get started, there are just a few important tools and materials you’re going to need. Let’s take a look!
You’re going to need:
- Cat 5or Cat 6 cable
- Wire cutters/ snippers
- Wire strippers/crimper tool
- Rj45 Heads for the cables
- Tester
- A ballpoint pen is not necessary, but can be very helpful and well show you why during the tutorial.
The methods for terminating cat5 and 6 are the same, so now that we have our tools and materials we can get started.
- How to terminate and test Ethernet Cable – I – Jacket Stripping and Trimming
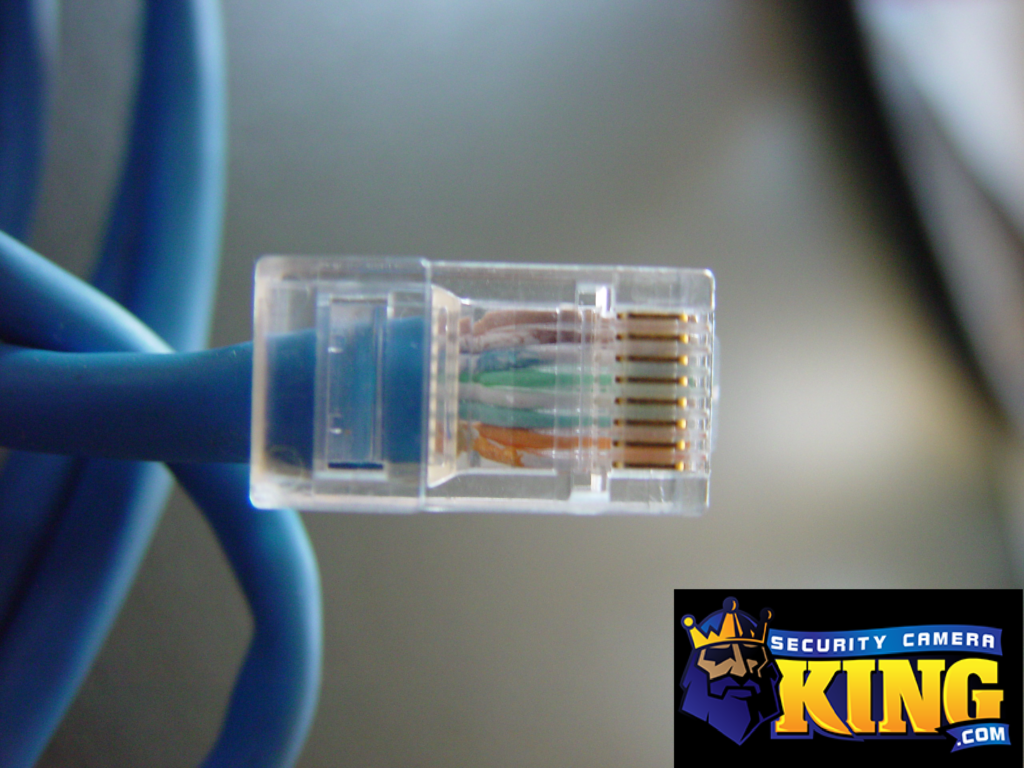
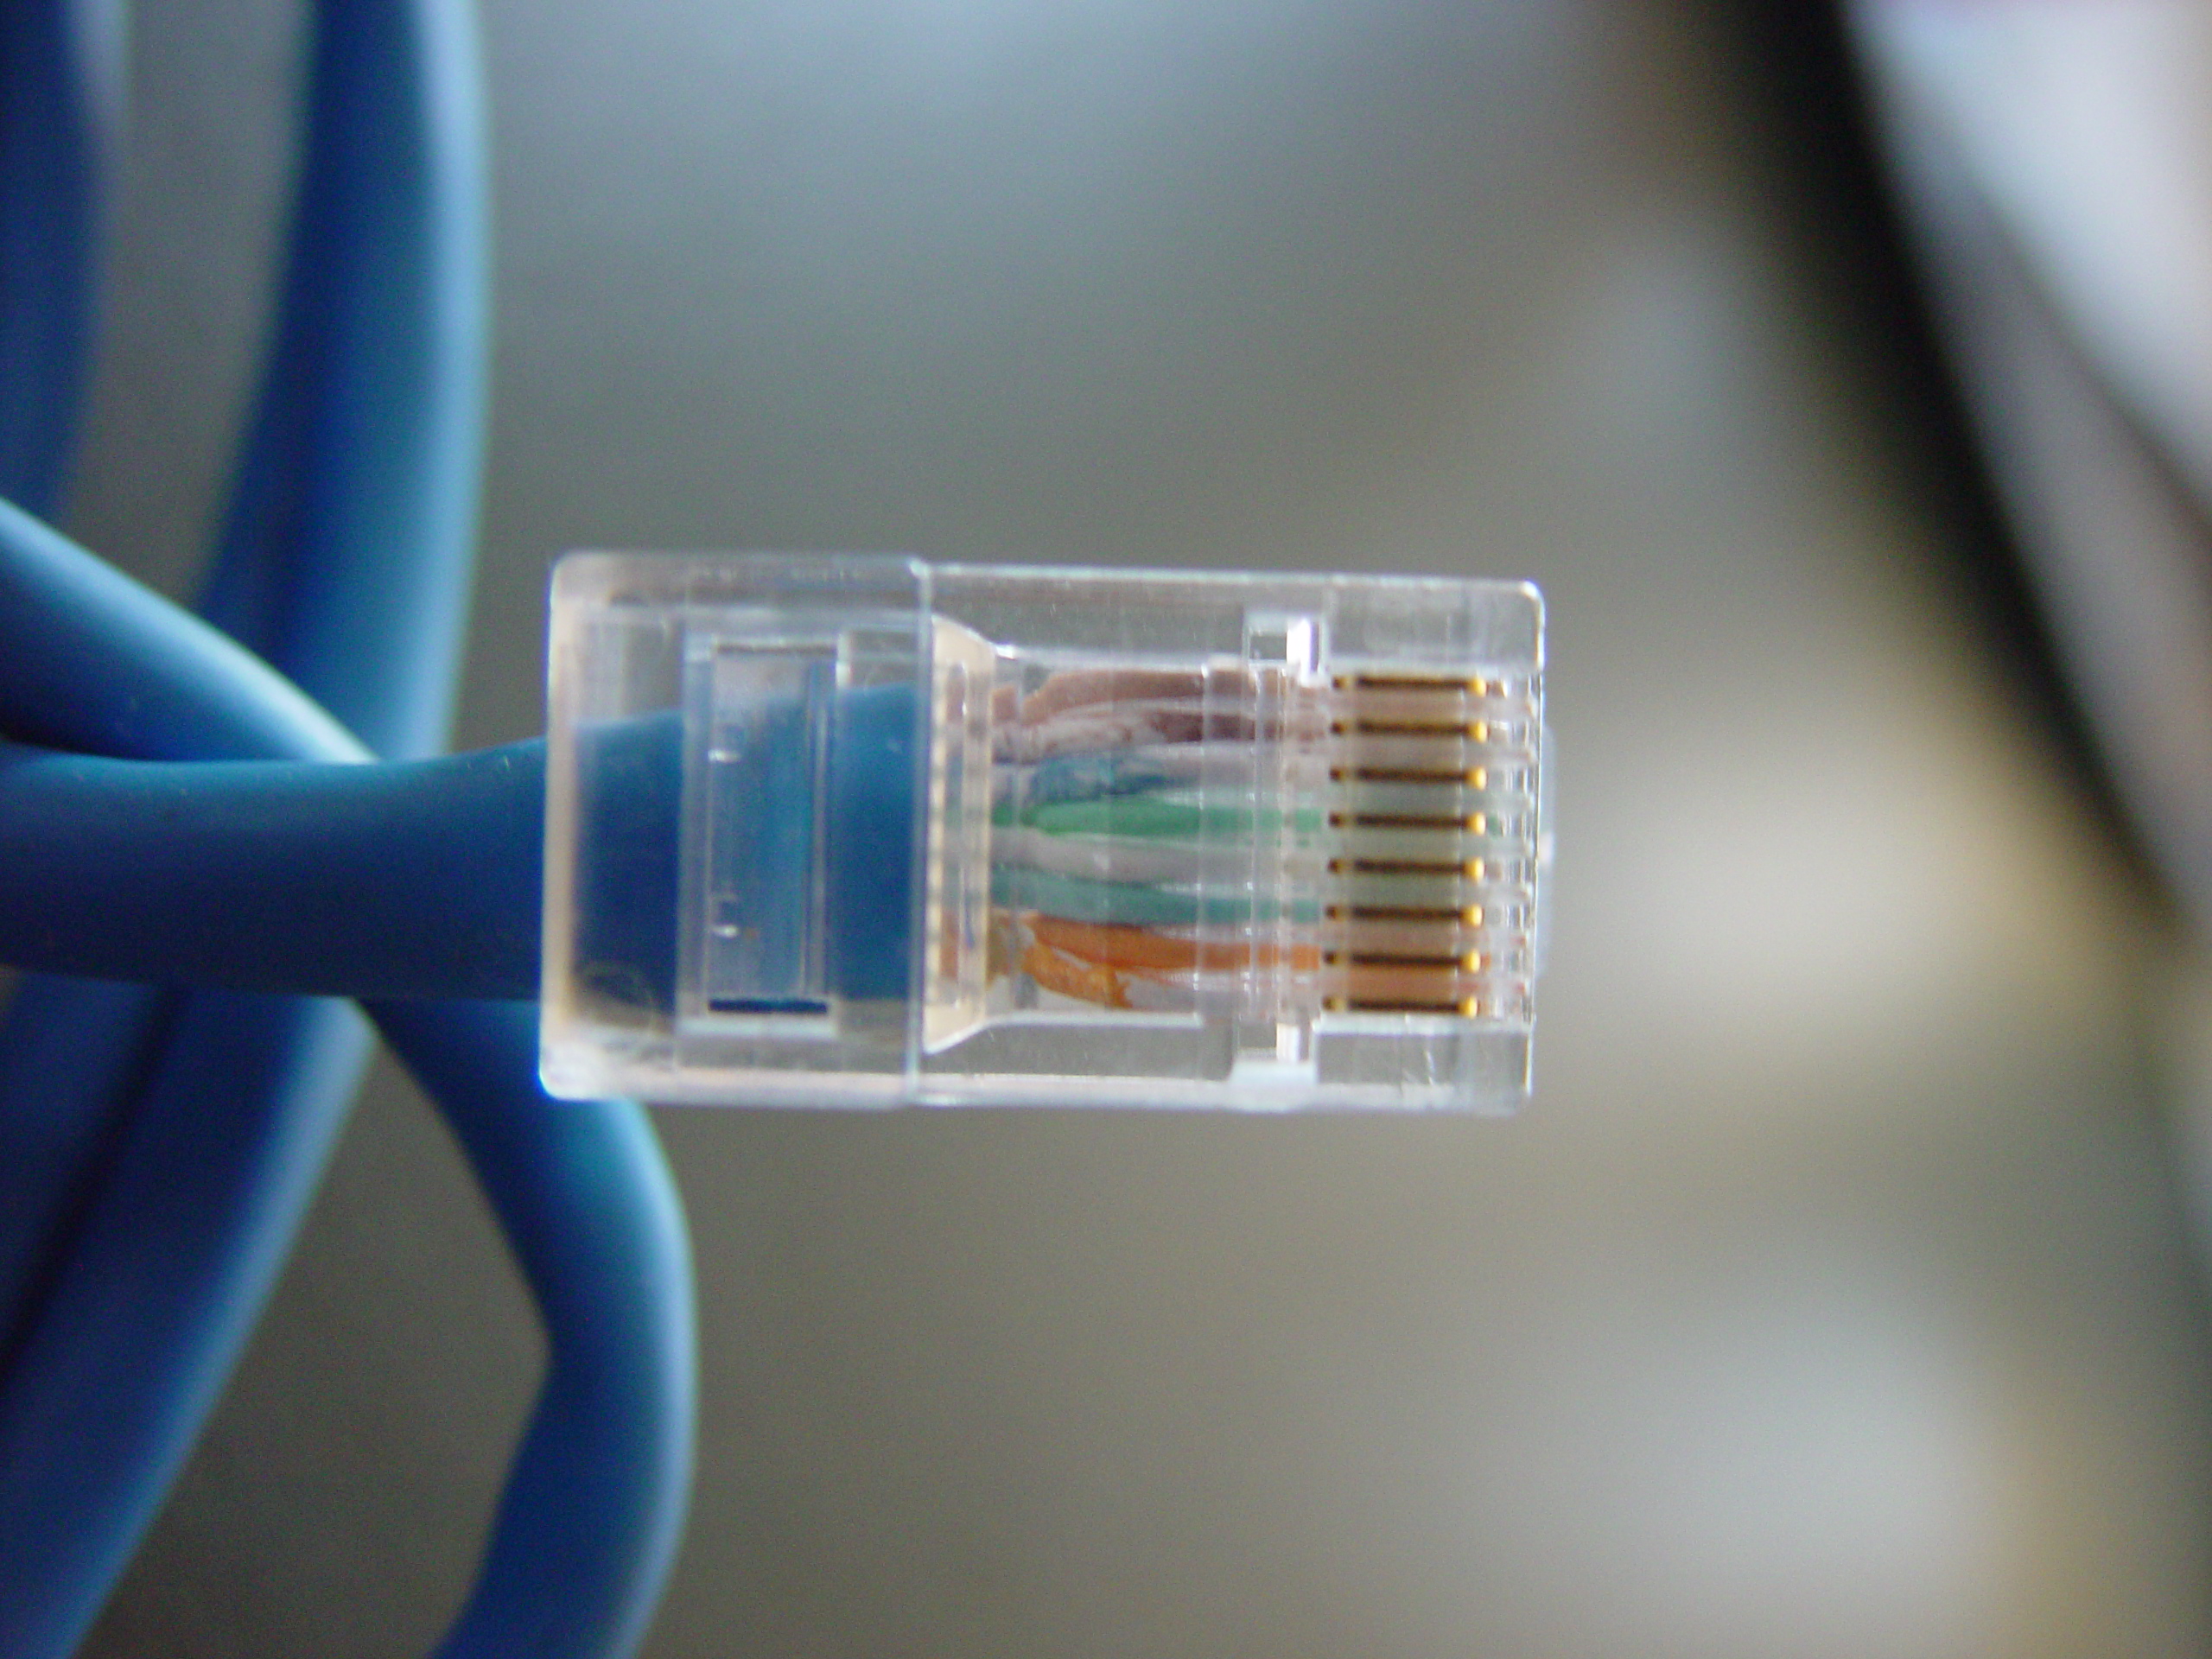
Using the stripper/crimper remove the outer jacket – or rubber insulation – from about three inches off either end of the cable If you didn’t trim far enough, you can pull down on the fibers found inside the cable to safely tear the jacket further without using the crimper/cutter or damaging the wires. When you have the length you need, trim the fibers and the jacket off. Do this for both ends of the cable. If you have cat 6, there will be a spline here You can gently tug on the spline to reveal the bottom-most accessible portion and trim it from there. This ensures the spline is inside slightly further. - How to terminate and test Ethernet Cable – II – Untwisting the paired wires
Each pair of cables needs to be untwisted, this can be done by hand like so. However, there is a nice technique, using the pen we mentioned earlier, that can help you accomplish this faster, and neater. Untwist just slightly at the base of the twisted pair. Then insert the tip of the ballpoint pen. While gently pinching the cables together just above the pen tip, begin to slide the pen up with a mild amount of pressure. As you can see in the video the result is a separated cable that is far more straightened than simply using your hands. As before do this for both ends of the cable. - How to terminate and test Ethernet Cable – III – Ordering the Wires
From here on out, know that although these steps need to be done at both ends of the cable, its okay and expected to do one side at a time, from trimming to crimping. The now exposed wires are going to be trimmed at the tip to reveal a bit of the internal metal wire and then inserted in a very specific order into the Rj45 head. This order is called the T568b Standard for wiring, we will display this info below, and on-screen in the video.First, based on the T568B standard, flatten the wires next to each other in a row, and order the wires from left to right as follows:

- How to terminate and test Ethernet Cable – IV – Flatten and Trim the Wires
Once the cables are flattened and in order, as you see here, trim them down using a wire cutter or snipper to approximately ¼ “ in length. - How to terminate and test Ethernet Cable – V – RJ45
Insert the cables, very carefully into an RJ-45 head. Check to ensure each wire is inside one of the small channels, and, that each cables metal wiring tip reaches the end of the rj45 head to contact the metal inside.
Also, it’s good to make sure the remaining jacket is tucked into the head also. - How to terminate and test Ethernet Cable – VI – Crimping
Insert the cable and head into the crimping too, as shown in the video. Squeeze 2xs to be sure.
Repeat steps 3-6 for the other end of the cable.
Once completed you can use a cable Tester to check continuity. Insert one end of the cable into the UTP port, and the other into the “Cable Tester” Port. Run the app on the tester, and you should see continuity across all lines.
Thanks for joining us today as we showed you how to test and terminate ethernet cable, If you enjoyed the video or found it helpful, give us a like and don’t forget to subscribe! Call sales today for more info on our amazing products at 561-288-5258!
Related: What’s the difference between DVR and NVR?
Related: What’s the difference between H264 and H265?
Related: IP PTZ Security Cameras – All There is to Know
Related: Resolution, and why does it matter?
Related: What are active deterrence cameras?
Find Us On: Facebook | Twitter | YouTube