Great! You’ve gone in the right direction and decided to protect your property using a CCTV surveillance camera system. Having cameras visible on your property is usually enough to deter most criminals from trying to gain entry into your home or business, but what happens if for some reason something happens to the DVR and you lose all of your recorded footage? If your cameras have been placed properly, you will have a great shot of an incident that occurred, but if you didn’t get to it in time to save and backup the incident, there’s a chance you will lose it forever if you do not have another copy of it being stored elsewhere for extra safety.
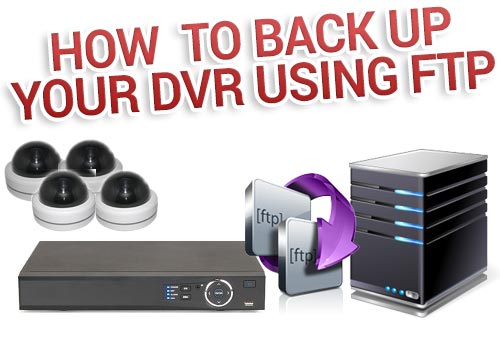
Hopefully, you’ll never have to deal with this issue but it does happen! The DVR can be damaged in many different ways. Hard drives can stop working, DVRs which are not on surge protectors can get fried during a storm, and then there’s the horrible chance that someone may deliberately steal or destroy the unit. In any of these cases, it would be really nice to have another copy of your hard drives stored far away from the DVR itself. This article will serve as a guide on how to back up your DVR using the FTP feature.
In order to Back Up your DVR to an FTP Server, you will first need some sort of an FTP server. A computer on the same network as the DVR or NVR that is always on will work perfectly, but you may also use a server that is stored elsewhere. A remote server is great in case of a fire or break-in where the device may be destroyed in some way. I do want to stress that the FTP backup feature will only work with footage that is backed up prior to the incident. This means that if you have a schedule set up to back up the DVR at 9:00PM every night, and the next day it’s 8:00PM when the DVR gets ruined, the last back up copy you’ll have on your FTP server is from the night before. Please be aware of this when setting up your scheduling, so that you’re sure the footage is being backed up as needed.
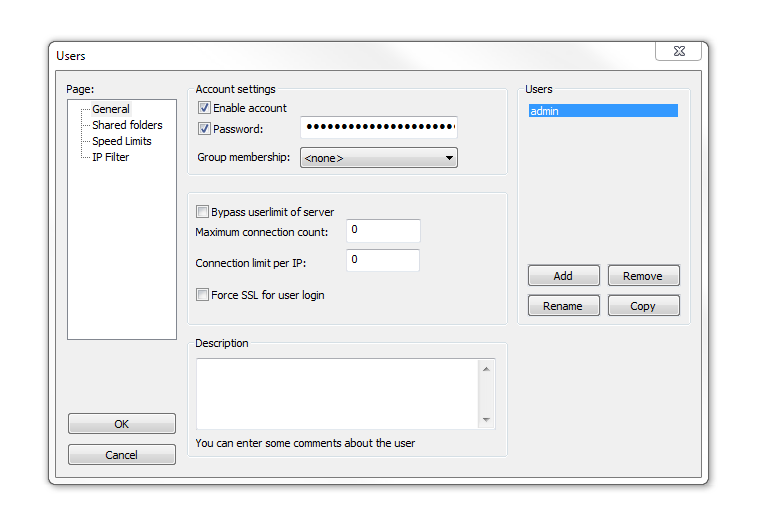
For an FTP software, I recommend FileZilla which is a free FTP server software that works on Windows, OSX and even Linux, and can be downloaded at https://filezilla-project.org/. Once installed, you need to set up your FTP directory and user accounts. Open the Users option and add a user and set the password.
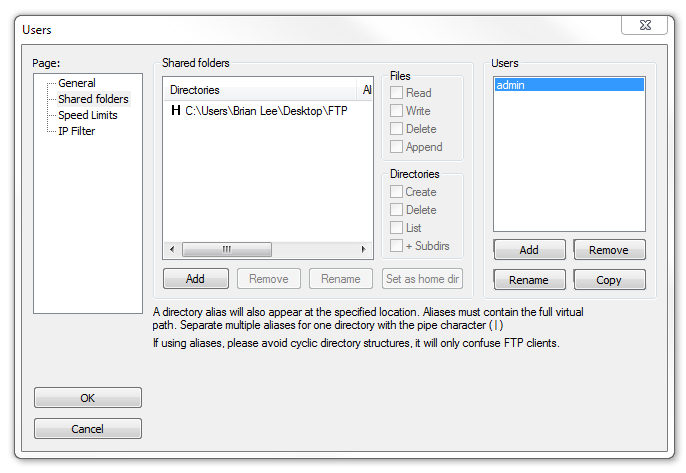
Next click on Shared folders and click Add. You can then browse to where you want the footage backed up to as shown below.
The FTP is now all set up. All you need to know from here is the IP address of the computer it is installed on. You can obtain this by going to your start menu > run, type “cmd” and enter to open a command prompt. In that window type “ipconfig” and hit enter. Your IP address will be displayed. Take that information down as we will need to enter it into the DVR’s FTP configuration which we will review next.
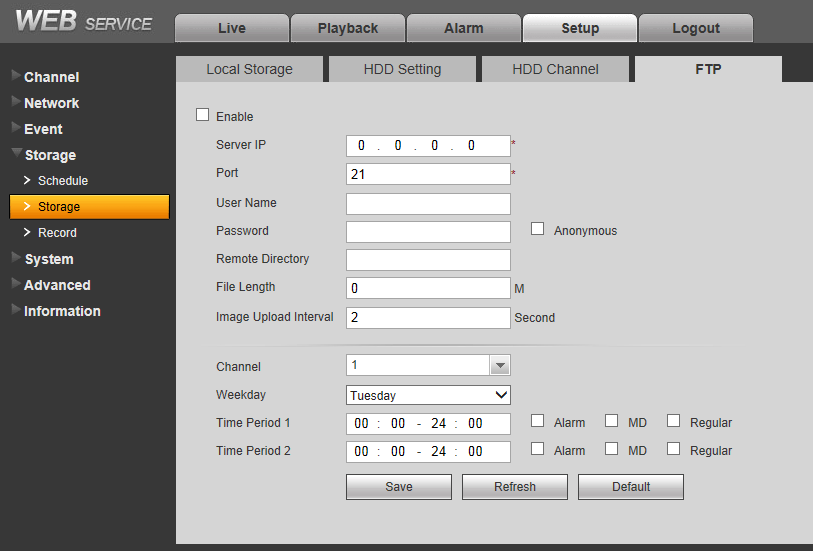
Access your DVR’s or NVR’s web service by typing the IP address of the DVR into your Internet Explorer address bar. Then click the Setup tab and the storage category.
Under that click on Storage and then the FTP tab. Click the check box to enable the FTP feature and enter your computer’s IP address in the Server IP field. By default, FileZilla uses port 21 so you can leave that field alone. Enter the user name and password for the user you created in FileZilla. Remote Directory can be left blank as you already chose the folder where you want the footage to be backed up to. Finally, you need to choose the channels you want to backup and the weekdays. For both I would recommend setting it to all to back up everything. I recommend the time period to be left at the default setting for all day, or you could set the periods to only back up footage for when you’re not physically at that location. Be sure to select the MD checkbox if your system is set to record based on motion, or the Regular check box if you record 24/7. You now have everything set up that is needed to have an additional backup of your footage for more piece of mind. If the DVR or NVR is stolen, hopefully you will still have the footage you need to lead authorities to an arrest.
Like I mentioned above, backing up to FTP locally is only as safe as the location where you house your DVR. If anything happens to that location, you still have the threat of losing your recordings. This is why I would highly recommend to backing up your footage off-site. A remote FTP server is definitely affordable nowadays and can save you in the event that your main location is destroyed or tampered with. For example, you may want to back up the footage from the recording device (DVR or NVR) at your business to a computer you have at home. The setup is relatively the same, so follow all of the previous steps for installing FileZilla on your home computer, and the same steps for setting up the FTP feature on your DVR or NVR. The one difference will be for the Server IP setting in the DVR’s configuration. You want to set this to your home network’s external IP. You can see what that is by visiting http://canyouseeme.org from your home computer. Use the IP address given to you on that site for the Server IP field in the FTP options.
The setup is almost complete, but you need to open up the FTP port on your home network’s router so the DVR can find the server. This is called Port Forwarding. You may Refer to your routers documentation on how to set up port forwarding. You will need to forward TCP port 21 to your computer’s IP address. Again, this can be found by running ipconfig from a command prompt. Once this is done, you can confirm your port forwarding settings are working by visiting http://canyouseeme.org and testing port 21. It should respond with a successful message if everything is set up properly. You are now set up, but keep in mind the backup process will use up a lot of bandwidth. You will need a sufficient upload speed from where the DVR is installed, and download speed on the network that has the FTP server in order to grab all that footage it’s backing up and download it onto the machine. You can test your speeds at http://speedtest.net. If your speeds aren’t great, you can always be more selective in what you back up. You can just backup a certain camera, day of the week or time periods.
If you want access to your footage from anywhere, or don’t want to run your own FTP server, you can use a cloud-based storage solution as well. Any cloud storage solution that has FTP access will work great. The account settings for your cloud storage service will provide you with the IP address, account and port needed to set up your DVR’s FTP backup feature.
I have listed three different ways you can enable FTP backup of your DVR or NVR footage. This will provide you with additional piece of mind, as your footage will still be available if the DVR is stolen or destroyed. You should still try to conceal the DVR in a secure location if possible, such as on top of a closet or attic, but if the criminal sees the cameras he will likely look for it until they can locate it. With the FTP backup feature of SecurityCameraKing.com’s DVRs and NVRs, you don’t have to be out of luck if it is found.
If you have any more questions or concerns, please feel free to contact our tech support department and we will help you get all set up with backing up to FTP. We require that you are using one of our DVRs or NVRs, which come with a lifetime of free tech support. You may contact us at 866.573.8878 or support@securitycameraking.com